

How to Make Basement Windows Look Bigger (with just Trim and Blinds!)


by Robin
Have you got one of these too? A basement room with a weirdly small and awkwardly high window? If you have a below-grade basement, chances are you do. It’s so frustrating – I used to struggle with how to make basement windows look bigger?!
Not any more! I have two DIY ideas of how to make a basement window look bigger!

I can’t wait for you to see what we did to solve this problem in our basement guest room! With just trim and cheap bamboo blinds, we made this odd little basement window look – dare I say it – beautiful. And it was so easy!
Check it out…
Here’s our first way (we have two!)…
How to make basement windows look bigger:
What you need…
- Bamboo blinds (the cheaper the better – you’re going to take them apart)
- We used these (available only in Canada)
- These would work well too (in the US and elsewhere)
- Window casing (for the outer box)
- Trim the same thickness as your casing (for the vertical section between “windows”)
- 1/4″ trim for the header of blinds
- Nailer (we have an older model of this one)
- Nails
- Mitre box or mitre saw (we have this one)
- Trim paint (ours is Soft Focus from Behr)
- Staple gun
- Staples
How to:
Step 1: Frame the faux windows with trim.

Can you notice that the faux windows are slightly smaller than the real one? I hope not – but it’s the best we could do.

We nailed it in place and caulked the gaps.


That’s all it is – one large box vertical trim in the middle section.
Step 2: Remove the hardware from the blinds.

I did this by just untieing the strings from the hardware and then retying the knots up against the bamboo.
Do this carefully – the blinds’ strings are simply woven around the bamboo – they will fall completely apart if you don’t retie the knots.
Step 3: Cut the new header/top piece for the blinds.

It’s about 1/4″ thick – and we cut it to the same length as the gap between the trim for all three windows.
The green tape you see above marks the centre and where the cut will be to make the bamboo the right width.
Step 4: Cut the blinds to size.

There are two pieces of tape to hold both sides of the cut together – wrap the tape as tight as possible before cutting to avoid splintering and messy ends to your cut.

Remember – you can always cut them smaller – you can’t cut them bigger! Err on the side of making them too big and then do more cuts to perfect it.
Step 5: Attach the blinds to the top piece/header.

Then stapled both sides to the header.
Step 6: Attach the blinds to the faux window frames.

Step 7: Make the bamboo look folded like roman blinds.

I carefully made sure the blinds were evenly folded in half (basically let them hang down evenly).
I held the bottom fold and pulled them up even with the bottom window trim.
Then I just stapled them in place.

Then I reached up and stapled it in place.
The beauty of staples – you can pull them out and redo it until you’re happy with it. Which I did, of course. Love that!
Step 8: Repeat the process for the other 2 windows.
For the left faux window, it was the exact same process.
For the centre window, I kept it simple for now. It’s simply stapled in place to look like an open roman blind. There is so little light down there, especially in the morning, it’s dark enough to sleep. I may go back later and pull the blind down and make it so that it works with roman blind tape and cord. We’ll see…
Here it is! Our first basement window solution:
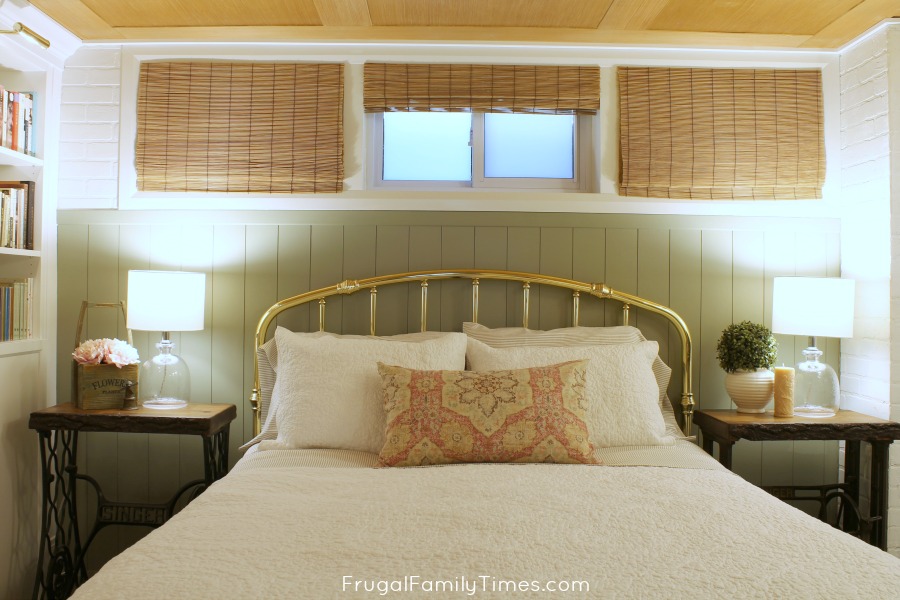
I’m thrilled with how this room turned out!
And it’s all DIY. Of course. 💪
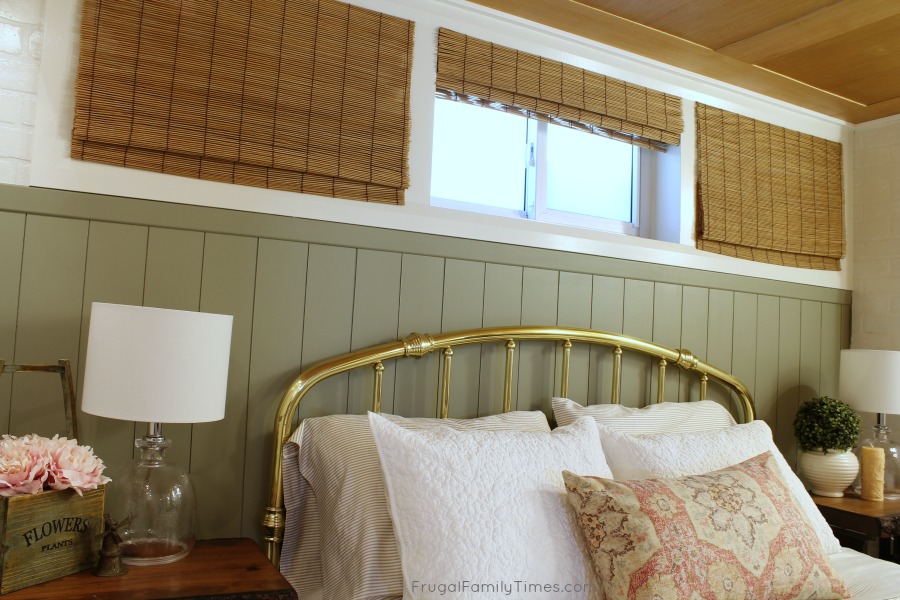

(Have you read about how we made the built-in bookcase?)
The pillow I made using this fabric.
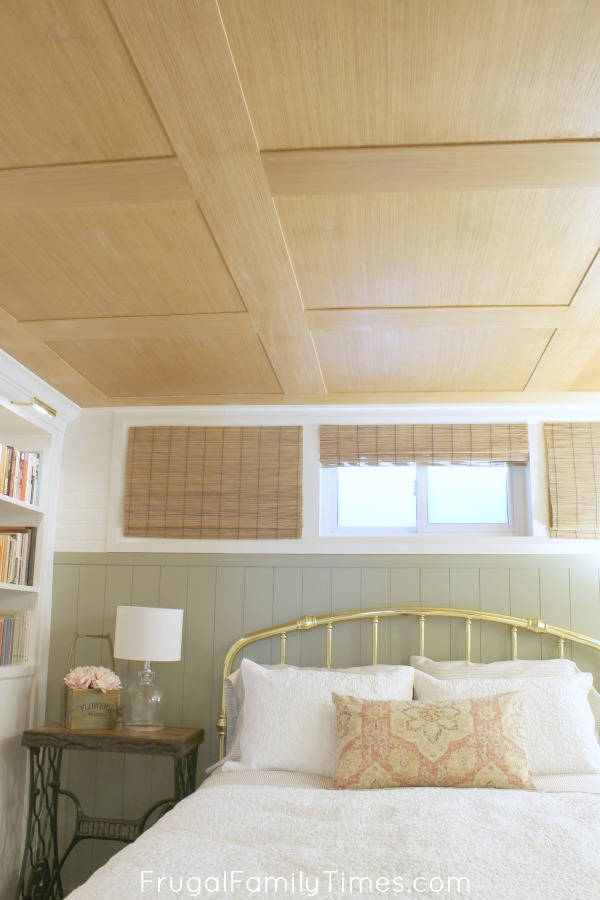
Decor sources:
Throw Pillow Fabric (I made the simple pillow using this tutorial.)
Sheets (So soft and pretty – and a great price.)
Coverlet and Shams (Yeah – I almost didn’t buy it when I saw who the “designer” was. Ha! But the quality is wonderful.)
Lamps (similar outside Canada)
Faux Pink Peonies
Faux boxwood topiary (similar) vase is thrifted
Panelling paint (green): Milk Thistle Behr
Trim paint: Soft Focus Behr
Other projects in our Basement Guest Room-Library:
- How we made this antique Singer sewing machine table
- IKEA hack Billy bookcase built-in – with painted brick backing and easy-wired bookcase lighting
- Our Faux Bricks Wall Treatment
- Natural Wood Panelled-look Plywood Ceiling
- Green Vertical Shiplap Panelled Wall treatment – which cost us almost nothing
This is the basement window in the next room! Here’s how we made it look bigger too…

This is one of dozens of projects we’ve created in our Budget Basement Makeover (more here) and one of many projects in our cozy Guest Room-Library (more here).

Robin and Ed are a DIY-loving couple with over 25 years of design and build experience. Also, Robin is a Nutritionist and former Registered Dietitian and Ed is an award-winning Business Educator. We share strategies for living a rich life on a DIY budget: creative money-savvy ideas for a stylish home, healthy meals and family fun. Our work has been published in the pages of Do It Yourself, Farmhouse Style and Better Homes & Gardens magazines.





Wow that look great! You’ve given me some ideas!
Happy to help, Todd! 🙂
Excellent idea. It truly made a big difference. What would you suggest for windowless basement? Thank you.
Hi Mel! A windowless basement is tricky to make brighter – but not impossible. The key is layers of light and reflective surfaces. Pot lights and wall sconces and lamps will give you light at a few levels and make it feel bright. Also adding mirrors will bounce light around and make it feel bright. 🙂
You have such great ideas that turn out magnificent! I am getting ready to do my whole house a little at a time. Lots of great ideas here for cheap. Keep the DIY's coming!!! I may need some help and need to ask some questions……thank you so much
OH Char! You can't know how much your comment means to me! I've been feeling blocked and discouraged and I needed to hear this sort of encouraging words. Thank you!!! 🙂
Wow! What a great idea! It does look bigger.
Thanks so much! 🙂
The entire room looks fantastic, that ceiling is amazing but the window hack is genius!
Thank you so much, Giselle! You’re so kind to stop and say so. 😊
hey girl! i love what you did with the window(s!) but am super impressed with the ceiling…did you go right over the ceiling tiles with the new look? I ask, because i have the same ceiling tiles, and abhor them! How did you do your ceiling?
Hi Diane! Glad you like our projects – the ceiling turned out great too. It was really cheap and pretty easy! Here's our tutorial: https://www.frugalfamilytimes.com/2018/06/our-paneled-wood-basement-ceiling-on-a-budget.html
Great idea. What a difference the "designing" made to the window. I'm keeping this idea in mind for future. Thank you.
Thanks, Andrea! Glad you like the idea. Thanks for your comment! 🙂
This is such a great idea. You made it less like a basement and more like a cottage or beach house! A lovely space, for sure!
Yes! It's so much more welcoming for our guests! Thanks, Angie! 🙂
What a brilliant 'trick'!!!! Makes such a difference. You are so clever to have thought of that and there are so many situations where that 'trick' can come in handy.
Well done my friend.
I'm so glad you like it too, Lynn! I hadn't even thought about how the idea could be used upstairs too. Thanks for your comment! 🙂
I had no idea that wasn’t three windows!! So smart!
Oh yay! That's what we were hoping for, Ashley. Thank-you for your comment! 🙂
This whole room is beautiful and I just love what you did with the window. It makes the room look bigger and brighter. Awesome DIY project.
Thanks so much, Sarah! 🙂