
We may earn a commission on purchases made after clicking links on this page.


by Ed
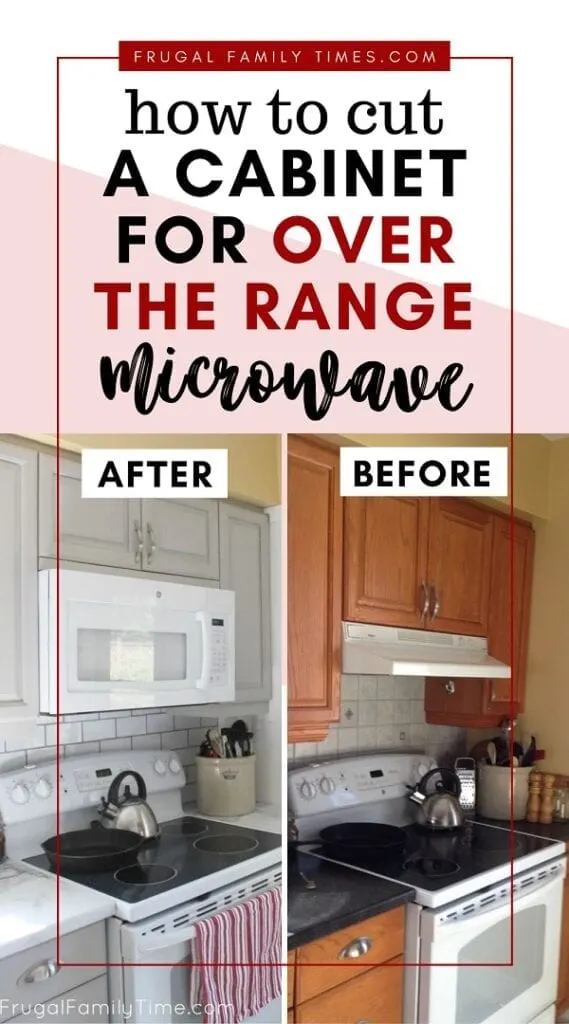
Have you ever wanted to put an over-the-range microwave over your range (of all places!), but thought you didn’t have enough space?
We thought that too!
But, like us, you might be mistaken – we were able to install one of these space-saving dynamos in our kitchen without too much hassle or expense.
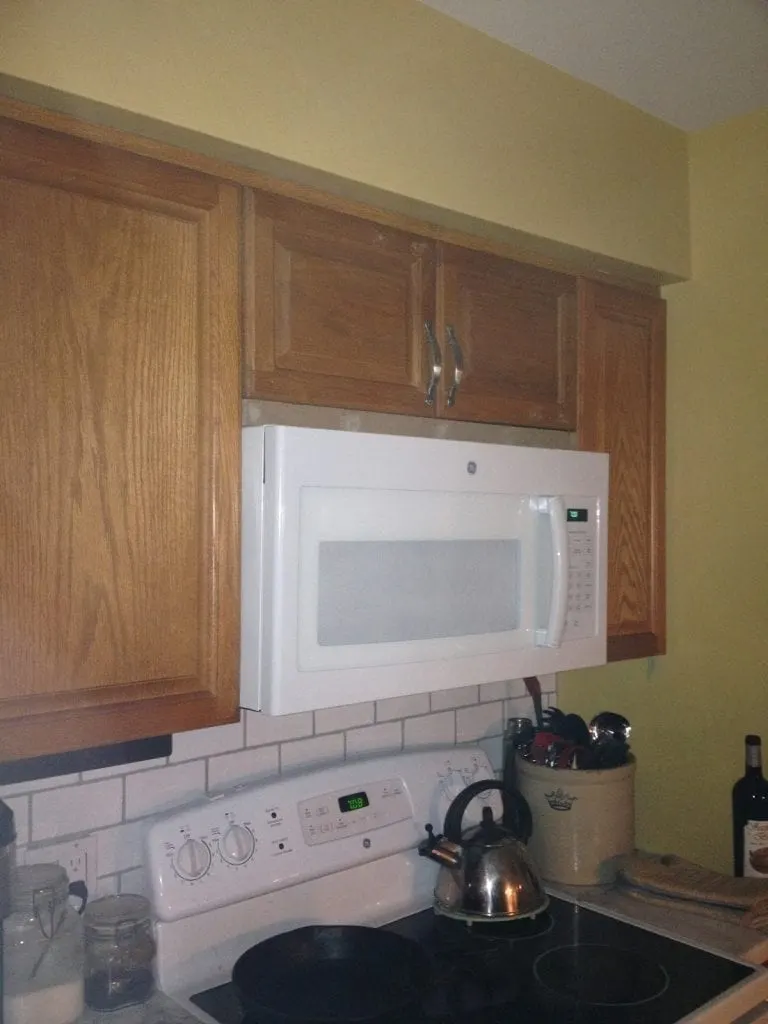
There’s a challenge: what do you do about your current over the stove cabinet?
Here’s how we cut a cabinet for an over the range microwave to make it fit well in our budget kitchen update…
The top of a microwave is a stupid thing. I mean, it looks like a perfectly good place to put stuff – flat, smooth and always in an accessible location in the kitchen.
But, as Robin reminds me, “Don’t put stuff there! It looks like crap!” And our microwave was visible from every room on our main floor. With it’s so seductive spot on top begging for stuff to be put there.


Everyone knew where to find those in our house.
Piling stuff on our old microwave was more of a symptom than the actual problem.
The real functional issue was that it sat on a deep microwave shelf that overhung the counter below by an excessive amount. This made the counter unusable below it. In our small galley kitchen losing this counter workspace was a very big deal.
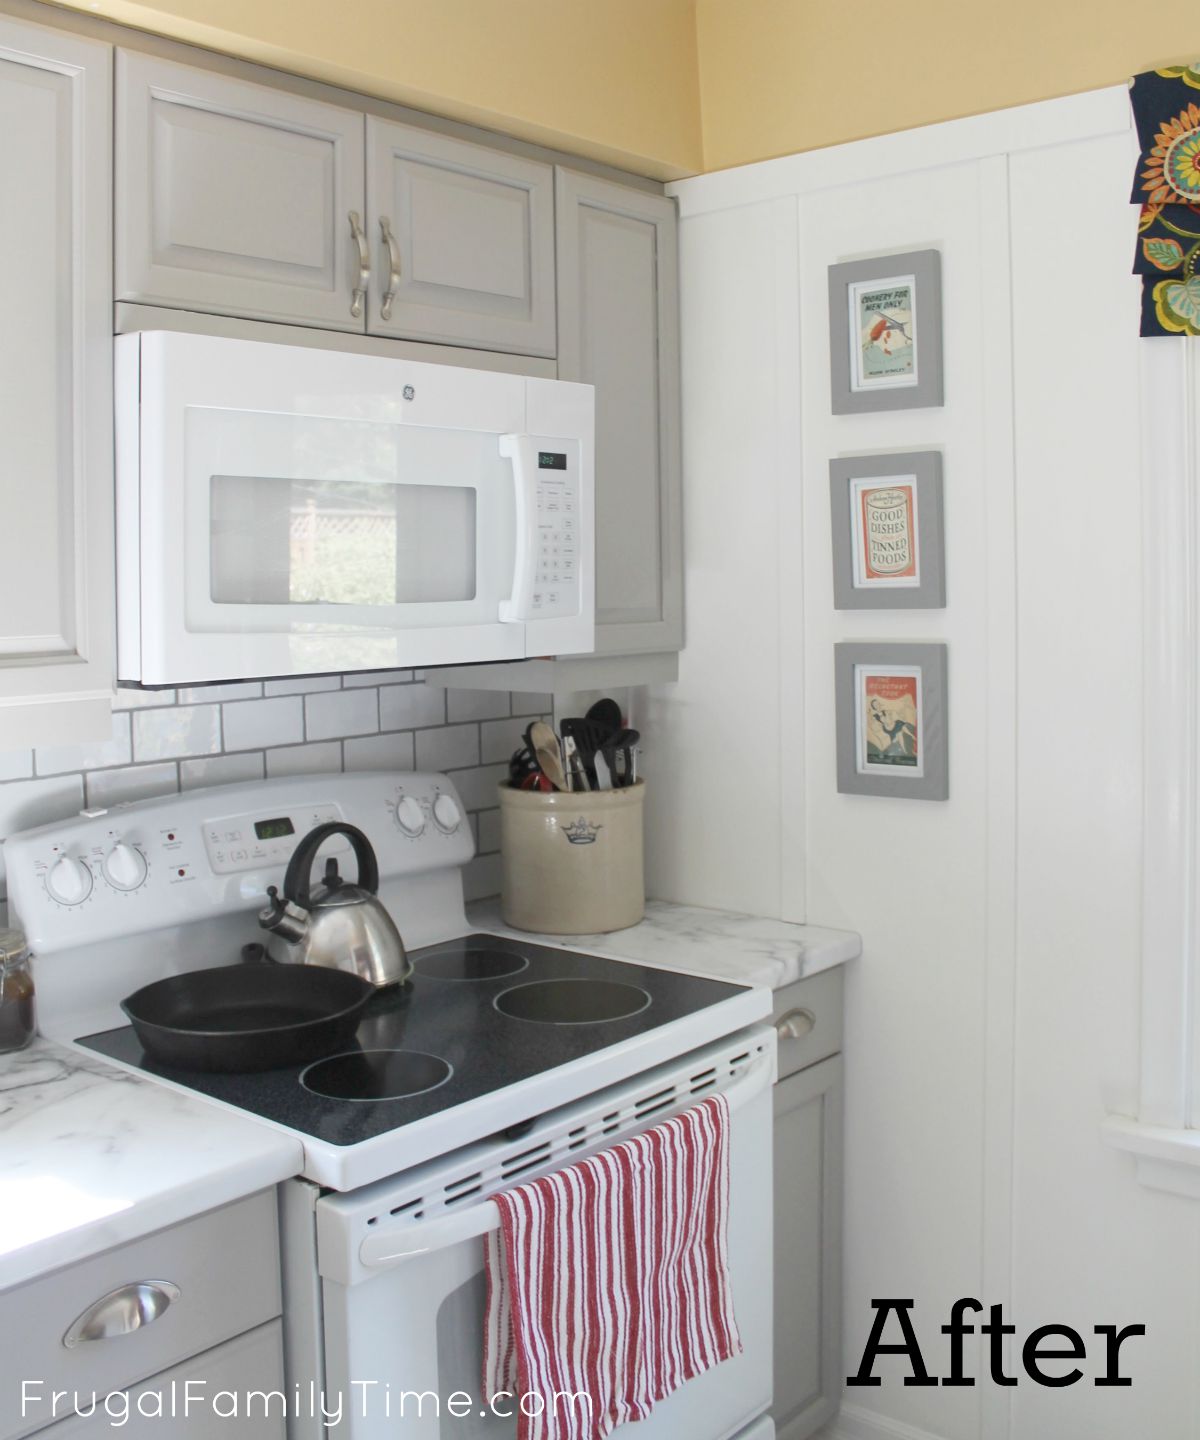
Plus, we had plans to make this spot pretty:


How to Cut Cabinet for Over the Range Microwave
Step 1: Choose an over the range microwave.
These babies are never cute, but they have dual functions, and in a small kitchen that’s a big priority.
Sure an awesome hood fan would be sexy, but that would mean we’d lose space for a microwave plus the storage of the space above. In our glorified hallway of a kitchen, that’s not going to work.
I’m of the mind that microwaves, no matter the quality, don’t have a long lifespan. (Consumer Reports (sort-of) agrees, They estimate 9 years – and I don’t know what fantasy island they bought their testers from, because we’ve never had one last half as long.) It didn’t make sense to spend a lot on one, we are doomed to replacing it soon enough regardless.
Robin wanted to buy one from the same company as our stove – just for a more cohesive look. (She may be frugal, but she’s no heathen.)
We waited for a sale and bought this GE over-the-range microwave for less than $200. We’ve been really happy with it so far.
Step 2: Make the cabinet over the stove shorter.


It sounds tough and a bit crazy, but it worked fine. Removing was straightforward once we got all the screws out that were holding it up and into its neighbours. A bit frustrating – some of those screws were buried deep below the hinges – in the end it was totally doable.
We pulled out the cabinet box and cut it down. This was fairly straightforward on a table saw – just take the cabinet box apart (usually easy unless you already have custom, handmade cabinets) set the gate for the amount needed to trim off and run the 2 sides of the cabinet through that need to be shortened and reassemble.
Don’t have a table saw? You could do the same with a circular saw, a straight-edge and a steady hand.
Ta da – you just made a Custom Cabinet. Time to brag!
Step 3: Electrical


No really. He isn’t.
This step will mean you need to hire an electrician or find a handyperson. Ed can do electrical work for us, but teaching it here is beyond his scope.
Step 4: Reinstall the over the range microwave shelf.

For the cabinet – just screw it up there how you found it. For the microwave – your manufacturer’s instructions will be your best bet.
For us, the real challenge was connecting the old duct to the new vent connection on the range hood/microwave. It was in basically the right spot but was a bit long. You can’t cut too much off or risk missing the connection altogether. Measure carefully!
We made it a bit long, then “coaxed” it into place when we tilted the microwave up on its bracket. Drop the connection bolts in and tape up the duct. Not a one person job, for sure – so invite a friend over if you need to.
Step 5: Cabinet Doors. (Maybe you’ll get lucky too?)
Because we’ve got horseshoes up our butts Due to good planning – we could reuse the cupboard doors from above our old microwave by turning them sideways! They fit perfectly for the width. (We had originally planned to convince Robin’s dad to make new ones.)
The height, however, was not such a perfect fit:


After paint and tiles that space now looks like this:
Would this work in your kitchen? Could your kitchen be improved with an over-the-range microwave?
You can find all the posts for our DIY budget kitchen update right here.


Our Honest Ruggable Review: Sure They’re Washable, But Are They The Best Kitchen Runner Rugs?


How to Hack In-Stock Cupboards to Make a Custom Kitchen (on a Budget!)

How to Cut a Cabinet for Over the Range Microwave (Our Budget Kitchen Update)


How to DIY Open Kitchen Shelves from Old Cabinets (a Beautiful, Budget Kitchen Update)


Karla
Saturday 17th of February 2024
What did you have to do to the electrical?
Robin & Ed Hicken
Thursday 22nd of February 2024
Hi Karla! We had to move electrical. However, this is not a DIY job if you don't know what you're doing - it could be dangerous and best left to professionals. For this reason we did not detail these steps. :)
Faith Ambrose
Friday 8th of March 2019
Can I ask what the depth of your cabinet is vs the depth of the microwave? Thanks!
frugalfamilytimes
Sunday 10th of March 2019
Hi Faith! It’s 11 1/4 inches deep. :)
Anonymous
Monday 14th of January 2019
Nice make-over, and lovely ideas, but you think 9 years is ancient for a microwave? I've had mine since '95, and it's been moved about 1000 miles over the space of 7 household shifts. Still works great and even looks good.
frugalfamilytimes
Monday 14th of January 2019
Wow! Sounds like you struck microwave gold! We’ve never been that fortunate.
Anonymous
Monday 30th of July 2018
I don’t understand the part about cutting the cabinet down. From what it sounds like you did you loose all of the frame and bottom floor. You said also you cut down both sides?What are you talking about?
Anonymous
Wednesday 1st of August 2018
Yes, that makes sense now. Thank-you.I ended up just using a filler board since we had just 7” of space remaining above the microwave due to 8’ ceilings+12” furr down.
frugalfamilytimes
Tuesday 31st of July 2018
Hi Jacob - Hope I can clarify a bit. The existing cabinet was the correct width, just too tall. We took the doors off and the box-part of the cabinet off the wall. We disassembled the box and then cut a few inches off both the left and right sides of the cabinet box. Top and bottom were left untouched and we just reassembled when done.
The doors we didn't touch at all - they came from another cabinet and, as you can see, worked out almost perfectly. If we didn't have the backup doors, you could get creative with some open shelving.
Hope this helps and feel free to ask for further clarification.
Anonymous
Monday 30th of July 2018
And it’s not the sides that would need to be shortened-it would be just the bottom or just the top. It by doing so you would lose so much if the cabinets structure it would fall apart and would not even look like a cabinet anymore.I am trying to do the same update right now and could really use a better visual of what you did-it would help a lotThanks
Unknown
Tuesday 31st of January 2017
Looks great! What colour and brand of paint did you use on cupboards? Any special prep, or just a good cleaning first?
frugalfamilytimes
Tuesday 31st of January 2017
Thanks! The paint is Behr Premium enamel. We had a Sherwin Williams colour matched: Pussywillow. TONS of special prep. It matters the most with cupboards: sanding, TSP, priming and letting the paint cure a few days (at least) before using. Worth it though! :)