
We may earn a commission on purchases made after clicking links on this page.


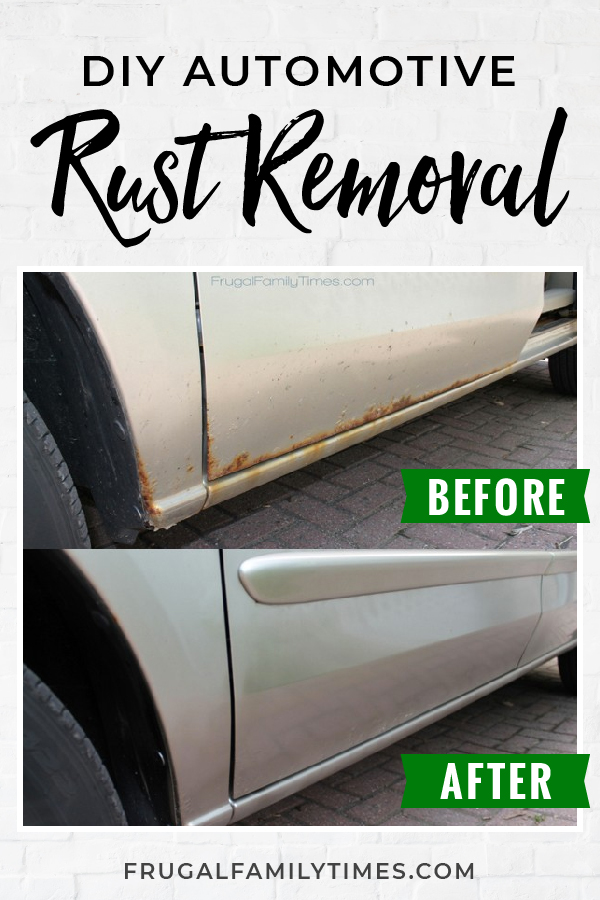
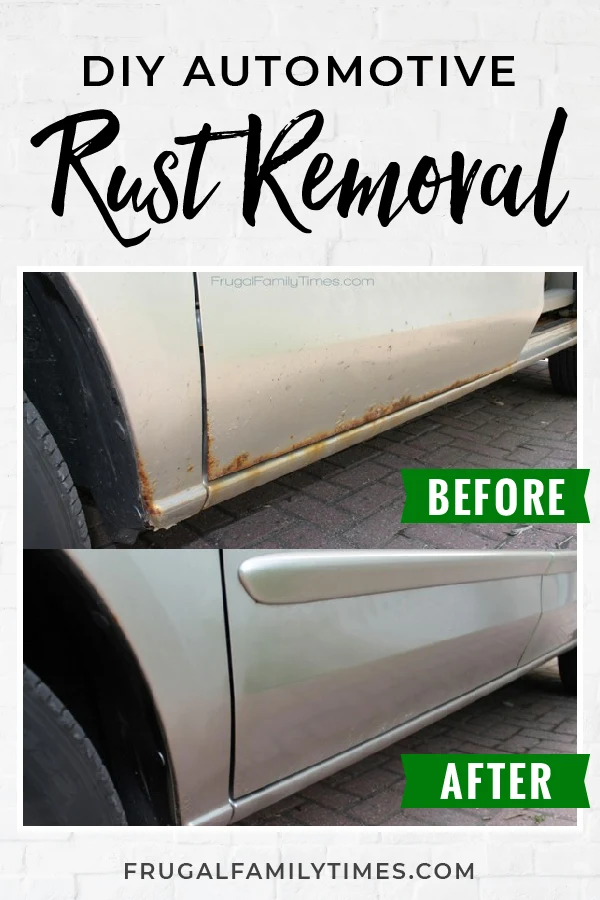
We drive a beater and we’re pretty proud of it – but that doesn’t been we want to drive a rust bucket. So Ed came up with a great DIY rust repair technique. Keep reading for our method of how to cover up rust on a car…

Intro by Robin Steps by Ed
Our ol’ van is over ten years old, runs really well, and best of all, it’s paid for! For over a year, we have had to make $0 in payments on the old girl.
That’s money we’ve been able to direct toward things that are important to us (Home DIYs! Travel! Working Less!). Low on the list of what we value is having a shiny, impressive ride. Our vehicle is just a tool to get us where we want to go.
There’s a bit of a caveat though: while we sense no shame in driving an old car, we feel tons of shame in driving one with rust.
Rust is exactly where we draw the line. An old van is fine, but please, let’s not have it’s rusty, brown roots showing.
So, much like a good home hair dye job, we give our van a quick age masking at-home treatment. It only takes Ed an afternoon and less than $40 in supplies.
With this small investment of time and money, our van goes from a rusty eyesore, back to being virtually invisible in its blandness. Just the way we like it.
Here’s Ed’s rundown of DIY Rust Repair – this tutorial will show you how to get rid of rust on your car…
This isn’t going to be pretty.


First, I’ll start this off by saying that the end product of this DIY isn’t showroom pretty.
It is a serviceable clean-up and paint job to coax a few more months/years out of a vehicle that is in otherwise good shape except for a rusty spot or two.


But it can get cleaned up and hidden…
It will eventually wear off and the rust will push its way through, but this is true of pretty much every rust removal out there: it is all just a band-aid solution. Rust always wins. But our goal isn’t to beat rust, it is simply to hold it off and drive our (paid for) vehicle for a little longer.
DIY Rust Repair: How to Cover Up Rust on a Car
Car Rust Repair Materials:
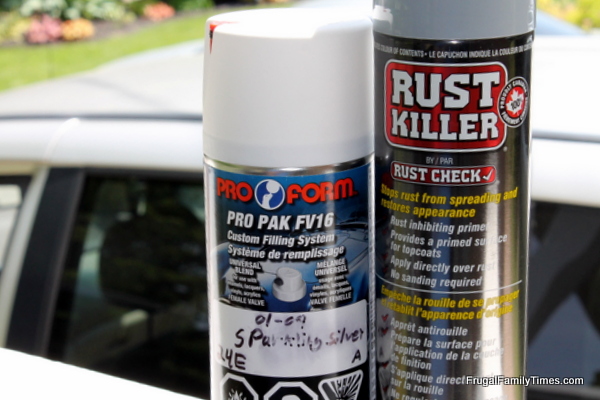

- Paint “bomb”.
- Get a can of paint colour matched to your car. You can get these either from an auto parts store or a body shop that will do custom paint matching. Even easier, you can order it from Amazon – just select your make and model from the drop-downs – pick your colour and have it delivered.
- Purchased locally, our big can of custom paint cost about $28. (Amazon seems to cost less!)
- Rust-killer/primer.
- It is an all-purpose rust killer and primer that you can spray onto bare metal/rust to stop it’s progress.
- Cleaning supplies.
- Water bucket
- scrub cloth
- I find these 3M scrub pads awesome.
- Rubbing compound – This is my favourite rubbing compound.
- Rubbing compound works miracles at cleaning up rust stains and cloudy over-spray from amateur hour spray painting (i.e. the type of painting I do).
Steps for DIY Rust Repair
Step 1: Check the weather forecast.
You don’t want any rain while the paint is being applied.
Plan enough time for multiple layers with at least an hour or two curing between each.
Step 2: Clean up as much of the rust, rust stains and mess as you can with basic cleaning stuff.
You’ll be surprised at how much of what you thought was rust, was actually just the mess that rust makes.
Some stuff, of course, is actually rust.


Step 3: Attack everything again with the rubbing compound.
You’ll find that rubbing compound should get most of any rust stains and mess off that other cleaners miss.


The initial clean up makes a big difference.
The rust stains are gone and you can actually see where the real damage is.
Step 4: Clean off any and all soap, rubbing compound and rust mess.
Dry with a cloth and leave things alone to air-dry for a while. You don’t want to paint over wet metal.
Step 5: Leap of faith time – Apply the Rust Killer/Primer.
Your car will end up looking like all those cars you see up on blocks in the movies. It will get better.
You may choose to tape off some areas (I did last year) but I’ve found that any build-up near the tape line tends to show up worse than the misty over-spray that untaped areas get.
Really, everything you do will kinda suck a bit, so pick your poison.


Step 6: You may want to do a second coat of primer to make sure the metal/rust is really covered.
Be sure to wait until the paint is dry before painting again.
Depending on the paint you buy and the temperature, this may be one hour or many.
Step 7: You can now apply your colour-matched topcoat.
Go easy. Once you start covering the primer and it starts looking normal again, the temptation will be to over-apply and get runs in the paint.
Be patient (I’m saying this as much to myself as to you, as I am writing this post between paint coats as a way to force myself to be patient). Many thin coats are better than 1 thick one (Yes, Dad, I heard and remembered what you said).


Wife able to make eye contact with fellow employees in the parking lot? Yes.
Step 8: You are nearly done (in fact, some of you will say, “good enough” and actually be done).
Others will want to go back with some rubbing compound after the paint has cured for a few days and give it a good buffing. This should help remove any over-spray haze that you get from shoddy spray can work. Again, not perfect, but done.
Our project this year represents the worst case scenario for salvaging a season of driving from a vehicle with some major rust spots. The next step – rusting completely through the door panel or fender – isn’t far off. No amount of cleaning and painting can hide a physical hole.
It is possible your vehicle has smaller rust spots and these clean up much nicer. Check out this comparison of the driver side sliding door. The small bit of surface rust and staining virtually disappear with a good cleaning and paint job.


So that’s that, for at least another few months.
Our next step may be to visit a wrecker and see about getting a matching driver’s side door (as that is the worst spot). Anyone have any luck with that? I’m pretty sure it will cost more than $40.
Any questions? Do you have an old vehicle you’re nursing along?
Al
Friday 6th of November 2020
Interesting post. I have a 2007 Honda, living with the salty grimy roads of Vermont. I have to keep the rust at bay every year with epoxy resins, fiberglass, and base coat/ clear coat. I don’t have a car payment , so if I have to put $400-$500 into paint and materials, so be it. Thanks,
frugalfamilytimes
Saturday 7th of November 2020
That's our thinking too! :)
How to Wash Your Car at Home - Auto Detailing at Home - Family Proof : Family Proof
Sunday 26th of July 2020
[…] is a menace that will slowly destroy the value of your car. This DIY project requires an investment: paint that’s similar to your car’s original color and a […]
Helen Travel
Thursday 28th of November 2019
I love your post you have shared here on your site. I would like to share it with my friends on all my social media accounts. Thanks for writing such an informative content.
Mark Armstrng
Wednesday 1st of May 2019
It's an informative post that you share. I love your blog.
stacy johnna
Saturday 1st of December 2018
Wow that's amazing its really work on my car too. Thankyou so much for your help Ed and Robin.
frugalfamilytimes
Saturday 8th of December 2018
We're so glad, Stacy! Thanks for letting us know! :)