We may earn a commission on purchases made after clicking links on this page.
by Robin
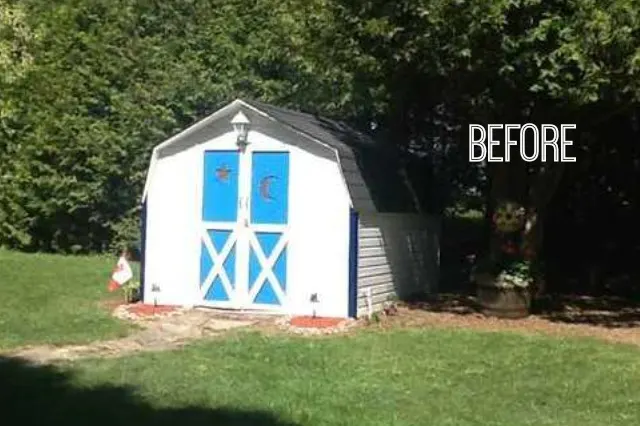
This weekend I said good riddance to this hideous shed!
I’m fully prepared for no one else to be as excited as I am about this shed makeover – and maybe not share my venomous dislike for the before version. It made me crazy!
I can’t put my finger on exactly what I hated the most – there was just so much to loathe.
I cleared away lots of crazy to begin our Mobile Home Makeover (more on all that here).
There were gnomes, ducks, bears, pigs on tractors and a very creepy baby – to name a few. That outdoor madness was relatively easy to get rid of (see: Souvenir Table 😂).
But what wasn’t nearly so easy to rid ourselves of was the “creativity” that this shed was victim to.
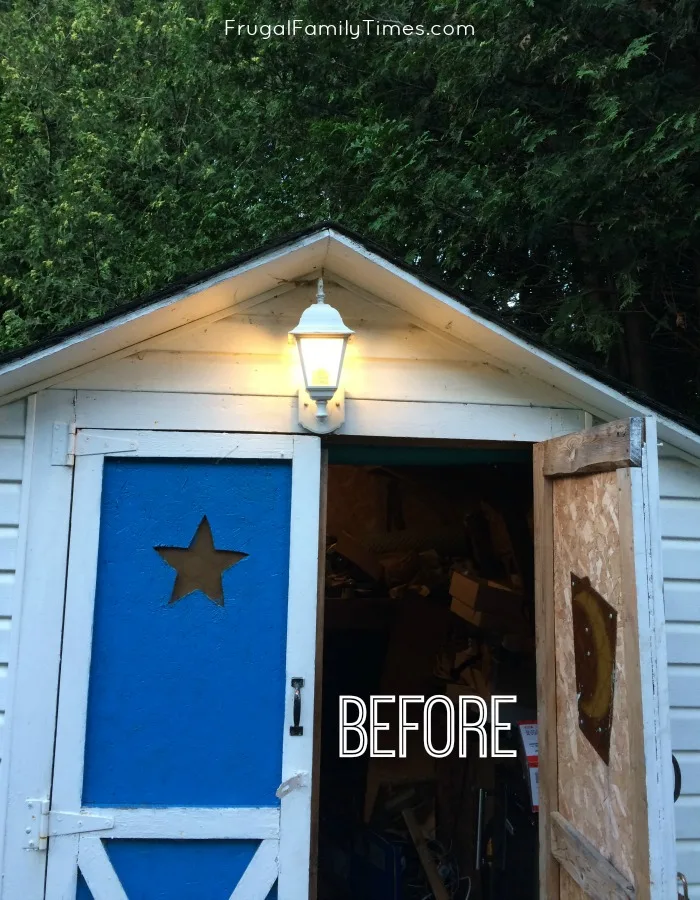
The bright electric blue accent colour did nothing to highlight the surrounding woods nor the rustic log cabin bunkie next to it. It should have been easy to solve with paint. If it weren’t for the other “fun” element.
What truly baffled me was how to banish the star and moon in the doors. That little bit of “fun” was not going away without a fight. They were cut right through both doors and then accented with attached 80’s yellow plexiglass.
Why??! So permanent and so…nuts.
Correct me if I’m wrong: doesn’t a moon on the door of an outbuilding generally signify an outhouse? (It was really just a matter of time before someone pooped in there. 😨😉)
My mental wheels turned for years now as to how to solve this hideous problem without replacing the doors entirely.
It wasn’t until last weekend when Ed was working on skirting the new deck extension that I picked up a board and had a Eureka moment!
I figured out how to do this shed makeover on a budget! The finished look is more natural, a bit farmhouse and an easy DIY.
TA-DA!
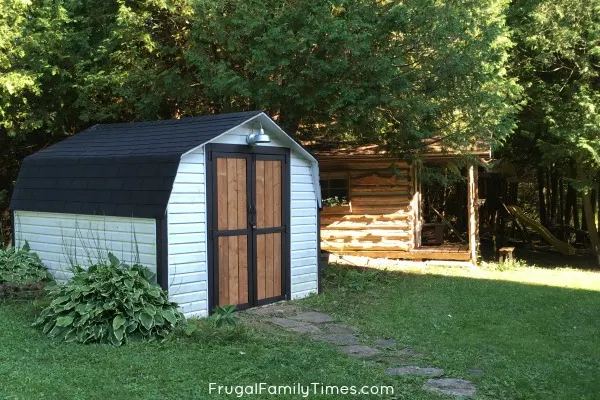
I wish I had a before picture from this angle. The old shed was aggressively loud and stole all the attention from the trees and the rustic cabin.
DIY Shed Makeover on a Budget
Shed Makeover Supplies:
- New barn-style light fixture (this one is wonderfully affordable!)
- Dark brown paint – I used Off Broadway by Behr Eggshell
- 6 Brown pressure treated fence boards
- Mitre saw (or a circular saw with a circular saw guide would work)
- Drill and bits
- 3/4″ wood screws
DIY Shed Makeover How to:
Step 1: Remove the extra shed trim.
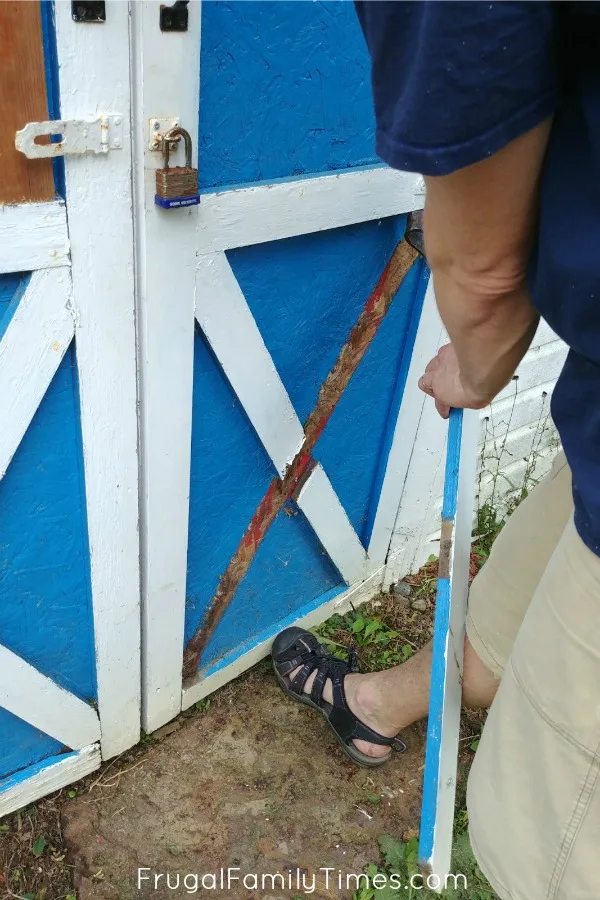
Basically, I sanded to remove any loose paint flakes and dirt. I then wiped it down with a damp cloth and let it dry.
Step 2: Paint the shed trim.
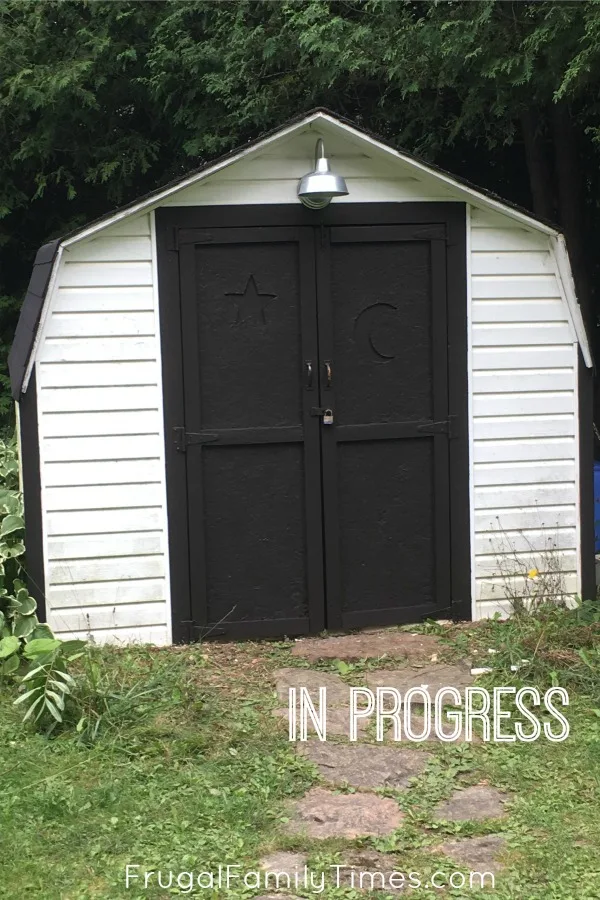
I painted right over the plexiglass. There will be very little space between the boards so the star and moon won’t be visible, especially when painted this dark shadowy colour.
I laboured over choosing the paint colour. I wanted to bring out the dark brown knots and tie the new shed colour to the logs of the bunkie. But, I still wanted it to look good with the black roof.
I found the blackest brown, that wasn’t too much of either, if that makes sense. It’s Off Broadway from Behr.
Step 3: Cut the fence boards.
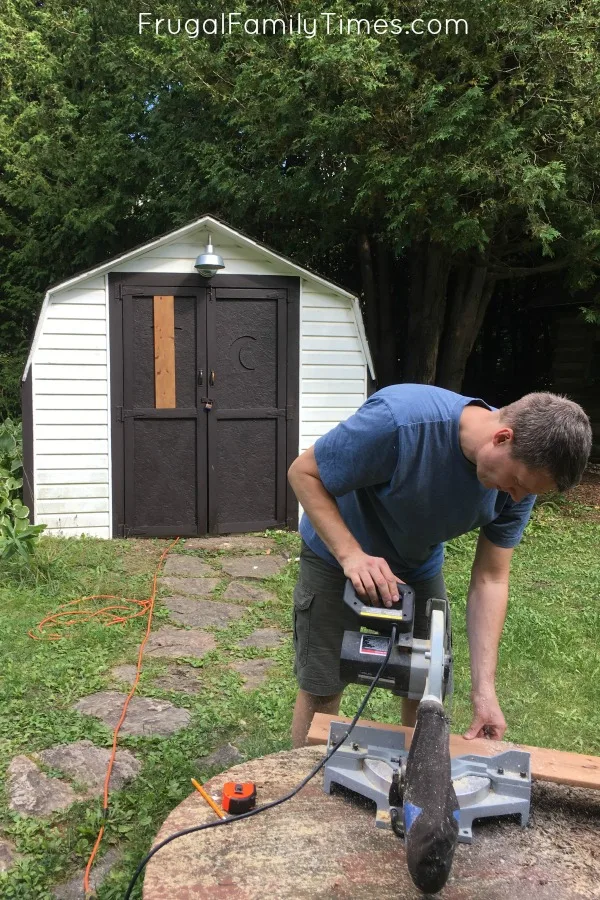
This old shed was not square, so each board needed to be measured and fit individually. (Of course. 🙄)
Step 4: Attach the fence boards.
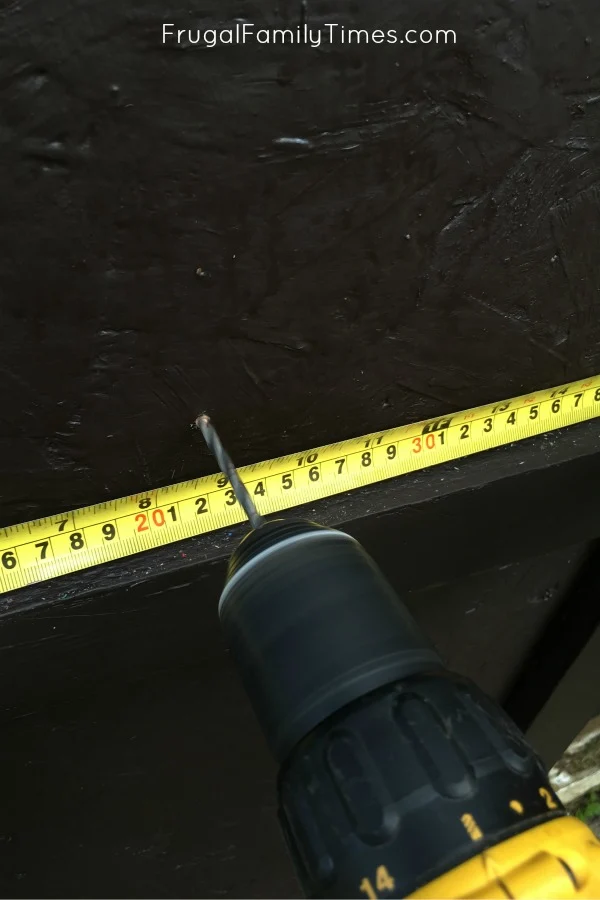
To do this we measured halfway between the side rails of the door and drilled a hole through. We did this on the top and the bottom.
Then we screwed through that hole from the back.
We attached all the boards this way. By attaching them from the back you don’t see the screwheads on the outside – much cleaner looking!
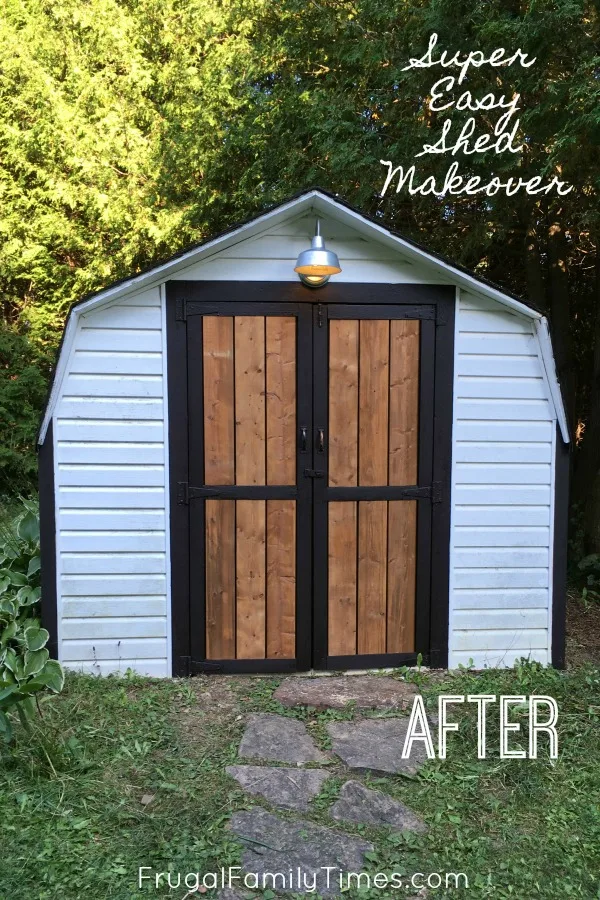
(This weekend I plan to divide the hostas that you see to the left and plant a clump on either side of the door.)
I am thrilled with how this shed makeover turned out! I would estimate it took us about 3 hours to complete and it cost less than $80. That includes this gorgeous barn light (a great, affordable fixture – I even used two in our Mobile Home Makeover bathroom!)
Do you have bizarre things from previous owners that baffle you? I’d love to hear about them below!



Unknown
Saturday 22nd of September 2018
heyyyyyyyyyyyyy....i'd like to see that log cabin bunkie (?) ...what is that, a guest sleeping room?
frugalfamilytimes
Saturday 22nd of September 2018
Yes, Diane! It’s a sleeping bunkie. It’s really cute - inside is pretty tragic, but we’re working on it. It’s tiny - just room for a double bed and an old cedar chest. Last week we wrote about a project we finished in their. :) Here’s an old photo. https://www.instagram.com/p/BHmzAIMjxXo/?utm_source=ig_web_button_share_sheet