

Inspired by Beach Glass.. DIY Artwork for our Bathroom
by Robin

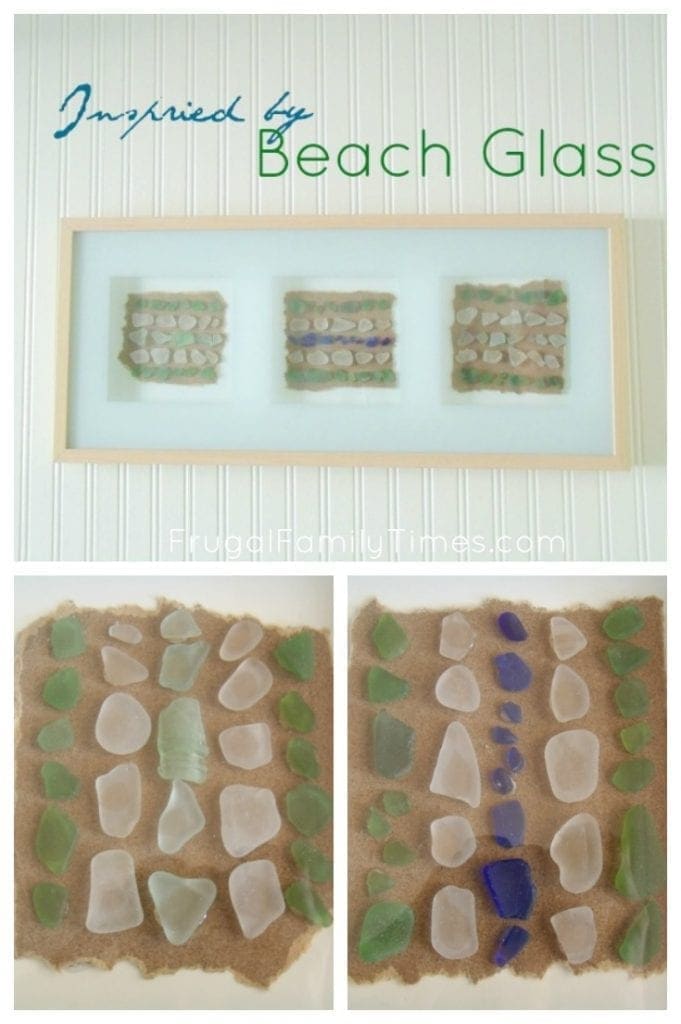
Our Frugal Bathroom Reno is finally done. I recently added the final element. Artwork handmade by yours truly. Actually, I am hesitant to call it artwork, but I am told by others it is. I tend to think of it as just something I made.
I love collecting beach glass. I could spend hours combing up and down the water’s edge looking for the lovely pieces of glass that wash ashore. My heart leaps when I find an especially rare colour. I love the feel of the soft matte glass in my hand as my feet wade in the water.
It was that tranquil feel that we were looking for in our recent bathroom makeover. I had a jar of beach glass in our kitchen window that inspired the colours and the beachy feel of our new bathroom. I think we were successful.
There is now:
- Soft, sandy coloured new flooring.
- A cottagey feel to the beadboard wallpaper walls.
- Colours inspired by the beach glass I’ve found: soft white, emerald green, pale turquoise and cobalt blue.
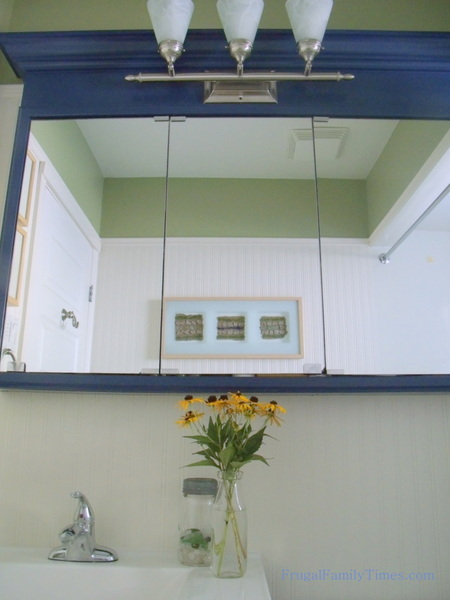
Now my beach glass jar is at home by our new bathroom sink, though it is a little bit emptier since I created this piece for the wall. I think the piece ties the room together nicely.
I had the frame for years, with the intent to do this project with it. (It’s the Erikslund frame from Ikea.) It took time because I didn’t have quite the collection of colourful glass that I hoped for. Our recent trip to the East Coast solved that. After that, all I needed then was the nerve to do it.
Sometimes it’s a challenge to move from my head and the safety there, to action and the risk that involves. But I finally did it.
I should have taken photos to show how I made this. Apologies. I didn’t have time for photos. I needed to make this piece covertly. It was a rush job. I had to do it while my daughter was away. She had ideas for our sea glass art; they did not overlap with my own. I think her’s involved a smiley face and a tree and a bird. My vision was a little more abstract.
The best I can do is write a description.

Here’re the steps:
- I yanked the back off the Erikslund frame.
- I cut a piece of foam core to fit the back of the frame. I traced the former art inside to get the size just right.
- To give the background a sandy feel, I tore pieces of medium grit sandpaper
into squares with rough edges. (Dorky story: I was actually thinking of taking some glue and some sand and making a sandy background. I wasn’t sure if this would work. I was describing my idea to Ed, “How hard would it be to glue sand to paper?” Then a lightbulb appeared over my head: sand paper!)
- Using my trusty hot glue gun I glued the pieces of beach glass onto the sand paper.
- I glued the sandpaper onto the foam core.
- I stapled the foam core into the back of the frame.
- We hung it up.

Do you share my love of beach glass? Have you made anything to display it?

To see more of our Frugal Bathroom Reno, check out these previous posts:
- How to Install Paintable Beadboard Wallpaper
- Saving Money: Mixing Vintage and Discount Hardware
- How to Install Peel and Stick Vinyl Tiles (that you can grout!)
- Builder Basic to Beautiful: Medicine Cabinet Makeover
- Bathroom Vanity Makeover

Robin and Ed are a DIY-loving couple with over 25 years of design and build experience. Also, Robin is a Nutritionist and former Registered Dietitian and Ed is an award-winning Business Educator. We share strategies for living a rich life on a DIY budget: creative money-savvy ideas for a stylish home, healthy meals and family fun. Our work has been published in the pages of Do It Yourself, Farmhouse Style and Better Homes & Gardens magazines.


I love this idea! My mom's new bathroom is going to be beach themed and this would be perfect. Totally going to surprise her with this! Thanks for the awesome tutorial.
I love that! 😍. Will you send me a photo of you make it?! 🙂
Simple yet beautiful! It's true, beautiful things can be from small and unimportant things. Like these beach glass, you have turned it into an amzing frame. Nicely done!
SeaGlass.us
Thanks, Dana!
That's beautiful!
Thanks so much!