

Wood Herringbone Ceiling (A DIY Ceiling Idea!)

by Robin math by Ed
Our basement media room ceiling has come a long way from the before:
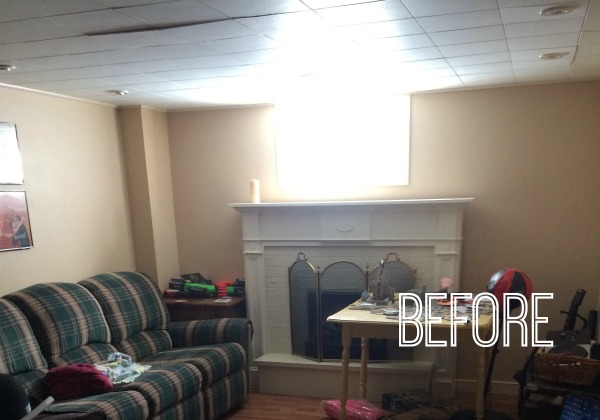
You can see – the ceiling before was the cheapo cardboard ceiling tiles.
Cardboard ceiling tiles are a good option – they are cheap and relatively easy to install. But is there a less inspiring ceiling?
I got a unique idea to replace this blah mess: a wood herringbone ceiling!
And, as I mentioned in our basement guest room plywood ceiling makeover post – they are nearly impossible to fix when one is damaged given how they’re installed. (see that droopy row in the photo above?)
Ceiling tiles tend to look serviceable only until you need to get behind one for some reason or if someone knocks into it with something. Which in our house of clumsies takes about 4 days.
Here’s the ceiling now:
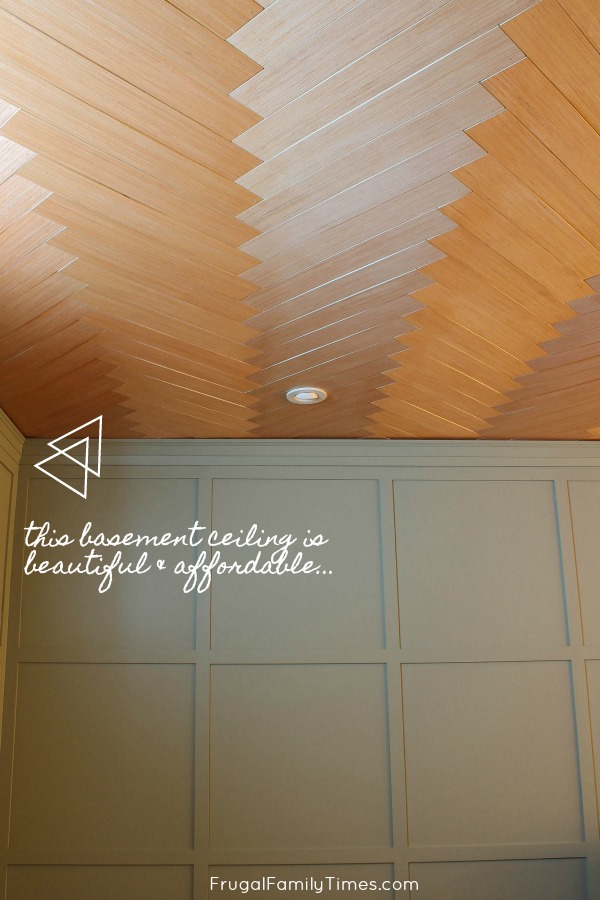
Can you believe this natural wood herringbone ceiling is a BUDGET basement ceiling idea too!?! Ed and I devised and installed it – and I still can’t believe how little it cost. And it doesn’t look like a plywood ceiling at all.
It is even more beautiful in person, folks. This is one of my favourite DIY projects we’ve done so far (though we have more coming soon that I think will compete for that title!)
Here’s the crazy thing I just realized: our gorgeous herringbone ceiling is actually CHEAPER than cardboard ceiling tiles! Our large room cost about $250. I’m flabbergasted.
I had some limitations when devising the ceiling for our basement media room. (I LOVE limitations – they inspire creativity!):
- It had to be unique. Basements are usually boring boxes and need all the help they can get to be interesting.
- It had to be affordable. We had gotten a quote for a ceiling product that was designed especially for basements – it was going to be well over a thousand dollars for this room! Not going to happen. (Plus I later learned that product couldn’t be painted. That’s a limitation I won’t accept!)
- It had to use the same plywood material that worked so well in our basement guest room plywood ceiling. These rooms are adjoining – so tying them together with the same material and finish would create a visual flow that would expand the spaces. Or at very least not visually shrink them.
Another very cool thing I figured out for this project – this herringbone ceiling idea could turn a pesky popcorn ceiling into a thing of beauty! It would be easier to install on an existing ceiling than our basement joist install.
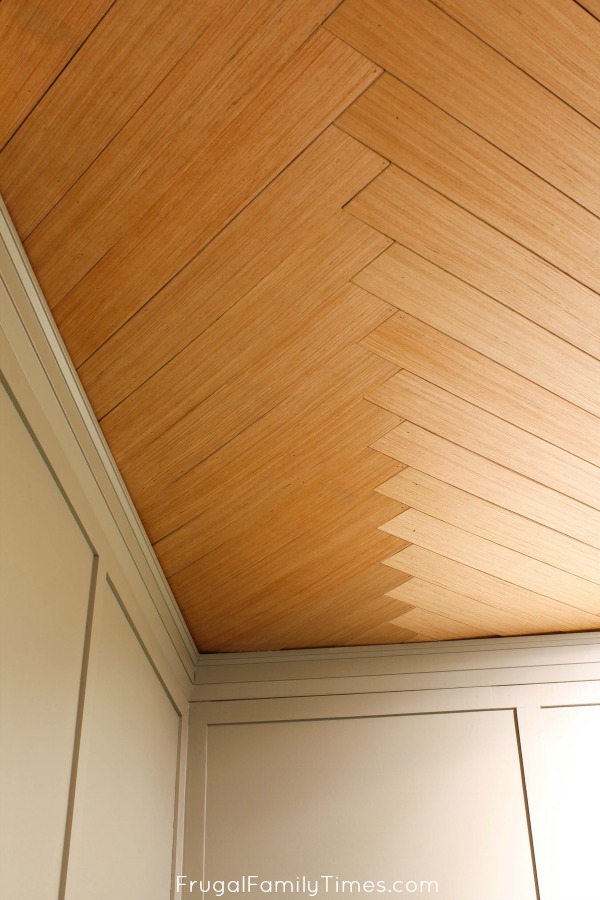
I love how the light accentuates the rows of wood planks.
It looks handcrafted which feels really special for any room.
How to DIY: Wood Herringbone Ceiling (Another Great Basement Ceiling Idea!)
What you need:
- Enough sheets of RevolutionPly plywood to cover your space (plan for about 10% extra for cutoffs)
- Speed square – essential to get the angles just right.
- Nail gun (we just got this one and we absolutely LOVE it)
- Brad nails
- Table saw (or circular saw and guide)
- sandpaper
- Optional: soundproofing insulation Rockwool is our favourite.
- Finish of your choice: we used Tung oil (we found this one smells best and drips least) it gives a handrubbed, crafted look.
How to make a DIY wood herringbone ceiling:
Step 1: Demo!

He was a frugal one too – you can see the pieces were all salvaged – rarely two alike.)
We then shoved Rockwool insulation between the joists – primarily for sound dampening.
Step 2: Prepare the herringbone ceiling planks.

This plywood comes in 4’x8′ sheets which needed to be cut to size.
First – we ripped them into 4’x2′ boards with the cuts against the grain. This is important! You want the grain to run the same way for all the pieces.
Next – we cut those sheets into 3-inch pieces – cutting with the grain.
Last – we sanded the edges smooth.
Step 3: The install.

If your joists are unevenly spaced – like ours – you’ll need to custom cut the planks for each row.
We used both the table saw and our mitre saw for these custom cuts.
How to figure out the length of your ceiling planks:

1) Measure the centres of your joists. This distance is your ‘a’ and ‘b’ variable.
2) Assuming you want perfect 45 degree angles, use the Pythagorean theorem (MATH!) to find ‘c’
Alternatively – No math method:
1) Measure the centres of your joists. Mark these points (A)
2) Use a square to mark a line down the middle of a joist.
3) Measure down this line the same distance as you found between the joist centres. Mark a point (B)
4) Carefully measure the distance between the end of line (B) and the point at the centre of the opposite joist (A). This is your ‘C’ – the length of your board.

Use a speed square on the joist to create a perfect 45-degree angle with the panel section.
Try and balance it evenly between the two joists and nail it – once on each end. RevolutionPly is light, so we only needed 5/8″ brad nails.

We initially used a small piece of metal for the gaps between the boards, but it was driving us crazy.
So, we ended up just eyeballing most of it.

Do not stress about this – when done, you won’t see the trees, just the beautiful forest.
Step 4: Install Potlights

Measure and cut plywood to fit between joists in the approximate location of lights.
Mark the centre of the exact location for potlights on the plywood.
Trace/scribe the potlight in the location marked on the board.
Use a jigsaw to cut out the hole.
Either rewire the potlight through the new hole or use a gap to fit it in.
Nail the board between the joists.
Finish securing the potlight by whatever method your lighting system uses.
You will have to scribe/cut/fit some herringbone boards around the lights, but this is actually easier than it might sound.
Most potlights have a good cover system that will hide a lot of sins. We switched all of our bulbs to dimmable LEDs to cut down on heat/fire risk.
Step 5: Finish with Tung Oil.

It was pretty straightforward – Ed just wiped it on with a rag.
We are deeply in love with the finished project!
This is just one of our DIY low basement ceiling ideas! Check them all out here.

Robin and Ed are a DIY-loving couple with over 25 years of design and build experience. Also, Robin is a Nutritionist and former Registered Dietitian and Ed is an award-winning Business Educator. We share strategies for living a rich life on a DIY budget: creative money-savvy ideas for a stylish home, healthy meals and family fun. Our work has been published in the pages of Do It Yourself, Farmhouse Style and Better Homes & Gardens magazines.




Hi there! I really love this idea and am itching to try it out. The biggest problem that we’re going to run into though is our heating ducts are roughly 6 or 7ish inches below our joists. Any ideas?
Thank you,
Kelsey
Hi, Kelsey! Could you clad the ducts with the same material and just let them blend a bit with the new ceiling?
Just came across this and I’m totally in love. Unfortunately I’m not handy enough myself but fortunately, I have some family that is. I’m nervous in lack of knowledge getting caught in a pickle if something needs fixed and a panel needs removed or replaced. How easy is it to remove/replace. Should I have extra panels cut ahead of time for the future?
Hi Randi! So happy you love our project! It’s super easy to remove panels – but the nails may pull out a bit funny and crack the boards – so your idea of cutting extras to have on hand for the future is a great one! I’d apply the finish to the extras at the same time too so that they appear the same when you replace them. Happy projecting! 🙂
Hi! Love this idea but how can I do this with a popcorn ceiling? I don’t plan to remove it just want to cover it up and can’t see where to attach it to (is it the joist?)
Hi Nancy! If you’re covering a popcorn ceiling you don’t need to worry about the joists. The small pieces are light enough that they should stay up with just nails into the drywall. Let us know how it goes! 🙂
How big was the room you did and how many 4’ x 8’ sheets did you end up buying?
The room is about 10 by 15. That’s about 150 square feet. There is very little waste, so I’d estimate we used approximately 5 or 6 sheets of plywood. 🙂
What material did you use to hide the gap between ceiling and drywall?
Hi Hannah – crown moulding did the trick! 🙂
Hello Robin & Ed – Thank you for sharing this great idea. I am in the process of replacing a ceiling in this manner now. I was a little confused about the length of the planks (math!), so I wanted to visually check my work. I cut a plank to length and put it up with double-sided tape. It overlaps each floor joist by – I don’t know – 1/8 to 1/4″. Did I get it wrong? (I had an idea that the outer corner of each plank would extend no farther than the outer side of each floor joist).
Thank you in advance.
Hi Russ – This is the tough part for sure. Our joists were pretty variable in how far apart they were from each other – sometimes as much as 2 inches. I tried to pick a plank length that worked for the whole room, but there were a couple of rows I had to custom size to fit correctly.![]()
Most of my planks, when set on a 45-degree angle (use a carpenter’s square to get your base row set up) overlapped the joist completely and overhung a slight bit (up to 1″, maybe) into the next row. At a minimum, the tip of the plank should completely cover the joist – see this photo for reference:
Because they are on a 45-degree angle, they will create ‘steps’ in the joint overlap that will serve as your starting spot for the next row. It sounds worse/more difficult than it is. You are on to a great strategy. Cut a few boards, try taping them up and then start a new row next to them to see how things start to flow. It will give you confidence that your planks are correct and let you nail that first row perfectly. With it done right, the rest should roll along easier.
Hope this helps – the early tediousness will pay off in faster working time for the rest of the project!
Ahh – sorry – the photo I tried to insert, (but didn’t get it to work) is the one from about midway in the post – showing the math. You can actually ignore the number crunching if you want and use the image itself (and the overlap it shows0 as a refernce.
How did you determine your starting point when it came to actually hanging the first boards? I still have the drywall on my ceiling and I feel lost here even though I think I have the joists marked out.
Hi Justin – so sorry for the delay – technical glitch here. 🙁 We started in the middle and worked our way out. That way we could save the trickier cuts to the end and make progress so quickly. 🙂
What did you do about areas that you might need access to? Like where plumbing is?
Hi Becky! We don’t have any plumbing in this area of our basement, so not a concern. As for other things, we have lots of photos that will help us find a spot we need to access and we can remove the slats that are there – much like lifting a dropped ceiling tile. 🙂
I was curious, how did you come to the 3” width? And where you attached the planks, was it always in the same section, basically uniform?
Also I absolutely love this this idea, and your project came out beautiful. Thank you for sharing. I am planning to do this in our bedroom!!
Hi Daniel! Glad you love our project too! This is one of my faves. 🙂 We came up with 3″ width after experimenting with a few and seeing what we liked. What’s also nice about 3″ is you can get an even number from a sheet of plywood (3″ goes into 48″ or 96″ nicely). The planks all lined up nicely – the nails too – because we followed the joists. If you’re putting it on a drywall ceiling you may want to snap a chalkline or something and follow that. 🙂 Good luck! Be sure to share a photo with us when you’re done!
Which side of the revolutionply did you show? I am getting ready to start a herringbone wall but not sure which side to use to get the look you have.
Your basement bedroom ceiling project with this product is the first post I read and I love it too. Are they using the same side of the ply because they do look slightly different?
Hi Annie, I’m glad you’re inspired by our projects! we love that! For both ceilings we used the side that looks a bit striped vs. the more solid looking side. Does that make sense? 🙂 Robin
I'm obsessed with your diy blog! I'm a new home owner and it has helped me visualize and dream up new ideas for my half finished basement! One quick question with this diy ceiling ( which is amazingggg ) I have an exposed basement ceiling, have the pair of you had to get behind this ceiling design to get to wires or pipes? Would it still be possible with this ceiling design?
Obsessed! Wow – thanks! 🙂
This part of the ceiling doesn’t have any plumbing in it and the electrical is done – so we don’t expect to need to open it.
If we did have to – I plan to use masking tape on the sections and number the pieces. We’d then pull them down, Dow what we need to, and follow the numbering system to put them back up. Does that make sense? 🙂
Great ideas which I find to be very doable.
Thank you! That’s our goal! 🙂