How to Hang Paintable Beadboard Wallpaper, an Easy DIY (Updated 2021)

Intro by Robin Steps by Ed
I hadn’t even heard of paintable beadboard wallpaper until I saw it on Pinterest. It was love at first read! I knew this would be a simple and inexpensive way to breathe some character into our bland main floor bathroom. This product has so much going for it.
Reasons to Use Paintable Beadboard Wallpaper:
- The beadboard design adds architectural interest. It gives texture and a classic look.
- It’s paintable. You have thousands of colour choices. Plus, you can change your design direction down the road and not have to tear the wallpaper out. Just paint over the colour you fell out of love with. Conventional wallpaper is not nearly so adaptable.
- It’s affordable. We found ours at Home Depot for $25 a roll. We almost finished our whole bathroom with one roll. Almost. Sadly, we had to buy another roll to do the last section – about 5 ft.
- It’s fairly simple to install. This was our first time wallpapering and it turned out terrific. (If we do say so ourselves…) This wallpaper is far simpler to install than actual beadboard, or beadboard panelling (which we have done before). With traditional beadboard, you’d need to remove your baseboards and trim. That’s more work. Boo to more work.
- Beadboard wallpaper durability is pretty good. We’ve had it installed for nine years and it’s holding up great! One thing to note – it’s a bit spongy in texture and can get nicked by long fingernails, etc. We’ve seen this near our hand towel. It took years to happen – and recently I just filled the nicks with spackle when I updated the paint.
About Paintable Beadboard Wallpaper:

pull up? waves? sweep? sun? point at nothing?
The wallpaper we used isn’t marketed as Martha Stewart brand anymore – this one looks very similar.
You will find differences in the products available. The biggest difference is whether it is pre-pasted or not. Martha’s requires you to put the paste on the wall and then hang your pieces.
(An Update: After completing a wallpaper project in our Mobile Home Makeover – we VASTLY prefer NOT using pre-pasted wallpaper. So, in our opinion non-pasted is the best beadboard wallpaper!)
If your paper is pre-pasted you can check out the how-to at Centsational Girl. She professionally presents the pre-pasted product. (Not sure why the alliteration seemed necessary. Sorry folks, couldn’t help myself.)
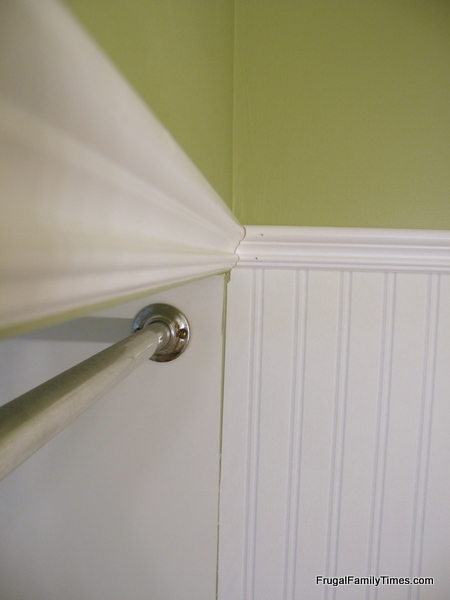
We chose to do a beadboard plate rail install. This means the beadboard runs up about 82 inches from the floor and then is capped with a piece of trim. There are 14 inches of wall above that which remains smooth painted plaster.
We chose this design for the added texture and interest. We will paint the area above the plate rail a different colour. Also, we chose this height so the plate rail could go all the way around the room to tie in the bulkhead over the shower.
How to Hang Beadboard Wallpaper:
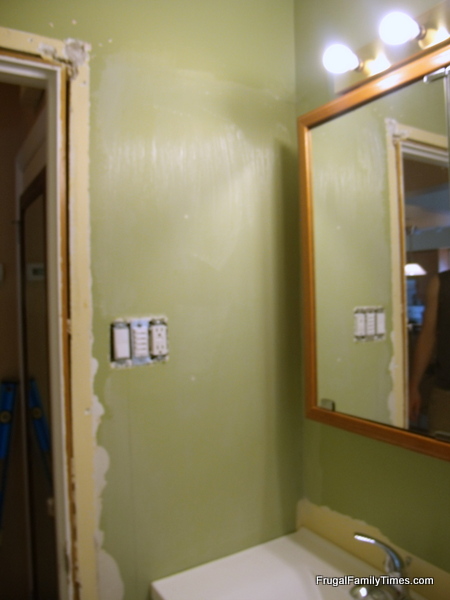
Step 1: Start with a bare wall.

Remove any and all things that could get in your way. For our bathroom project, that meant towel racks, pictures and toilet paper roll holder.
Fill any holes that these leave and sand the wall smooth. This may feel silly, given you will be covering it, but wallpaper has a way of showing small imperfections as badly as paint does.
Clean the wall thoroughly (TSP or the like). Wipe it down. Eating off it should seem like an OK idea (except for the fact that food would slide off and mess it up again).
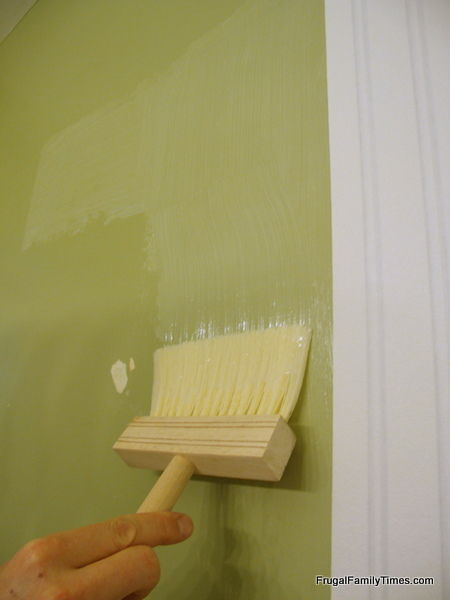
Step 2: “Size” the walls.
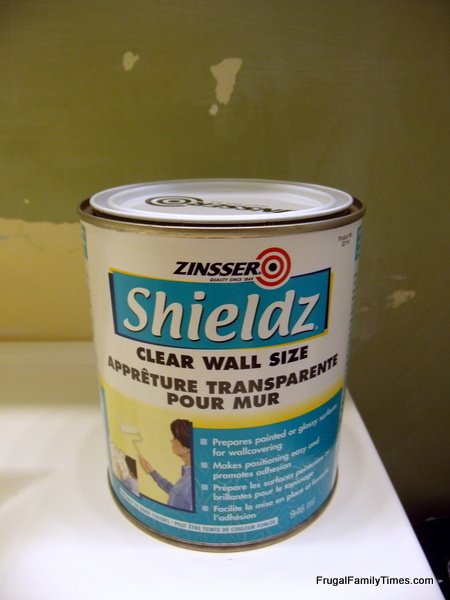
Wall Size is the foundation for your wallpaper sticking and ensures things dry equally and stay stuck.
The kind we got basically paints on with a milky-clear colour and dries to a clear-matte of the original wall tone. It goes on quickly and everything we read indicated it was not the step you wanted to skip.
Also, did we mention this was a bathroom where baths and showers and moisture would be? We wanted to overkill every step where possible.
Step 3: Give yourself some guidelines.

If you aren’t going all the way to the ceiling, draw a horizontal line where you will stopping the paper. Measure from the line to the baseboards and add a couple inches for margin of error to find how long your paper will be.
We also drew a few vertical lines marking the width of the paper, just to give us an idea of where it should line up (we were starting in a corner, so the house was really the guide for plumb, but we have been known to have some less than straight corners…)
Step 4: How do you apply beadboard wallpaper? Cut and paste!
Try to choose a simple area to start with – a clear wall with no fancy cuts. Cut your paper to proper length and try it in place. (We did this “fitting” several times with the first sheet before we worked up the courage to actually hang it.) Don’t worry – things are pretty forgiving.
Apply the paste liberally, especially around edges where peeling could most easily occur.
Ours is no longer available but this one is even cheaper and gets great reviews.
Step 5: Get Hanging.
Working from the top down, line up the vertical edge of the paper with the corner (or whatever is serving as your plumb guide). The paste will allow you to move your paper around a fair bit, so don’t panic when (not if, when) the air bubbles and wrinkles appear.
Keep a wet cloth handy to wipe up any glue that gets on the surface of the paper or the surface of your skin.
Step 6: Smooth it out now.
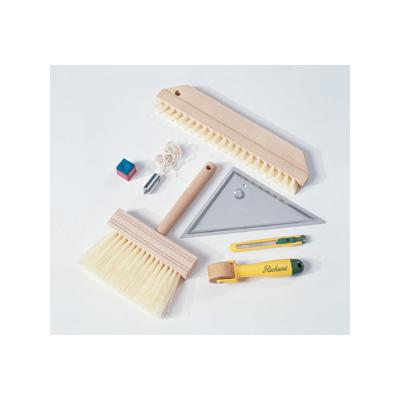
Your wallpaper kit will have a very wide, short-bristled brush you can use to “comb” out your paper, gradually moving any bubbles or wrinkles off the side. Really bad spots may require you to remove part or all of the sheet and start over.
Take your time, as each section becomes the new plumb line for the next sheet. See below for an example of how wrinkled the paper can be and still be smoothed to a presentable finish.

Step 7: Trim the excess.

Use a sharp utility blade and a metal straight edge (again, we got one in our wallpapering kit). Work your way along baseboards or seams carefully slicing the excess paper off.
Keep your utility knife sharp by snapping off sections. A sharp knife will give you cleaner cuts.
Step 8: Keep the momentum going!
See how great that first section looks? Get that wall done and it will look great too. Now that you know that the end result is worth the effort, keep plugging away at the more difficult walls.

Think ahead, measure carefully and leave yourself some excess to trim off and try everything in place a couple of times before you slop on the glue.
What worked best for us was only cutting one edge at a time, fitting things a bit, then marking and trimming the next edge that needs it. You know the old adage: measure twice and cut once.

Step 9: Moulding and trim.
This could really be a whole separate post, but if you have never done any trim before, a chair rail (or in our case a plate rail) is a pretty easy place to start.
Mark a horizontal like around the room, measure to the corners and cut an inside mitre on each end your chosen trim.
The back side of your trim should span the distance between the walls with the mitre sloping in.
Get a level and nail it in place.

Repeat.
Any nail holes and gaps in your mitres will get the drywall filler treatment, and then everything gets painted, so don’t sweat it.
You can see that we overlapped the chair rail on the paper should help keep things tacked down, even if our glue job craps out. Bathroom… Damp… Overkill on all steps…
Step 10: More Mould.
We also replaced the trim around the door, partially to make it consistent with the rest of the house, but mostly to make the plate rail extend uniformly around the room.

Rather than mitre the corners around the door, we cut them square and topped the door with a plain old (new actually) piece of MDF that connects the door moulding to the plate rail moulding.

Step 11: Fill, Sand and Paint.
Fire up the Poly Filla, fill those nail holes, miter mistakes and any other gaps that are annoying you (at this point, it may be the mouth of the partner “helping” you. HA!) (Seriously, don’t do that, the drywall filler would likely kill them and then who would ever help you hang wallpaper again?).
Anyhow the paper and the trim are all primed already, so after the fill is dried, sanded and dusted clean, you can paint away. We used a semi-gloss white (Cloud White from Benjamin Moore), so the effect is pretty muted here.

Beadboard Wallpaper Cost Breakdown:
- Wallpaper = $ 40 (with most of a roll left)
- Wallpaper tools kit = $ 13 (we can use everything again for our next wallpaper project, too)
- Wallpaper size = $ 10 (lots left here)
- Wallpaper paste = $ 17 (also, lots left)
- Trim for plate rail = $ 27
- Paint = $ 0 (we had a lot left from painting the trim in our house)
Total Cost: $107!

Any questions? We’d be happy to help, just leave a comment below.
To see more of our Frugal Bathroom Reno, check out these previous posts:
- Saving Money: Mixing Vintage and Discount Hardware
- How to Install Peel and Stick Vinyl Tiles (that you can grout!)
- Builder Basic to Beautiful: Medicine Cabinet Makeover
- Bathroom Vanity Makeover

Robin and Ed are a DIY-loving couple with over 25 years of design and build experience. Also, Robin is a Nutritionist and former Registered Dietitian and Ed is an award-winning Business Educator. We share strategies for living a rich life on a DIY budget: creative money-savvy ideas for a stylish home, healthy meals and family fun. Our work has been published in the pages of Do It Yourself, Farmhouse Style and Better Homes & Gardens magazines.


Oh, hey… question after six years ;-)… would you use this wallpaper over wallpaper? I hate to take down what's there just to cover back up, but I know nothing… Thoughts? Thanks!!
It depends on how well your current wallpaper is sticking. If it's peeling or buckling at all – it may affect how well the new paper sticks and looks. If it's on really well though – I think you could just put this beadboard wallpaper right over top! 🙂
Do you have any advice about what wallpaper paste to use in a bathroom and with this kind of paper?
Thanks!
Did you have to fill the seams with caulk?
We didn't!
Thanks for the excellent tutorial! It's great to see the process you went through, and my, what a result!
After letting your beadboardwallpaper dry you will need to stand your headboard up against a wall. You can then either install your piece of crown moulding on top or you can apply glue to your 2 x 3 board and place it on the very top of your headboard so that there is a half an inch overhang on each side of the headboard.
Did you have to fill the wallpaper seams or did they disappear when painted?
This is a fantastic job. Very nice work guys! It turned out beautiful. If you're getting into any other DIY projects that are paintable wallpaper related, or any other wallpaper for that matter, contact me and I might be able to help out with some of the material. Keep up the great work!
I am planning on doing this… I only have a jigsaw for cutting wood, any tips on how to do the corner pieces of the trim?
A couple options:
1: Super lazy – Don't mitre at all – just but the trim up as close as possible and fill in the gaps with Poly-Filla or some other material. It won't look perfect, but if the trim isn't too big/fancy, and you have some poly-filla skills, it probably won't be noticed much.
2: Want to do a good job: Buy an inexpensive mitre-box and back saw. Most stores that carry tools should be able to point you in the right direction. It will be a little more work to cut by hand, but will give you true mitred corners.
Hope that helps. Thanks for reading and the question,
I've been planning this project for ages and now that the holiday craziness is over I'm ready to start! Any tips for fitting it around the toilet? That's the part I am finding the most intimidating.
It sounds crazy, but we removed the toilet. It's actually easier than it sounds and I'm really not sure how else to fit the paper in behind. It was a no brainier for us, because we changed the flooring too. You're right, Katie, that is totally the most intimidating part!
Hi Robin, You mentioned scratches and nail marks in the paper. I found a similar product at Lowes and tat was the case with theirs, as in it was a soft material. Is this the same problem with this wallpaper? Thanks, Happy New Year
Yes,Eric, it's the same issue with this paper. It's the only drawback so far – it has a soft sort-of spongy texture that is susceptible to scratches. We're working on a way to cover them, but haven't gotten that far down on our to do list. Happy new year to you too! 🙂
Do you have to take down popcorn ceiling before installing on ceiling? – Is it possible to paper over the popcorn and not see the texture under the wall paper?
I think the main issue with popcorn ceiling texture would be whether the glue uld stick well. I think after awhile you'd find the textured ceiling would come unstuck and your wallpaper would peel off. If you want the Beadboard look over a popcorn ceiling you'd be better off with the hardboard panels vs wallpaper.
Just scrape off the popcorn ceiling, it's messy but not hard. Nobody likes popcorn ceilings anymore, really outdated.
Thank you for the tips. I am excited to get started on this. I am going to try and put up the beadboard over existing tile in our kitchen. Will it adhere well to tile?
Hmmmm…I'm not sure this would work over tile. It might not stick well and you may see puckers where the tile grout is. You might have better luck with attaching Beadboard panelling there. It would be sturdier and easier to clean. Would that work for you ?
We have a manufactured home and walls already have textured wall paper on it. Do you think we can just wash and the apply the wall paper over it? I am sure we will need to put on the paste. Let me know your thoughts.
Hi JoAnn – How textured is the old paper? If it was fairly smooth, I guess you could just apply sizing over it and layer the new stuff on top (in theory).
The safe money (but more work) would be on stripping it down to bare wall. Have you tried peeling any yet (in a small, unnoticed area, of course)? Sometimes it comes off easier than you'd expect.
Of course, sometimes it is a nightmare pain (our old living room had that type). Either way, being rid of it is almost always better than covering it. Not probably the answer you hoped for, but thanks for the comment.
Hello – when adding the trim, did it overlap the wallpaper or was it above it? Also how easy would it be to hang things on it, like a picture frame?
We both overlapped the trip and had the wallpaper just meet it. I'll explain: for the plate rail on top, we overlapped the trim over the top of the wallpaper – maybe 1/2"? But for the baseboard trim, which we didn't remove, the wallpaper just touches the top of it.
It's super easy to hang pictures on it. Exactly how you would hang normally. We have 3 different pieces hung on the wall with no problems.
Hope this helps you!
Hi. Looks great! Looking at you pictures I see that you also painted your bathroom cabinets white. What method did you use for this? Paint? Or a cabinet painting kit? Thank you!
Hi Jared, yes we also painted our cabinets – it was just primer and paint!
You can read all the details here:
http://www.frugalfamilytimes.com/2012/08/diy-frugal-bathroom-reno-updating-old.html
Hi Robin — it's 9 months later now — how is that wallpaper holding up in the bathroom? My husband and I are considering the same — same height and plan…. Thanks for any feedback — and great tutorial!!
Hi Karen! It's holding up great. That is not our heaviest use bathroom. It sees only about 4 baths a week and a couple showers a month – so steam isn't a huge factor in there. That's probably helpful. The only drawback would be the occasional scratch, like from people's nails when they reach for towels. It's not incredibly noticeable, since it's white all through, but it doesn't look "perfect". I think we could touch those up and paint over (when we have time to devote to perfect i.e. when pigs fly).
Thanks for your question and feedback! 🙂
Thank you for the amazing tut! I may have the courage now… IT looks so great!
Will you come back and let us know if you try it, Becky? That would be fun! Thanks for your comment, and kind words!
Purchased six rolls. Plan to do living room ceiling with this paper. Has anyone tried this before?
What a great idea! A quick search led me to this link: http://ths.gardenweb.com/forums/load/decor/msg021756438817.html
Looks beautiful!!! I like it.
Thanks, Steph. We really like it too!
Thank you for this tutorial. I am thinking about installing this in my powder room and you've made it seem so simple. Looks fantastic!
Thanks, Shauna. We are really pleased with how it looks! ~ Robin