
We may earn a commission on purchases made after clicking links on this page.


Do you have a staircase in your house? Does it have a landing or a ‘dead zone’ at the top where usable space is just sitting there, doing nothing? Or is there some other nook or cranny that would benefit from a built-in? (Your house has a cranny? Really?)
We did. In fact, we did several years ago when we first did this project. (Note: please excuse the amateurish step-by-step photos – they are a few years old – back before we even started blogging! We weren’t the professionals you see today. 😉)
Robin looked at this wasted area at the top of our staircase and knew we could use it better. She then got creative and re-imagined it as a location for a built-in bookcase and a planter. The huge window behind it gets great light – and plants would be very happy there.
(Also, notice the electrical outlet we needed to move.)
Then we built it.
This was my first-ever built-in piece of furniture or -in all honesty – my first piece of anything, ever that was built from scratch and not just adding shelves or paint or whatever to something pre-made.
I’ve preached the virtues of beginners working with MDF in the past; this was the project that convinced me of that.
And as “sought after” as custom built-ins are – they offer a lot to like in terms of simplicity for the first-time DIY-er. How did we do it? Read on.

Materials list:
- ¾ MDF panels – cut to needed sizes by you using a table, circular or jigsaw or by the good people at the Big Box store cutting table.
- Optional: Pine handi-panel for planter base and/or shelves if you want real wood. (Which will withstand water drips better. MDF swells unforgivingly.)
- Trim for edges and planter lip – we used 1 x 2 beech, but really pine or even more MDF could work too, depending on your budget.
- ¾” Quarter Round to hold shelves up
- Paint, wood fill, nails, screws, tools.
- Optional: Panelling or wallpaper to go behind shelves
How to Build a Bookcase at Top of Stairs – with bonus planter!
Step 1: First off, scout out the location for your built in and do some measuring.
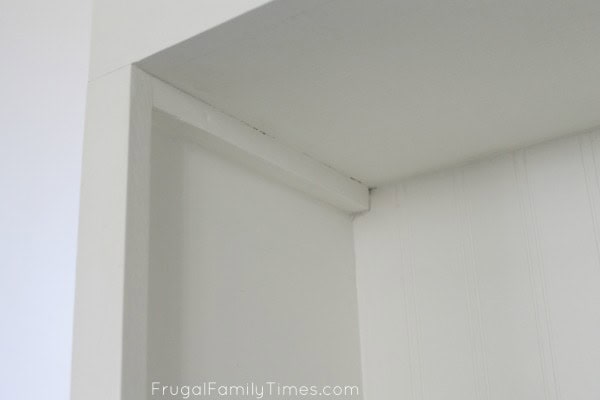
We wanted the shelves here to match the half-wall in size and then have the planter top the whole thing to make it look like wall and bookshelf were seamless.
You can still see the seam, but for the most part the effect is quite good.
Step 2: Draw up a sketch with how tall the shelves are going to be and check for conflicts with existing baseboards and electrical.
Triple check your measurements and design.
Make sure what you want to fit will fit: is it deep enough for a book? Are the shelves tall enough? We chose to make all of ours the same height, but you could mix it up a bit.
Another VERY important consideration is making sure your shelf will be strong enough. How long your shelf is, and the material it’s made of, is important for how much it will hold. This link here gives you good guidelines for figuring the span of your bookshelf.
Step 3: Move or work around any issues.
We had an electrical outlet that was going to be right where we (Robin) wanted a shelf to be. I killed the breaker, cut a small bit of drywall and moved the box about 3 inches so it would clear the shelf.

Had we been more ambitious, this would have been a great time to wire shelf lighting. If you aren’t super-keen to do some wiring, get a pro for this step.
Robin’s note: You might be tempted to just adjust your shelf height to accommodate the electrical outlet – or put the shelf over the outlet. Don’t! This is a permanent feature to your home, don’t sacrifice how good it looks just to put in less effort.
Step 4: Next, prep a spot for the base.
For us, this meant cutting the carpet (this is a built-in after all – it isn’t going anywhere once done). We made the base slightly smaller than the bookshelf so it would overhang and we could hide any potential ugly with trim options.
Nonetheless, cut carefully. Treat it like a haircut – if in doubt, cut less carpet out than you think you’ll need. You can always cut more, as the saying goes. (Robin’s note: That’s a saying????)

Step 5: Build a 2×4 base frame.
One of the best parts about built-ins (from a beginner’s point of view) is that you will be screwing and nailing to existing walls (that have studs in them).
This means a lot of the structure and strength gets ‘built-in’ (see what I did there?) and for a new DIY-er, this is a nice bonus.
You can see my base isn’t even complete 2x4s, just bits I had laying around. Very frugal. No one sees this part and your bookcase will be stable from being nailed to walls.
Step 6: Attach the panelling or wallpaper/paint the back and sidewalls.
The shelves will go over top of this, so whatever you do, know that it is going to get really hard to undo really soon. If in doubt, you can always change paint.
We used a piece of beadboard panelling back there – attached with small nails. Beadboard wallpaper would work too.
Step 7: Install an end panel
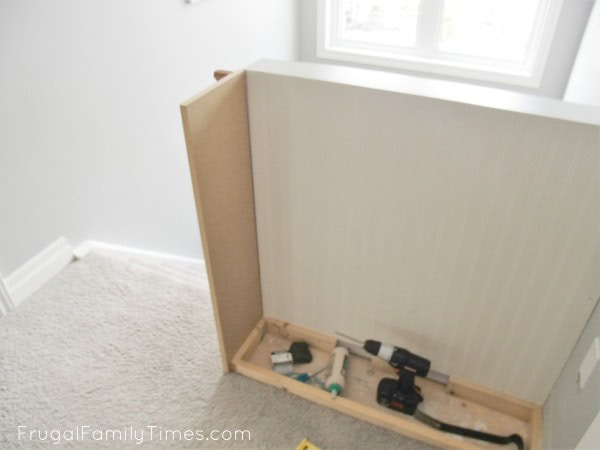
If your built-ins aren’t between two existing walls, you’ll need an end panel. Attach it to the frame you built on the bottom (this may involve a small bit of carpet cutting too). Ours was also held in place by the planter on top.
Shelves will soon hold it too, but you could Kreg-Jig drill it into a wall stud if luck is on your side.
8) Build the planter on top.

We used real wood for this just in case water every leaked out of the plants. MDF tends to swell with moisture and never look normal again.
Real wood (pine or beech like we used) will also swell but can be more forgiving once it dries out again.
The planter is just a board with a 2-inch lip nailed around it. Mitre if you like (we didn’t). This is then screwed to the top of the half-wall and supported in place by small 1×1 strips nailed to the wall and side panel.
Step 9: Measure shelf heights (again)
Draw out level lines and cut pieces of quarter round. You can mitre the back corners if you like, but no one will ever really see them, so let your conscience be your guide on that…
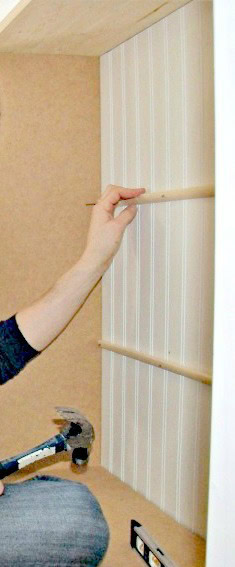
Screw or nail the quarter round to the level lines.
Voila – you’ve made cleats to support your shelves.
Step 10: Cut shelves to size and place them on your quarter round cleats.
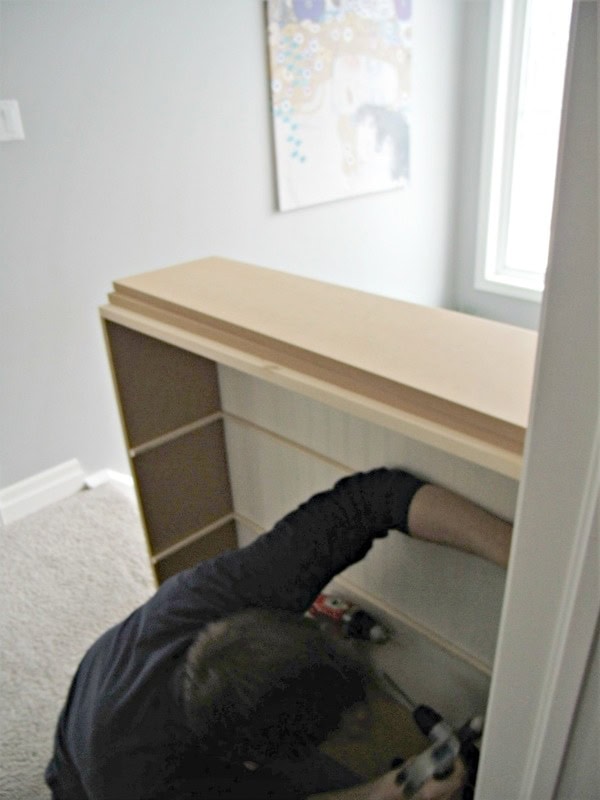
Step 11: Trim.
We then added trim pieces of MDF along the face on the corners and the base. We kept it very simple.
Step12: Fill any holes, sand and paint.
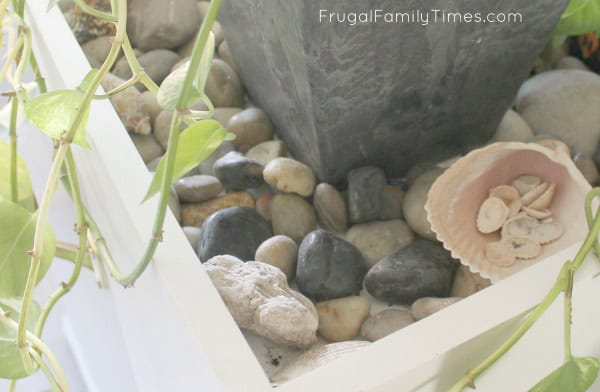

We’ve also added fossils and shells collected along the way.


Done. You made a built-in!

Robin’s note:
There are ways you could make your planter water-resistant. I considered a few – a waterproof coating, or making a tray for the bottom. My laziness eagerness to get using it got in the way of both of those ideas. I went the easy route: trays under the pots to catch any water overflow that might happen. Works just fine.
Click here to see all of our magazine-worthy Basement Stairs Makeover projects
You can find even more staircase project inspiration in our collection of 20+ Best DIY Stair Makeover Ideas
quin
Tuesday 17th of October 2017
What's the paint color used in the stairwell? Really like that gray.
quin
Tuesday 17th of October 2017
Thank you!
frugalfamilytimes
Tuesday 17th of October 2017
Hi, Liza. It's Coventry Gray from Benjamin Moore. In still love it and it's been there 10 years! :)
Laura - The No Pressure Life
Thursday 8th of December 2016
This is great! The planter makes this project super unique. I love that it adds life and texture to what's typically a blank space.
frugalfamilytimes
Friday 9th of December 2016
Thanks, Laura! And I forgot to post a photo of how it looks on the other side - it's pretty with the plants draping down. :)
Mona Andrei (aka Moxie-Dude)
Friday 25th of November 2016
OMG - What a great idea!!! Star for your geniuses!
frugalfamilytimes
Friday 25th of November 2016
We love getting stars, Mona! Thanks! :)