


We may earn a commission on purchases made after clicking links on this page.
We figured out how to make a huge DIY poster frame for way less money and here’s why:
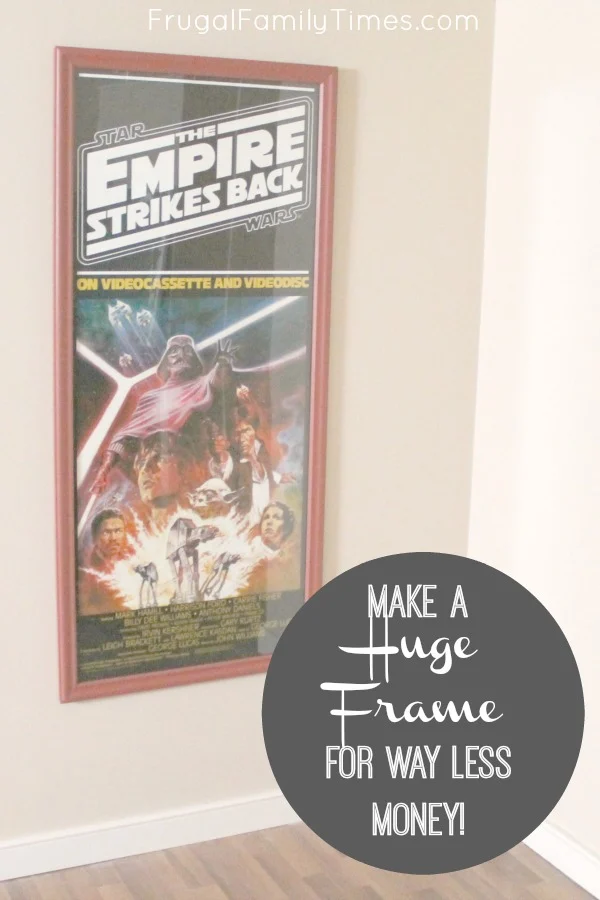
There are so many reasons we wanted to hang this giant old-school Empire Strikes Back poster.
- We are super Star Wars nerds. (Ed knew he wanted me to bear his children from the moment I called him a “Scruffy Looking Nerf Herder“.)
- This poster deserved better than spending the last couple of decades rolled up in one closet or another. I’m told it’s worth a lot of money.
- It holds some fun memories. As a kid, I won it in a colouring contest at the local video store. When I went in to pick up my prize, the owner apologized, all he had was this Empire Strikes Back Poster. He kindly offered to find me a poster for something girlie instead. I insisted he didn’t need to bother. I only had eyes for Han Solo, even as a kid.
Armed with a 60% off framing coupon we finally went to give our treasured poster a more fitting home. I don’t know how much we thought Michael’s would charge for a frame for this, but we were not prepared to pay over $350!
That was the quote WITH the discount. The main problem is that it’s a very odd size – 23″ X 53″. Custom framing was our only option, but we were not willing to pay that much. Back to the closet for you, dear old poster friend.
Until a recent trip to Home Depot, by poking around we found all the elements. Here’s how we made this huge DIY Poster frame for cheap!

How to Make a Huge DIY Poster Frame


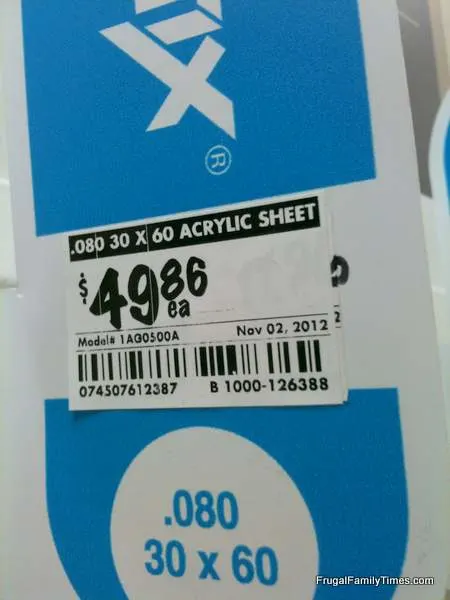
We could cut it to size ourselves, plus it wasn’t glass – we didn’t have to worry that some rec room roughhousing would end with a visit to the ER. Safer

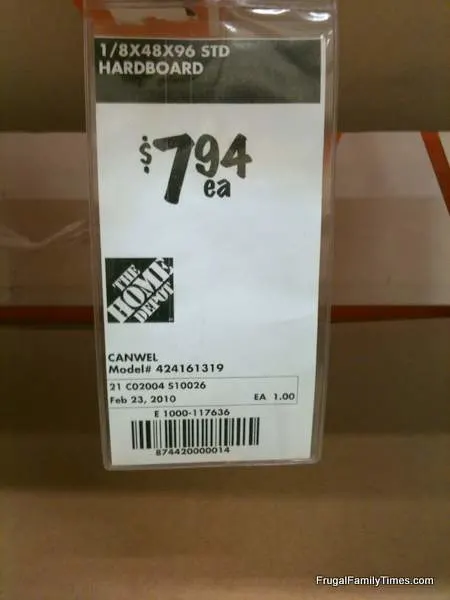
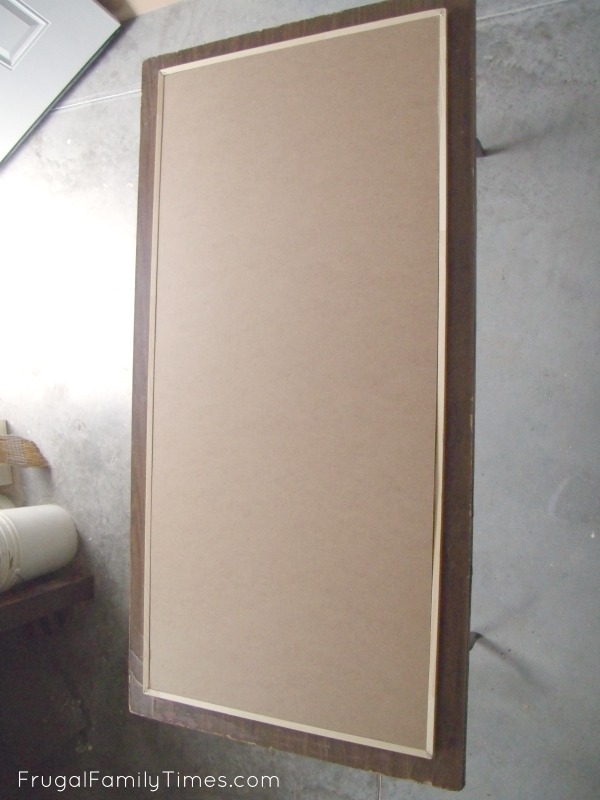
And, because sometimes we have DIY horseshoes up our butts – this inexpensive hardboard was the PERFECT depth to be the poster’s backing. Sold!
So, that’s the details on the materials: perfect fit and the price was right. This frame cost us hundreds of dollars less than the quote that sent us reeling.
We like Star Wars and stuff, but there was no earthly (or galaxy-far-far-away-ly) way we were going to pay hundreds for a basic frame.
Why so much? The unconventional size of the poster – 23” x 53” – means we couldn’t buy an off-the-shelf poster frame.
But unconventional is what frugal people do best – and so began our quest for an easy, basic frame that looked good and didn’t cost a fortune.
So if you’re wondering, “How do I make a poster frame?’ or “How can I frame a poster for cheap?” you are in the exactly right place!
Steps by Ed
DIY Poster Frame Supplies:
- A sheet of acrylic plastic big enough to cover poster ( look in the Windows and Doors area of your local Big Box hardware store)
- Plastic cutter
- A sheet of hardboard cut to Poster Size (Home Depot will give you two cuts for free – enough to cut it to your poster size and be able to fit it into your hatchback)
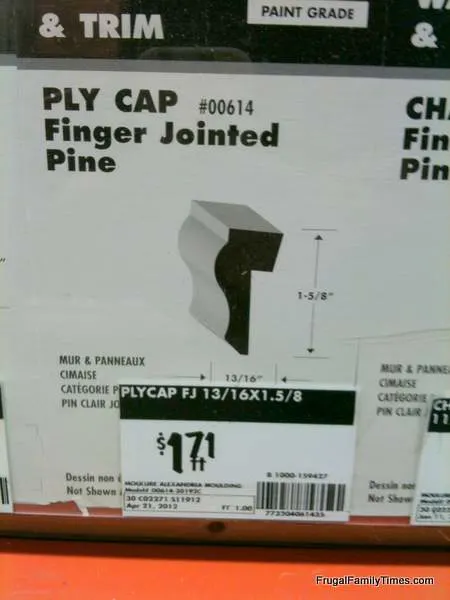
- Trim/moulding to build a frame around it (we used pine Ply Cap)
- Picture hanging kit
- Mitre box and saw
- Speed square
- Stapler and staples
- Wood glue
DIY Poster Frame Steps: how to frame a poster without glass
Step 1: Cut your acrylic to size.


Use the already cut-to-size hardboard to mark your Acrylic plastic sheet.
Using a straight edge and sharp knife, score the plastic repeatedly until cut about halfway through. You can then snap it cleanly.
Think cutting drywall or tile, if you have done those things.
The Acrylic sheet is the most expensive part of this whole thing, so take your time on this and do it right.
Step 2: Make your frame


If you don’t have a mitre box or saw, you likely know someone who does (they may even have mitre experience and be willing to trade help for beer or food).
It is not super difficult, but you will want to go slowly and think it through.
Assemble the frame around the plastic and hardboard. Fit everything together and see how you did. Make any adjustments (I had to trim down my plastic a bit to get a nice fit).
On the back, staple your mitred corners together.
Depending on the frame material and how big your poster is, this may hold it together.
Due to size, I glued and added a screw in each corner (carefully predrilled). I also used some filler to hide mistakes.
Step 3: Assemble plastic, poster and hardboard backing into the frame.

You can use smaller staples to hold the hardboard into the frame.
If it all fits, paint/stain the frame, add the hanging kit and hang it with pride.


Next time people admire your (nerdy) cool, unconventionally sized vintage art, you can tell them how you made the frame, too.
If you’d like more fun and affordable ideas for wall art – check these out:
- Ultra Easy Custom Art – No Artistic Talent Required!
- Cheap & Easy DIY Glass Whiteboard for Dry Erase
- Our Custom Bar Sign! Easy tips to design your own logo for personalized wall art.
- Old Canvas to New Art for a Teen Bedroom: “What Would Hermione Do?”


Robin and Ed are a DIY-loving couple with over 25 years of design and build experience. Also, Robin is a Nutritionist and former Registered Dietitian and Ed is an award-winning Business Educator. We share strategies for living a rich life on a DIY budget: creative money-savvy ideas for a stylish home, healthy meals and family fun. Our work has been published in the pages of Do It Yourself, Farmhouse Style and Better Homes & Gardens magazines.
Grace
Monday 2nd of October 2023
Hello, I used to be a custom framer at Michaels. DIY is great if you don't care about the piece of art lasting a long time. The point of custom framing is to preserve the artwork; the glass is UV resistant to stop fading, the frames and mat board and backing are all acid-free so that the artwork doesn't get discoloured or damaged, and we backed the frames with a dust cover to help prevent moister and debris from getting inside. If no mat was being used, spacers were put in to prevent the artwork from pressing against the glass because over time the art could stick to the glass and ruin the artwork. So, that is why it is more expensive, as the frame is all made of specialty materials and custom designed to your space, and aims to make your art last as long as possible.
Kiara
Tuesday 12th of March 2013
Hi! I just found your blog yesterday, and I'm loving it. I'm about to check out The Loop. :)
I worked at Michael's when I was pregnant with my seven-year-old, during the Holiday season, and prices were about the same in the custom framing department. I had a lot of customers come through my check-out complaining about it. I remember one woman who wanted to have an 18"x20" photo framed and matted, and they quoted her a price of $270! I ended up showing her some pictures of some frames I'd done myself for inspiration, and she hired me to do it!
frugalfamilytimes
Tuesday 26th of March 2013
Thanks for visiting and leaving your comment, Kiara! I am blown away at that price - framing is killer expensive - so great you've got the skills. :)
cred
Wednesday 6th of March 2013
nicely done!
but what the heck Michaels? Who is paying over 300 bucks for a frame AND at that it's less than half without the coupon!! Maybe some would splurge on something really special but I can't see many doing that at full price- crazy!
Ed from Frugal Family Times
Thursday 7th of March 2013
We think that Michaels never really charges their full prices - as there almost always is a discount sale on frames - but this was a very basic frame quote (just a big one). If someone wanted a slightly fancier one, or any extras, it would cost thousands.
We love craft shopping at Michaels, but custom frames... yikes. I'm sure there are some small, custom framers out there doing reasonably priced work, but for what we needed, DIY was just fine. Thanks for reading,