


We may earn a commission on purchases made after clicking links on this page.


by Robin
This DIY shiplap ceiling was so easy to do, we weren’t even planning to write up the tutorial. But after we shared our post about how to make a faux beam that we made look like reclaimed wood – readers started asking us how we did the shiplap ceiling, too.
(Many people have asked where to get this gorgeous ceiling fan – it’s here.)
So here you go – a very simple tutorial for how to install a shiplap ceiling!
We have so many projects to show you from our Mobile Home Makeover. We’ve finally solved the worst of the problems:
- fixed Water damage!
- perfected Rodent proofing!
- Craziness Absolutely Everywhere!
It feels fabulous to finally be working on the prettier parts that are infinitely more fun to share.
We haven’t talked much about our bunkie – which is weird because it’s one of our favourite features of our weekend getaway! We’ve barely even shown you pictures of the place.
You may have caught a glimpse of it in our recent post about how we transformed our totally tacky shed.

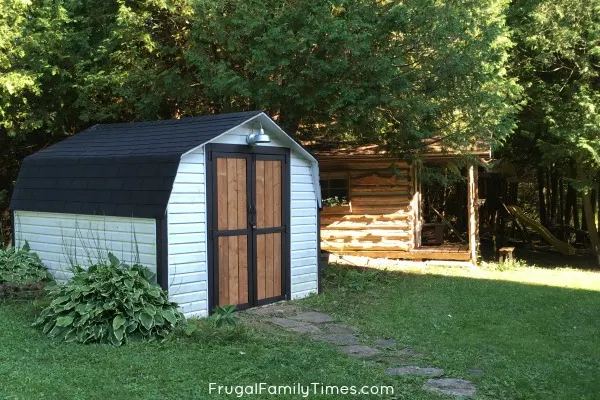
(You won’t believe how this shed looked before – so tragic.)
The bunkie is really adorable. It’s a tiny log cabin – just big enough for a double bed with a cedar chest for a nightstand/storage.
We use it for overflow sleeping when we have extra visitors – usually, it’s our daughter and her friends. (And Ed and I have been known to sneak out here on rainy days if the mobile home is overrun with noisy kids.)


A surprising benefit of having antlers is it’s a great place to dry your paint rollers. 😜
Enough blah blah about the bunkie!
Here’s what we promised – how we installed our simple DIY shiplap ceiling:
Step 1: Demo your old ceiling and insulate as needed

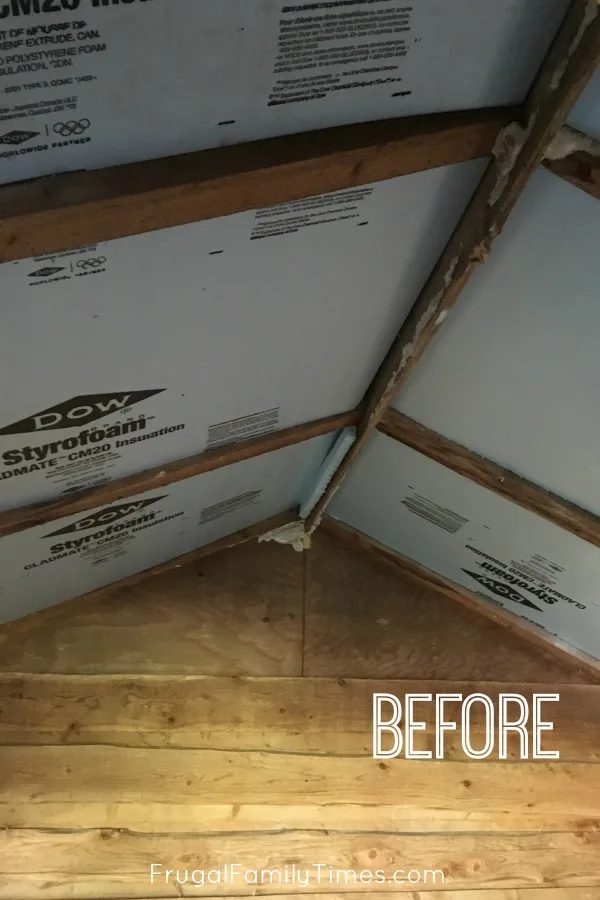
What you see here is the ceiling prepped: we’ve cleaned it up and put insulation between the joists.
Step 2: Choose your Shiplap Ceiling Materials


We knew we were going to build and install a rustic beam and the bunkie has rough wood walls, so we chose the smooth side for contrast.


Step 3: Prime Your Boards
You’ll also notice that we primed our boards first. Consider doing this – it’s much faster to do them outside where you have space and don’t have to hold your arms up over your head. You can be so much less tidy which equals speed!
Step 4: Install Your First Board PERFECTLY


But the reason it takes so long is because it’s essential to get it perfect. If your first board isn’t straight and level your whole ceiling will be wonky and will look awful.


Step 5: Nail Your Boards in Place


Nail your board in place along the corners and joists. A couple of nails in each joist should be plenty.


Repeat the process on the other side.
(Note: wearing your father-in-law’s hand me down shirt is rarely flattering. In case you were wondering…)
Step 6: Cover Roof Peak with Wood Faux Beam (full tutorial here)


You can see all the details on that here.


To compliment our shiplap ceiling we chose this affordable outdoor ceiling fan – it’s so good!


We’ve got more projects from our Mobile Home Makeover for you to enjoy! Check them – including the story behind this unique property – here.
We’ve got lots of DIY Ceiling Ideas, find them all here…


Robin and Ed are a DIY-loving couple with over 25 years of design and build experience. Also, Robin is a Nutritionist and former Registered Dietitian and Ed is an award-winning Business Educator. We share strategies for living a rich life on a DIY budget: creative money-savvy ideas for a stylish home, healthy meals and family fun. Our work has been published in the pages of Do It Yourself, Farmhouse Style and Better Homes & Gardens magazines.
Lynn Spencer
Thursday 23rd of July 2020
You always have such great tutorials and this is no exception! Thanks for the clear instructions.
Lynn
frugalfamilytimes
Thursday 23rd of July 2020
Thanks so much, Lynn! You're so sweet to comment. :)
Valerie Haumont
Friday 17th of July 2020
This is misleading. You don't show how you made the sides with the router.
frugalfamilytimes
Saturday 18th of July 2020
Nope. Not misleading at all. The product we used already has the sides with the grooves: https://www.homedepot.com/p/1-in-x-8-in-x-8-ft-Premium-Shiplap-Reversible-Pattern-Whitewood-Board-368260/100042287 You can see this in the photos.