
We may earn a commission on purchases made after clicking links on this page.


Intro by Robin Steps by Ed
Work continues oh-so-slowly on our Cozy, Industrial Basement Pub and Hobby Room. We’ve made progress, but pandemic burnout and material sourcing challenges have delayed things. I’m sure you can understand. The last few months have been A LOT.
Our goals for this room are to create a fun and functional space.
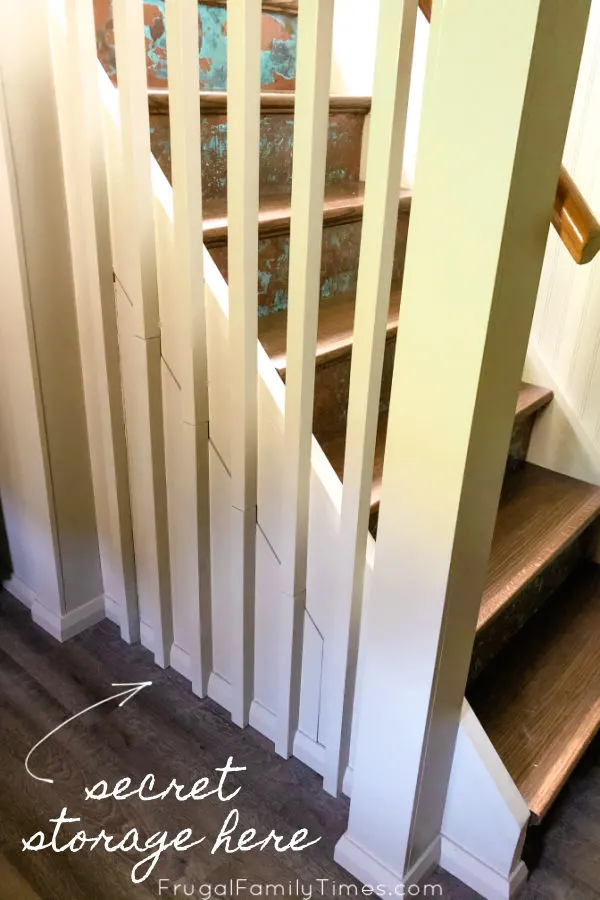
One of the functions is storage. We are designing and building so many storage solutions – including this hidden storage under stairs solution – and it turned out so cool!

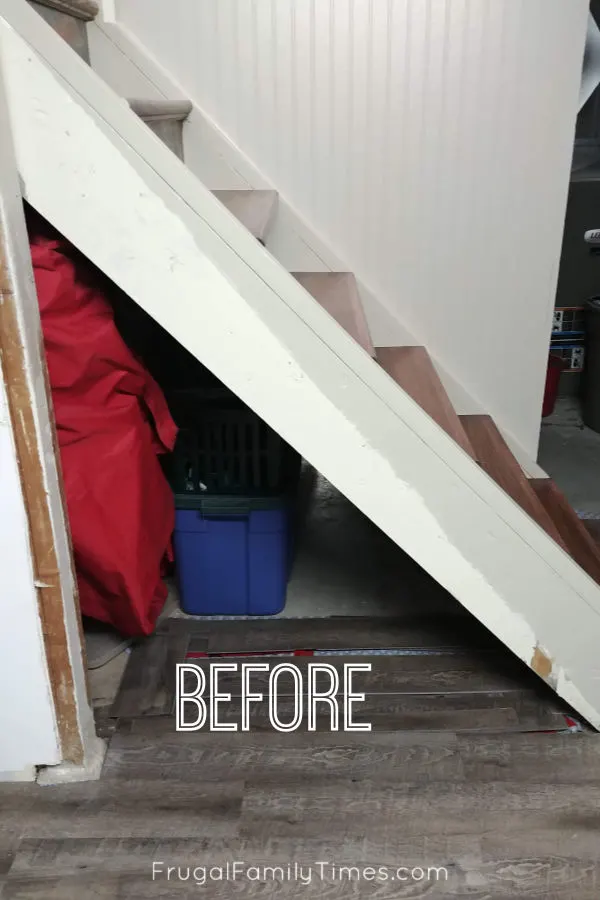
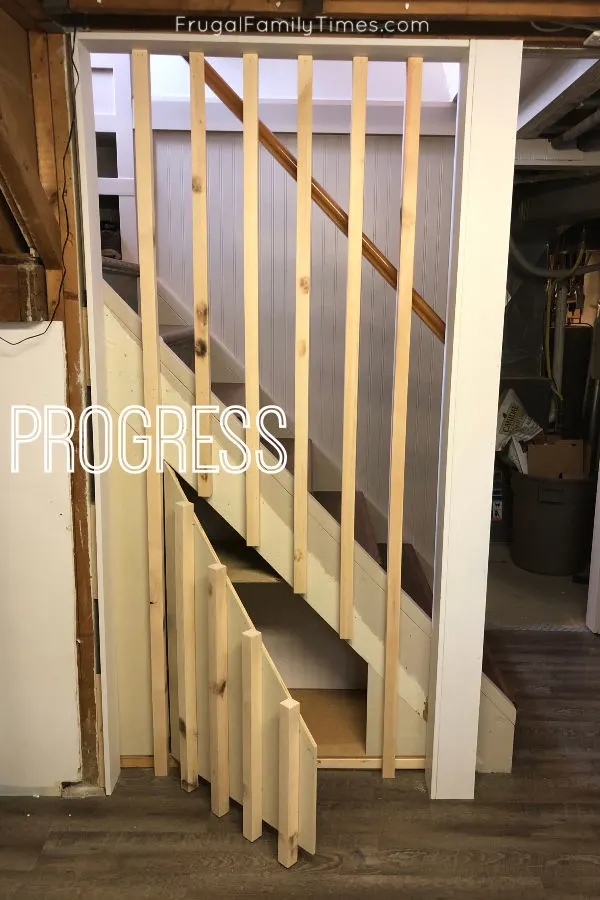
Our solution: we built our storage to be accessible from both sides and made the shelves half as deep. This way nothing gets “lost” underneath.
We can access the bulk items we use on a regular basis without pulling out a mountain of other things that end up in the way.
This is the new home of the giant pet food bags and other pet dodads. Dog cones are tricky to store!
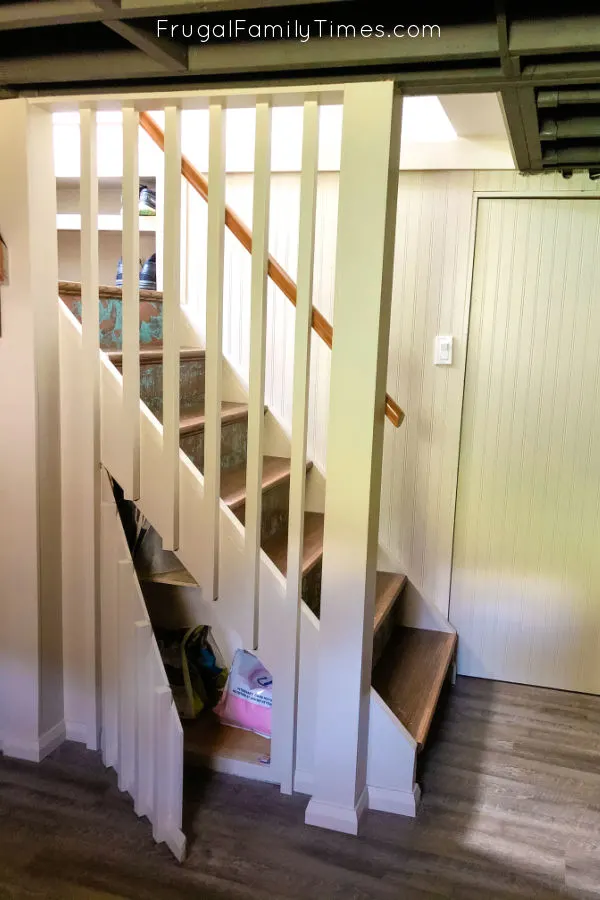
This hidden storage under stairs is also combined with a sleek, modern stair railing and pillar. We devised and DIY’d this storage solution to maximize the under stair storage and make our basement stairs safe. Plus – it looks pretty great, no? What follows is Ed’s step by step tutorial…
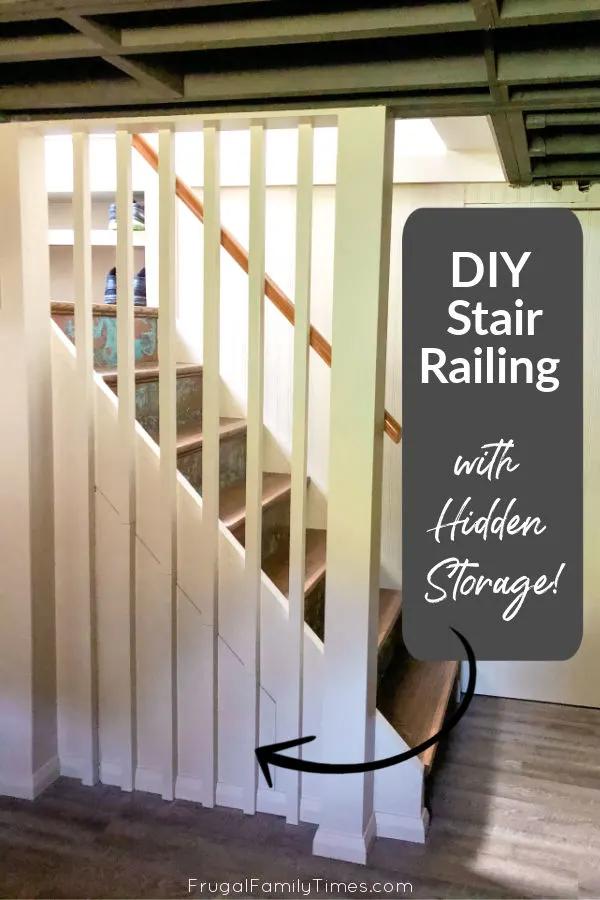
Hidden Storage Under Stairs (& DIY Basement Railing)
Materials List:
- Misc. plywood, MDF or panel board to create whatever shelf configuration you desire
- 2″ x 2″ x 8′ clear pine lumber for railing (number depends on how many you need for stair run)
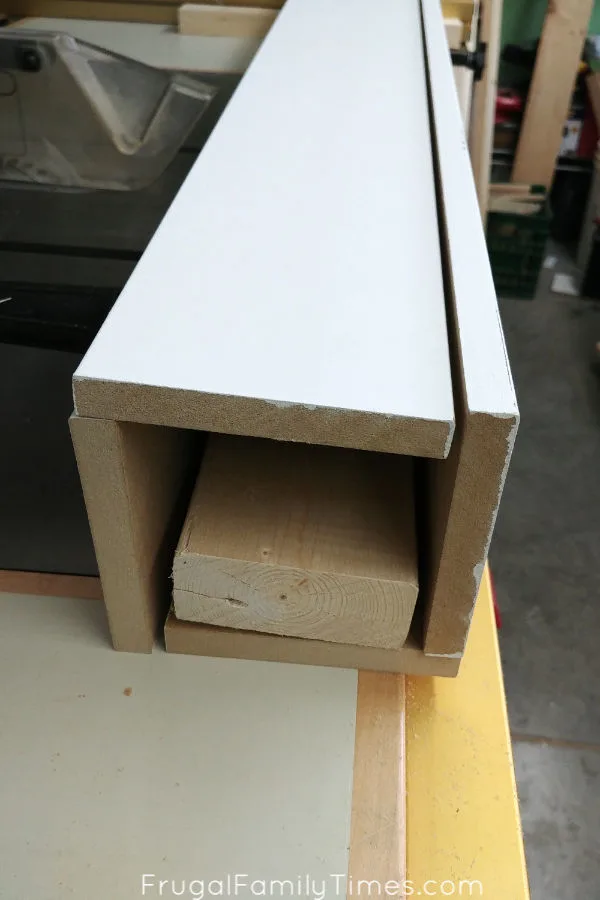
- 2″ x 4″ x 8′ studs to frame post
- 5/8″ x 4.5″ primed MDF to wrap post with
- Piano hinge
- Trim/baseboard of your choice
- screws, nails, construction adhesive and caulking
- an Electric nailer is helpful (we LOVE this one)
- Paint (used Loggia from Sherwin Williams)
Steps for DIY Hidden Storage Under Stairs (with DIY Basement Railing)
First: Build the Post and Balusters
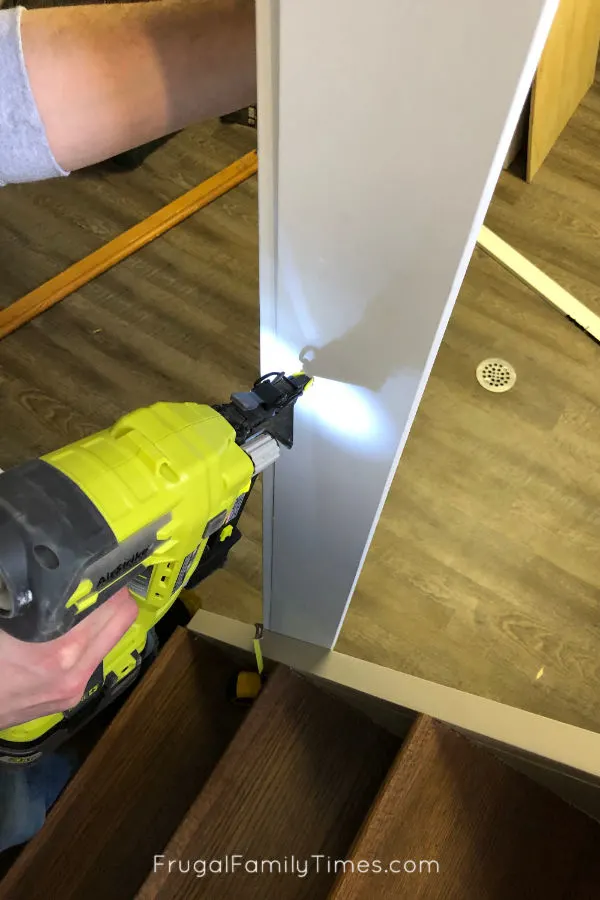
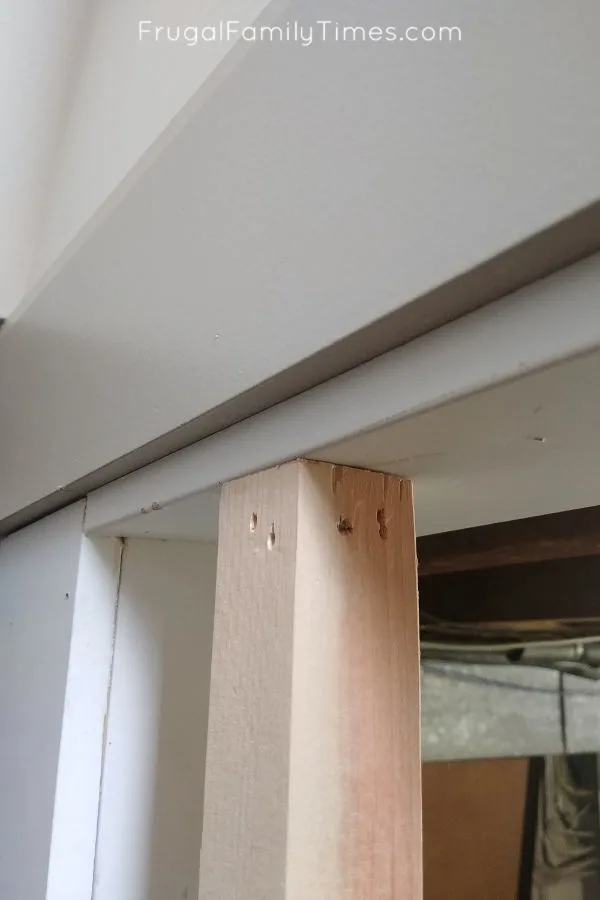
Step 1: Clear out space and install a post for the handrail to attach to.

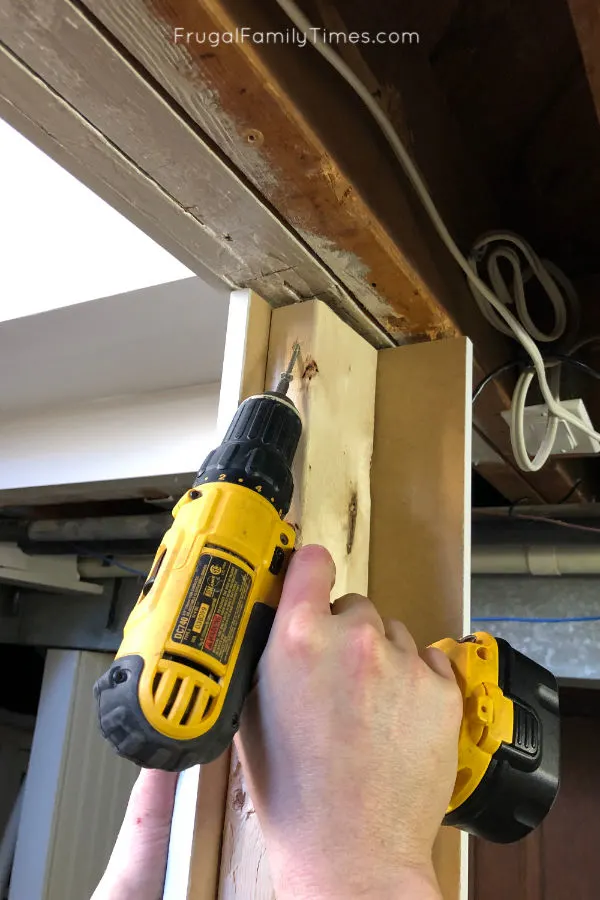
It is anchored to the joists in the ceiling…


Step 2: Build the space for hidden storage under stairs

Plan out what you want your storage for and build the shelving appropriately. You may decide that you don’t want any built-in shelves at all.
We built our shelves to be half as deep as the stairs. This made for useful storage accessed from both sides.
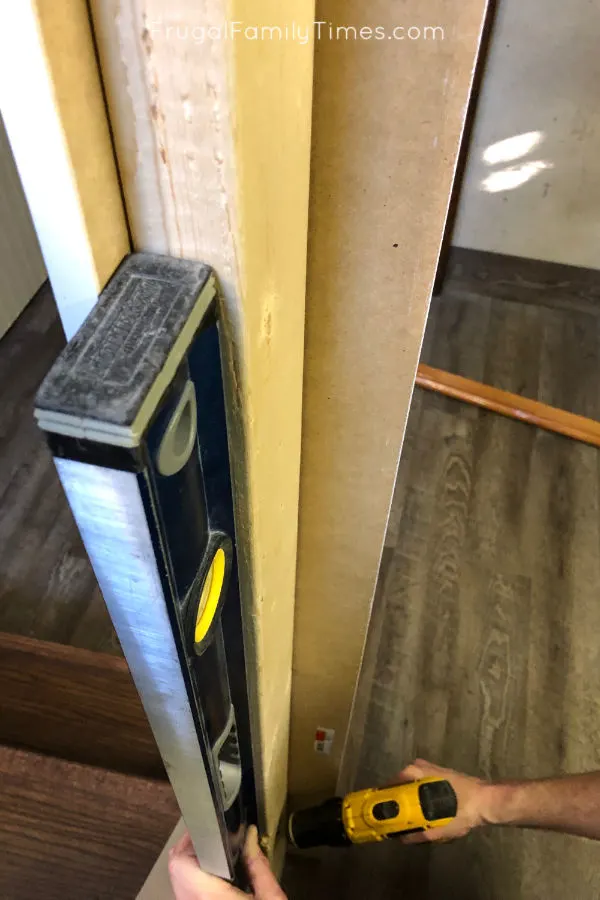
Step 3: Prepare and attach the 2″ x 2″ baluster railing wall

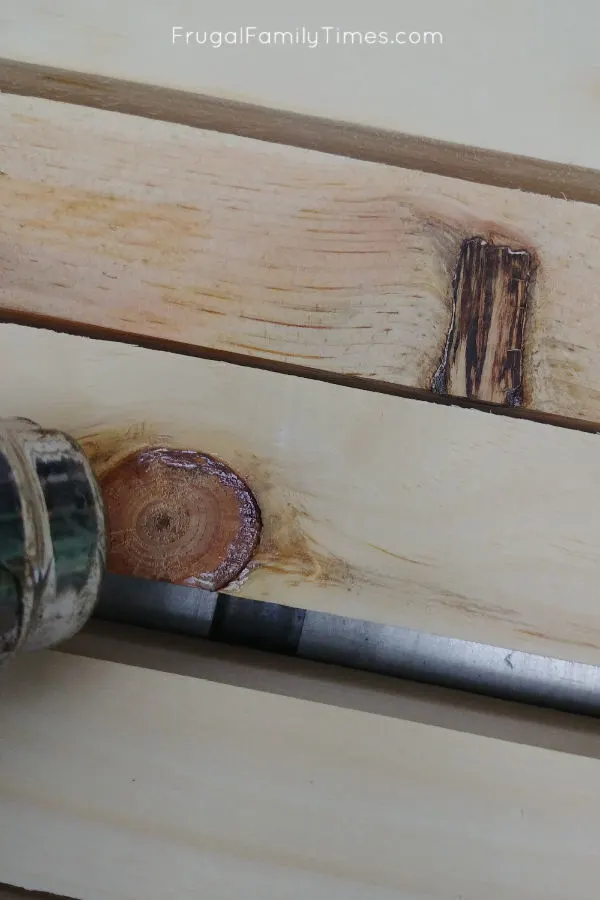
Sap will literally boil out of them and reduce the chances of it bleeding through the paint for years to come.
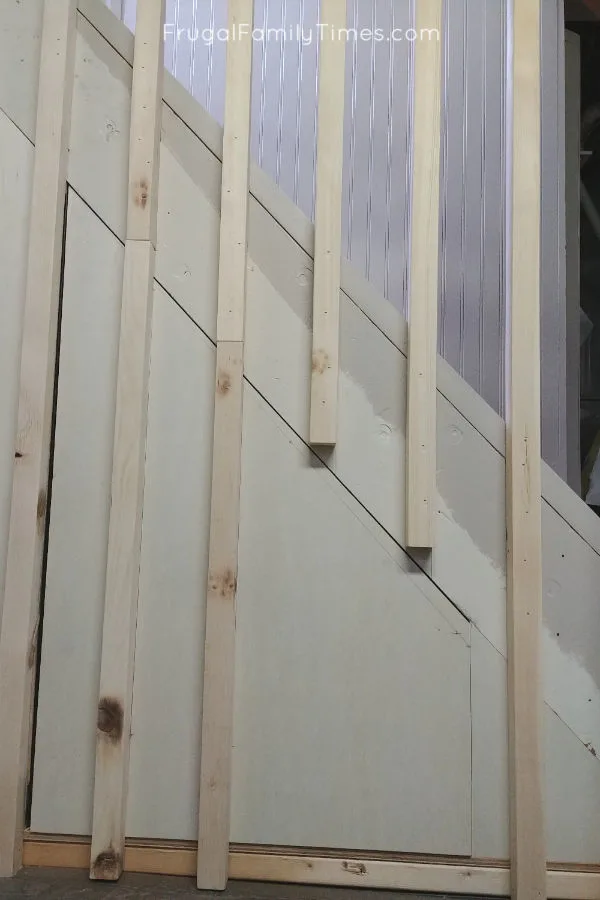
Sand them all and choose the straightest pieces for the long, uncut sections.

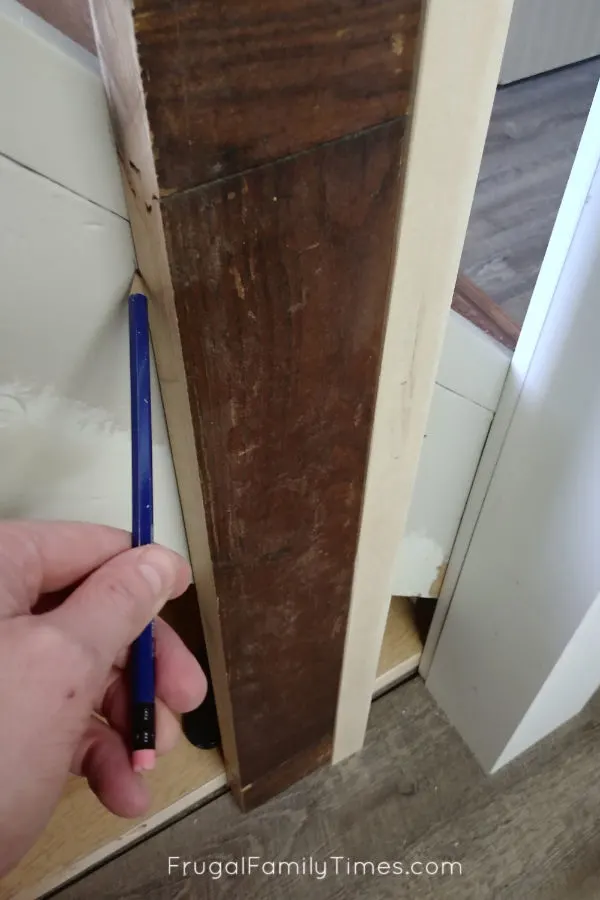
We then cut a piece of scrap wood to fit that space and used it to draw lines where each baluster/wall rail would land. This will also help you plan out the door to access space underneath.

You will need to cut each one individually based on the opening and the stair slope.
Next, build the hidden storage under stairs

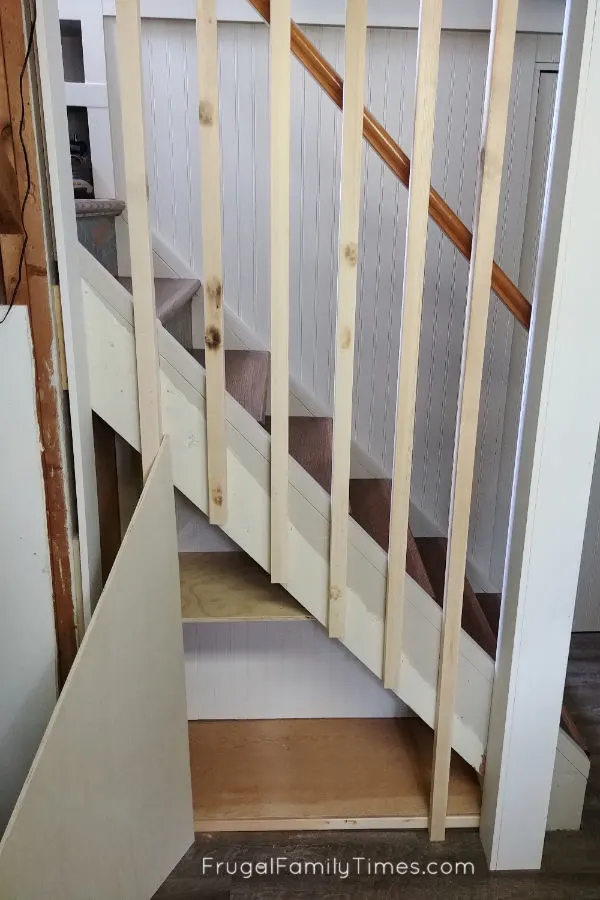
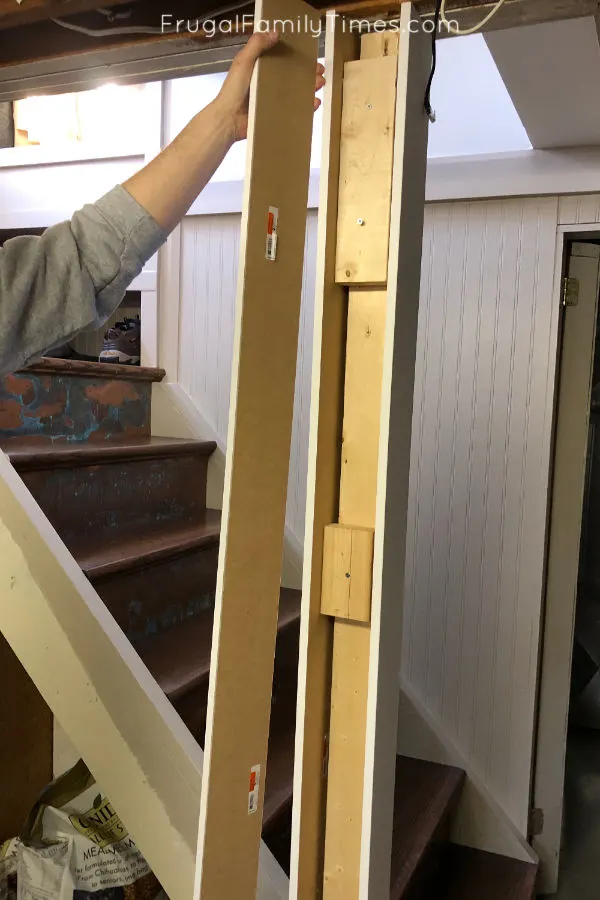
The first and last balusters are floor to ceiling. The others are where the door opening will be and cut off exactly where the top of the opening angle begins. No railing can overlap into the space or the door will be impacted.
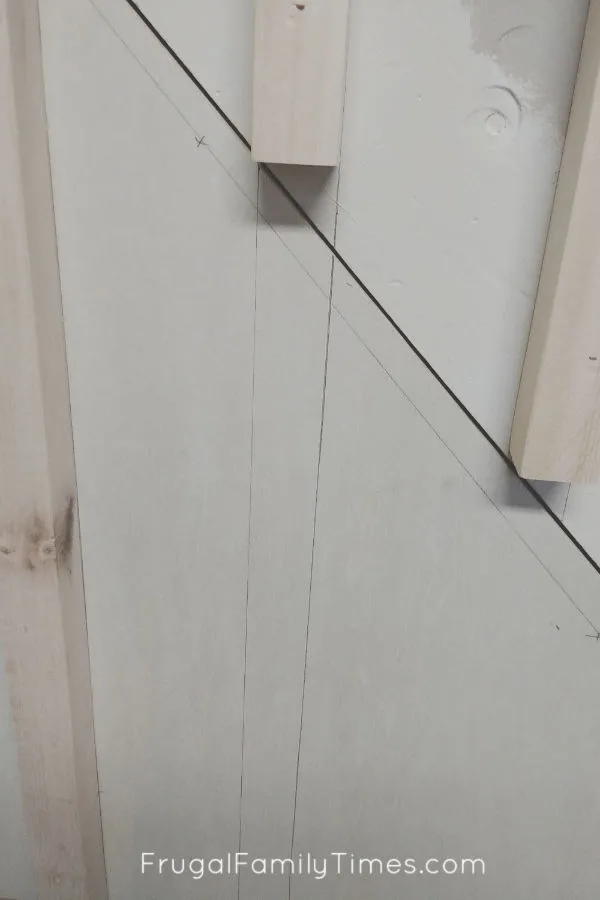
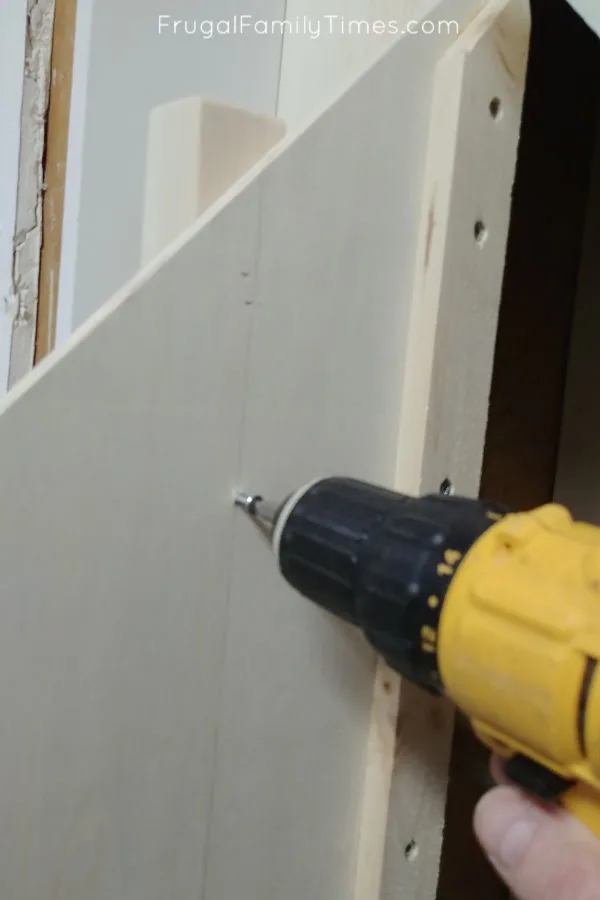
The other thing you can see in this image is the door/ wall. I cut it from one sheet of 1/2″ birch plywood. The angle was carefully measured (use your Rise/Run = slope math from high school).
We then cut the door section to appropriate size and used the cut offs to fit into either end of the opening to create the wall.
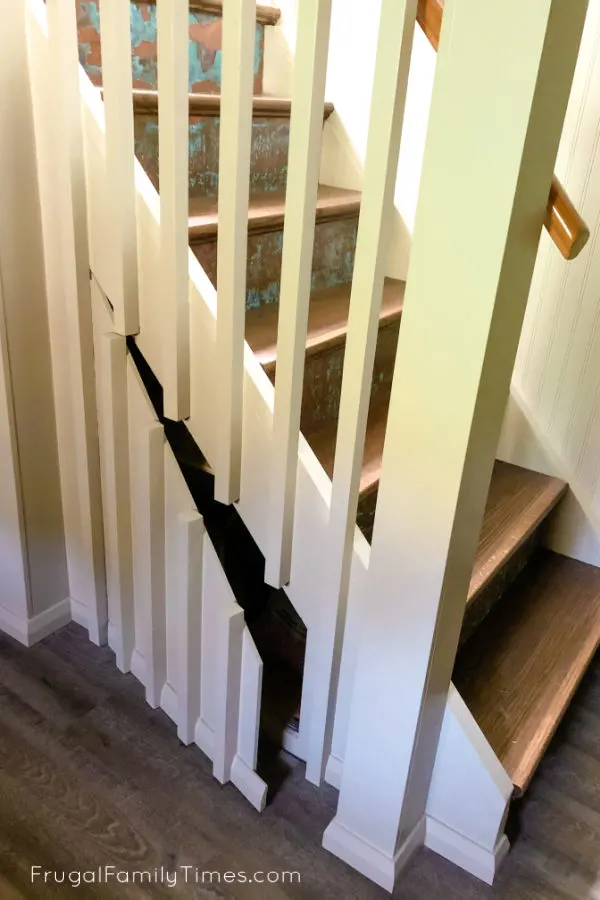
Step 4: Install the door and add the railing face.

Use a piece of cardboard or any scrap you have to make a practice door/angle if you like. You’ll only get one shot to cut it and a little practice makes perfect.
It will not fit tight on any side/angle, or the door won’t open. The best you can hope for is an even gap all the way around.
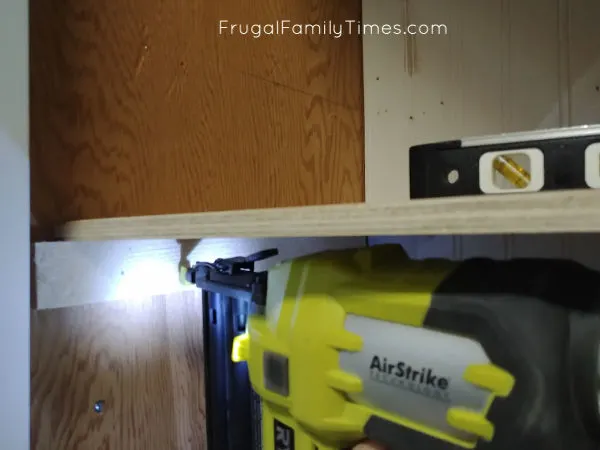
Once hung on a piano hinge (see next image), you can use a straight edge to transfer the baluster lines down onto the door and create a template for attaching the decorative facing rails.

We added additional wood to the back or the door to screw the piano hinge into as plywood end grain isn’t the best.
The other thing you can see is an additional line I drew on the back of the door to screw through into the rails. They were also glued on the front.

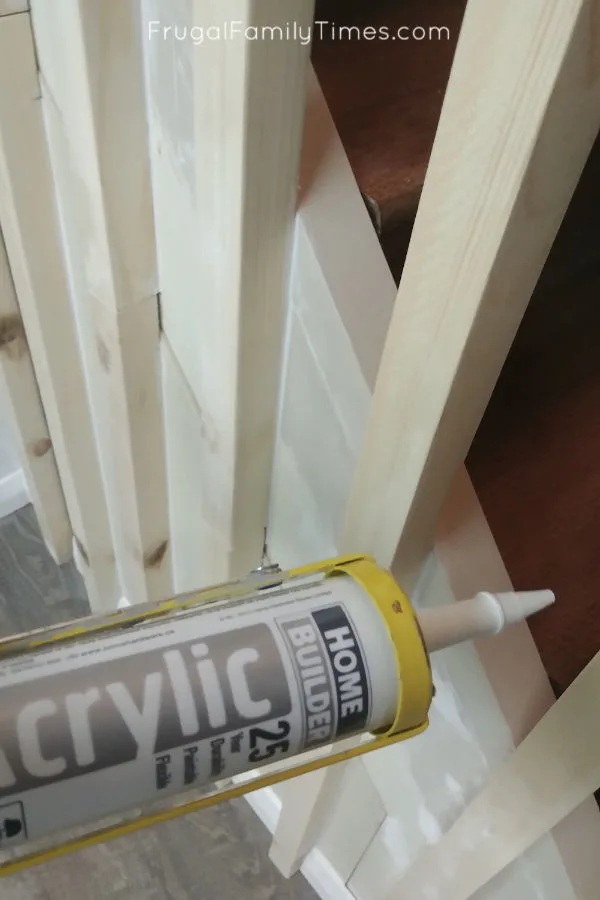
Each time you attach a rail, try opening and closing the door.
There will need to be a small gap between the wall rail and the door rail or it will bind. Basically, there are lots of spots the door can jam in this project and you need to check each new piece as you install it.

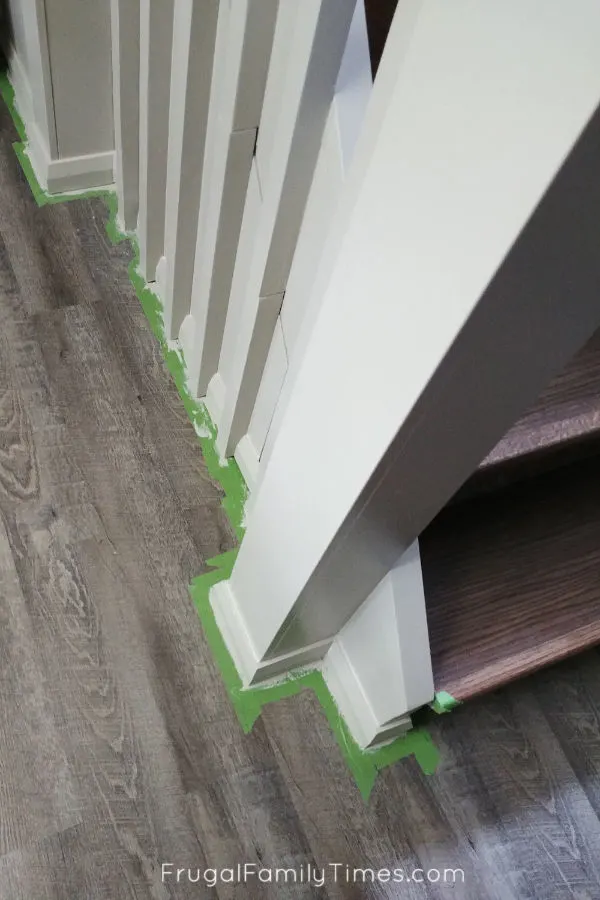
Step 5: Trim and paint


The pieces you put between the rails will need to the cut individually – lots of fitting and fiddly cuts in this project sorry.
We did a piece on the door that moves with the door, but you don’t like that, it could be cut in half and split between the wall and door sections.
The baseboard next to the hinge will need to have an angle cut into it or the door won’t open.
Again, test the door every time you nail a new section to it.


They’re so good – and surprisingly easy!
Click here to see all of our Basement Stairs Makeover projects
lynn
Sunday 6th of March 2022
What a fantastic project! I so want to come for a visit and take a tour of all your projects in real life.
frugalfamilytimes
Tuesday 8th of March 2022
Yes! That would be so much fun, Lynn! Thanks for all your encouragement. :)
FDS Brokers
Saturday 12th of September 2020
I really appreciated the extensive pictures of this project. I liked the idea and I liked that the storage was not obvious because of the trim you put on the bottom next to the floor. Excellent job!
Loveland
Thursday 30th of July 2020
How cute and practical. Keep up the good work!
frugalfamilytimes
Thursday 30th of July 2020
Thanks for the encouragement, Loveland! It’s so very appreciated! :)
Mab
Thursday 30th of July 2020
I really appreciated the extensive pictures of this project. I liked the idea and I liked that the storage was not obvious because of the trim you put on the bottom next to the floor. Lovely job!
frugalfamilytimes
Thursday 30th of July 2020
Thanks so much, Mab! I’m really happy you like this - and took the time to let us know. :)