

We may earn a commission on purchases made after clicking links on this page.
Intro by Robin & Steps by Ed
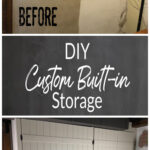
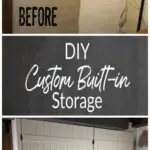
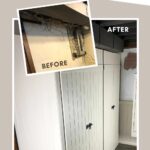
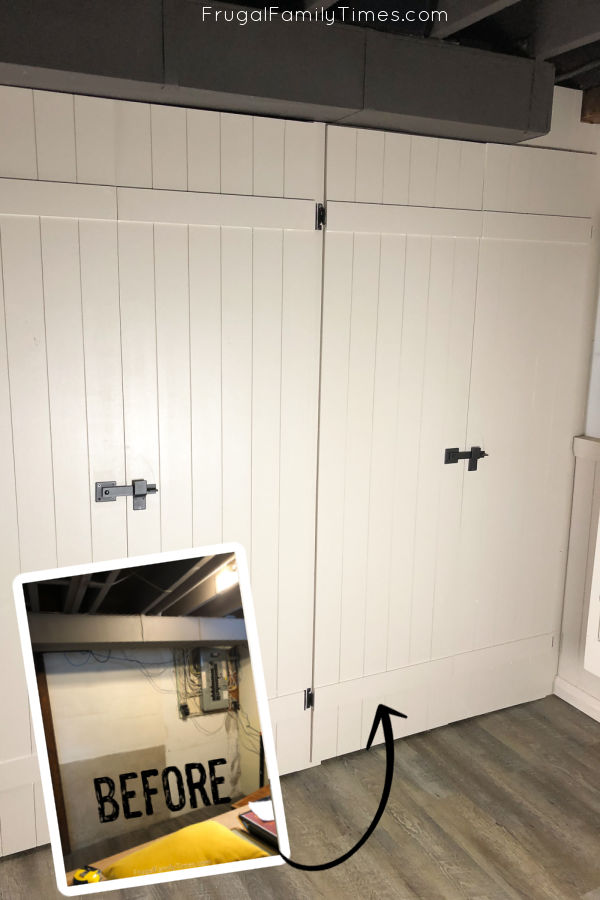
Storage can be beautiful! Our DIY built in cabinet made our basement storage look attractive while organizing so many things. Our easy basement built-ins were also designed to hide the electrical panel, wires and pipes.
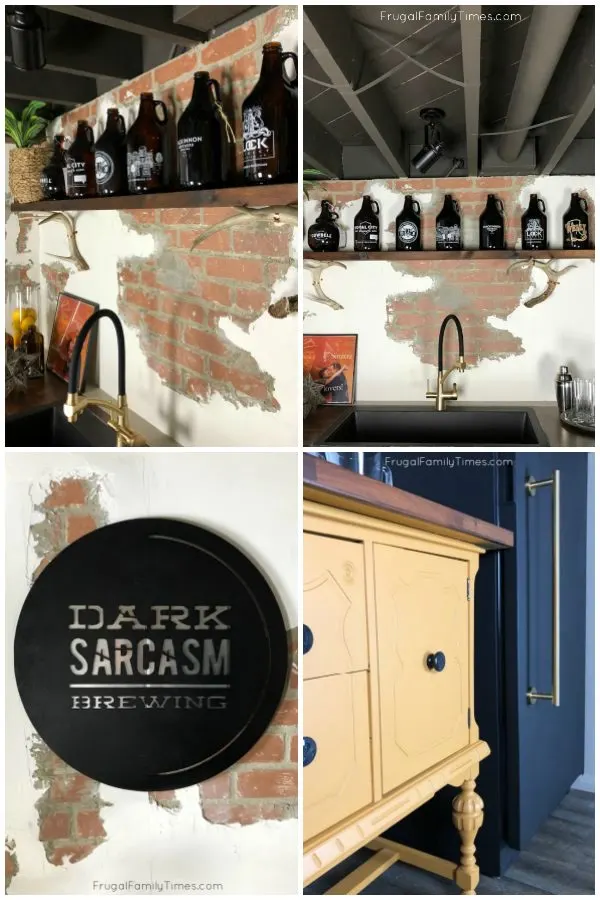
Can storage do so much and still look great? Oh yes! We’re pretty proud of this final project in our Basement Hobby Room and Pub
Our DIY basement built ins needed to work very hard for us. We had the following requirements for the design:
- Hide the electrical panel in a safe way
- Hide wiring and pipes, but still have them be accessible when needed
- Be beautiful, but not visually obtrusive (I always call this sort of design “quiet”)
- Tie in with other elements in our basement – in particular our hollowcore door makeover in our Media Room and the tongue and groove ceiling in our Basement Powder Room
- Function well as my crafts cupboard, especially to fit the big sewing machine of my Grandma’s which I love. The design I had in mind meant that the sewing machine could pull out easily for use – and it wouldn’t be piled with stuff on top. (We are bad at tidy horizontal surfaces.)
- Storage for bulky items like our fun size pool table, air hockey table and wine making jugs
- Affordable to make
What is a built in cabinet?
Built in cabinets are made custom to the space. They are anchored to walls vs furniture pieces that can move around. Think: a closet vs a wardrobe. We find building built-ins so much easier than building free-standing furniture!
We made a lot of simple DIY built-ins that are as beautiful as they are functional. (You can find them all here.)
Is it cheaper to build or buy cabinets?
We find it’s often cheaper to build built-ins vs buying furniture pieces to meet our needs.
The exception would be if you’re buying the furniture piece used – you can find great deals on furniture this way. For example, we just made over an old buffet and hutch that cost us $60 WITH delivery. You can’t make anything for less than that.
For this DIY built-in cupboard I had priced out new free-standing units for the space and it would have cost more than twice as much as the materials we used. And they wouldn’t have looked nearly as good or been customized to our needs.
We also believe that well made custom built ins add to the resale value of a home.
So the short answer: used cabinets might sometimes be cheaper than built-ins, but they will never be as cool and custom.
How deep should built-in cabinets be?
It’s up to you! That’s one of the wonderful things about built-ins. You can customize them exactly to your needs.
For example, if you were looking for a space to store canned goods or to display a collection, you would want to make the built-in less deep than if you were looking to store bulky items.
We made this basement built in just deep enough to slide the sewing machine in and out. If it weren’t for the sewing machine, we would have made it much shallower. It’s easy for things to get lost at the back of a very deep cupboard. To solve this problem we designed the shelves in our unit to fit some tubs and bins that hold smaller craft supplies.
How high should built-ins be?
Built ins can be as high or low as you need them. That’s one of their beauties.
For example, we made this bookcase at top of stairs built in quite low – but that’s what makes sense for the space. (It was also our very first built in!)
And our DIY window seat IKEA hack built-in is low, of course, so you can sit on it.
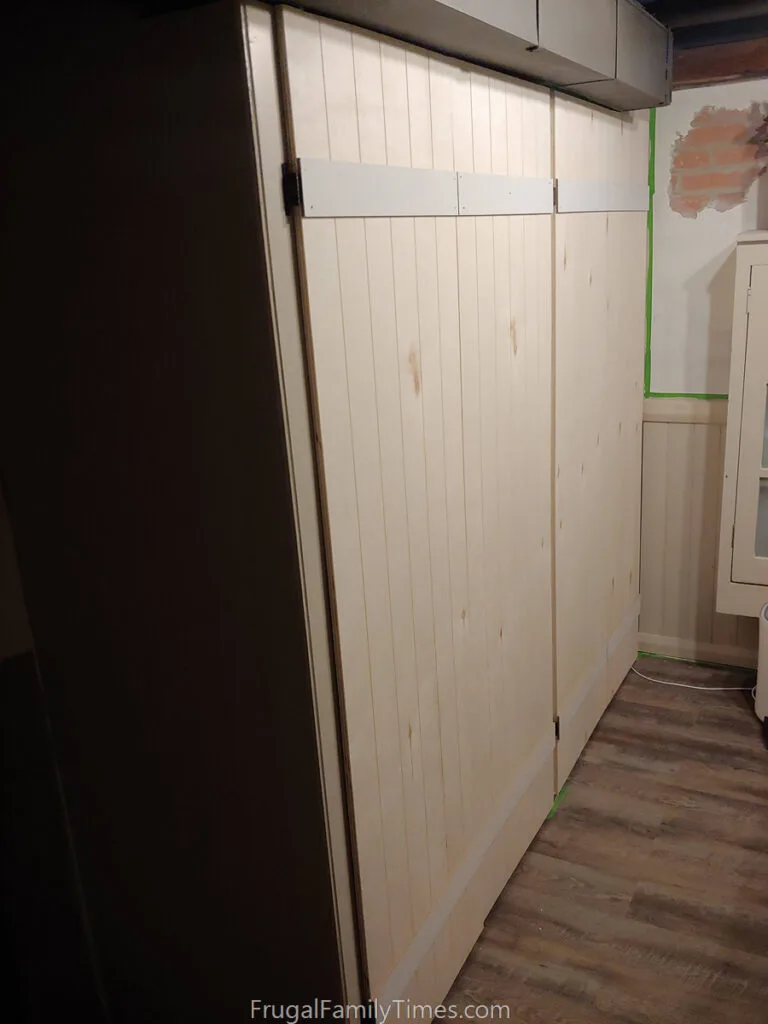
Today’s built in cabinet is as tall as we could make it. It comes as high as the ductwork at the front and right up to the ceiling on the sides.


Electical panel – check!
Pipes – check!
Wiring and plumbing – check!
Our modem and router are hidden here now too.

What material is used for built ins? Here’s our DIY Built-In Cabinet Material List:
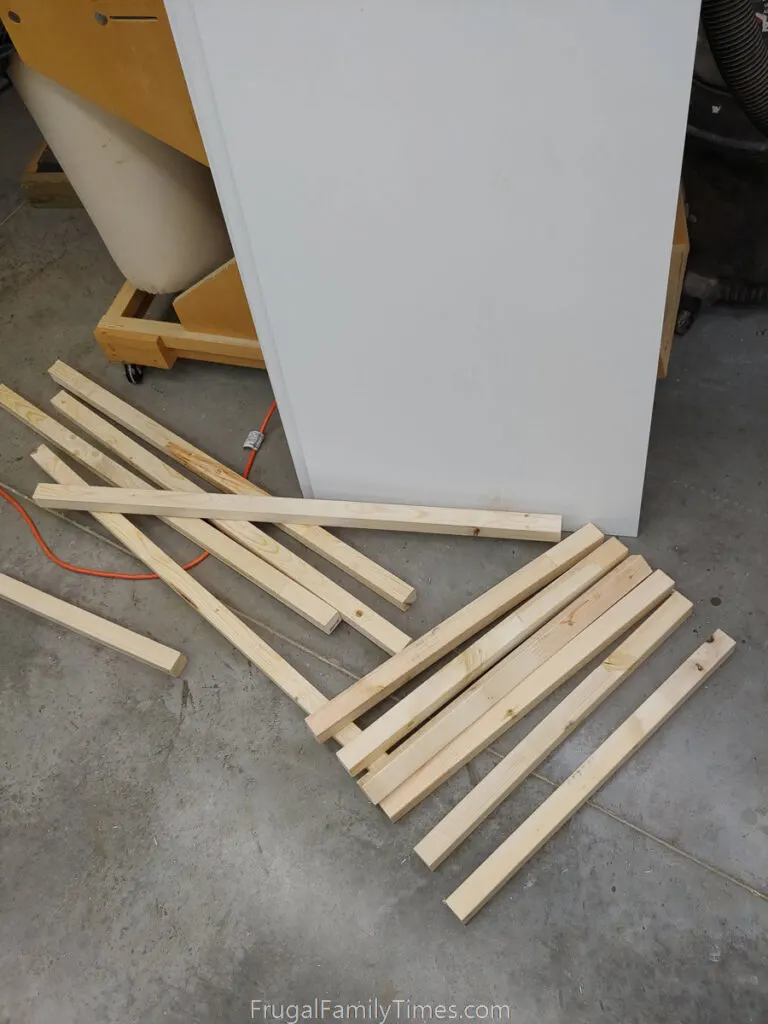
- 2″x4″ for framing
- 2″x2″ for shelves
- Tongue and groove boards for side (you could also do paneling or drywall)
- Melamine panels for shelves
- 1/2″x 4’x8′ plywood sheet for doors.
- Door hinges
- Latch hardware (we used this one: it’s actually a barn door fence gate latch!)
- Thin (1/4″-1/8″) MDF or melamine scraps for doing hinge bands on doors
- screws, including Tapcon screws to anchor if floor/wall are concrete


How do you build a built in cabinet? Here’s what we did…
Start with the Built in Cabinet frame.

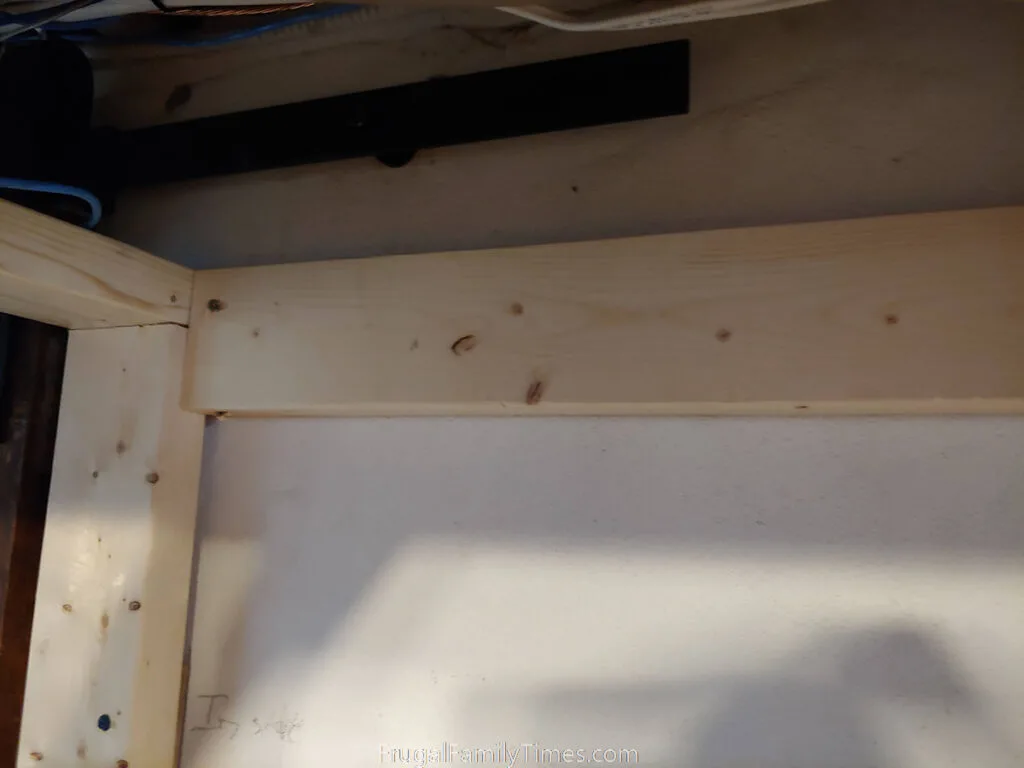
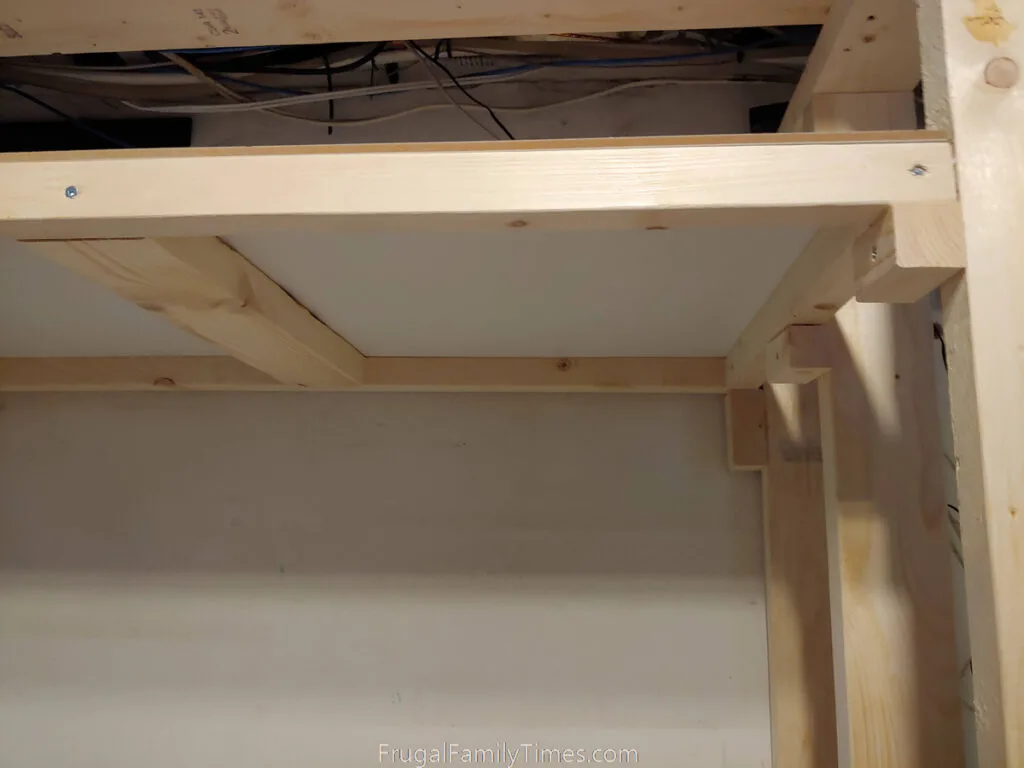
In our case, both the wall that runs down the middle of the house AND the floor were, so I started by anchoring a 2″x4″ length to the top of the wall so the cabinet wall sections would have something I could easily nail/screw into.
If your space doesn’t have concrete, then regular construction screws or nails will likely be enough to secure it.

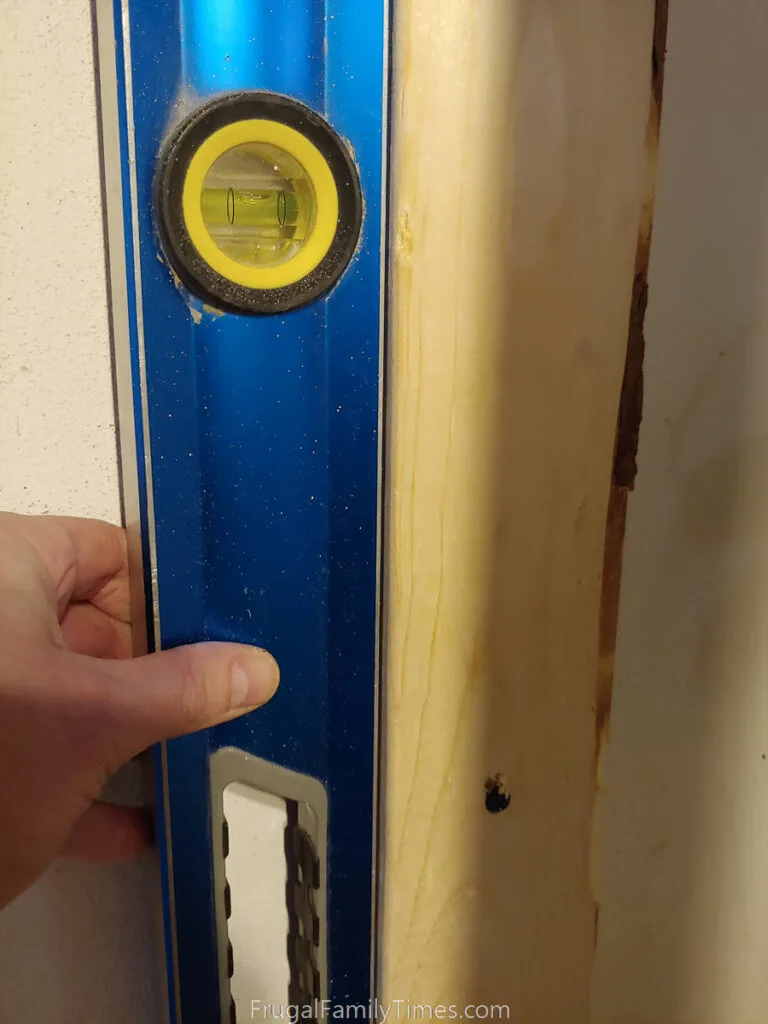
I then anchored them using Tapcon screws to the concrete wall and the floor(now is the only chance to get this level & plumb- Tapcons are serious commitments).

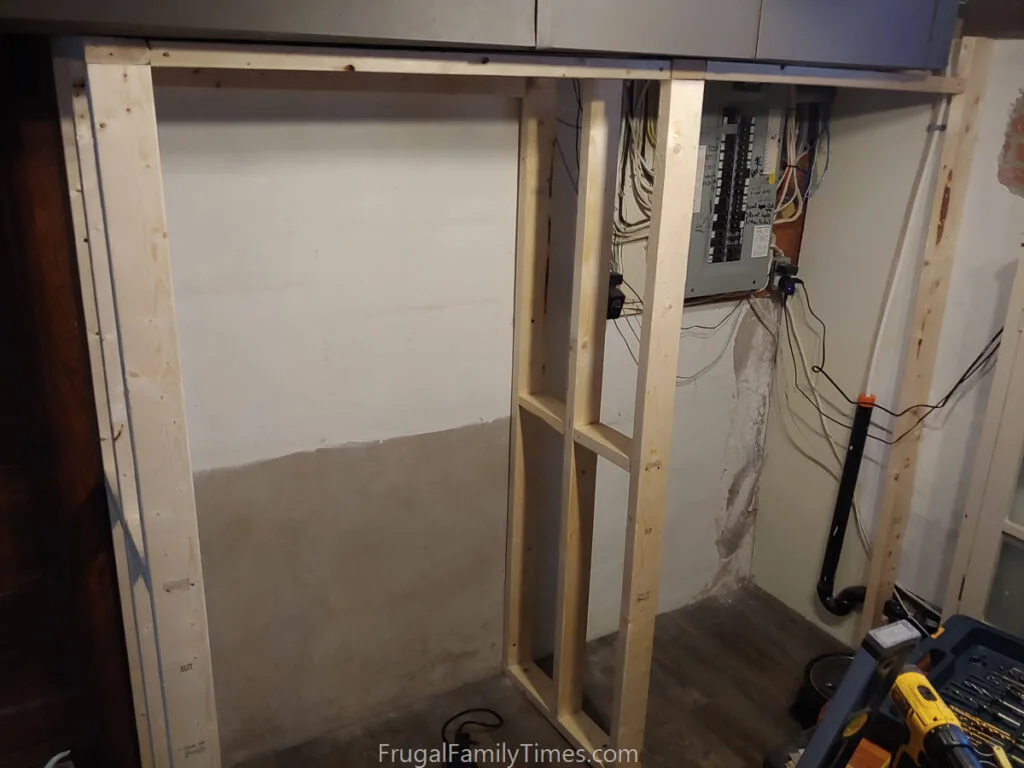
I didn’t need another wall on the side next to the actual house wall, so I just anchored a 2″x4″ to it so the cabinet doors would have something to mount to. You can see additional lengths of 2″x4″ between the cabinet sections, just under the ductwork.
This helps keep everything together at the top, while Tapcons keep everything in line on the floor and wall areas.

You can see all the Tapcon heads anchoring both the floor and wall.
You can also get a sense of all the ugly one side of the unit is going to be hiding and how much usable space the other side will have.

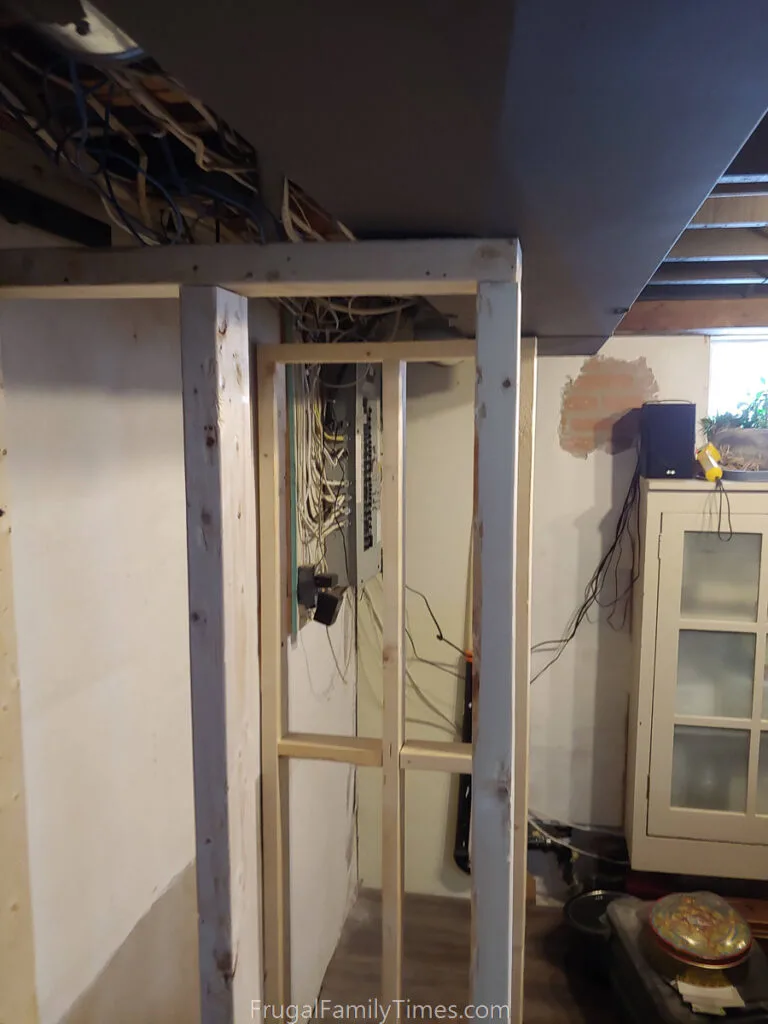
I later added some scrap 2″x4″ pieces into the gap behind the duct – just enough to give me material to nail the Tongue & Groove (T&G) boards to – and it was easy.
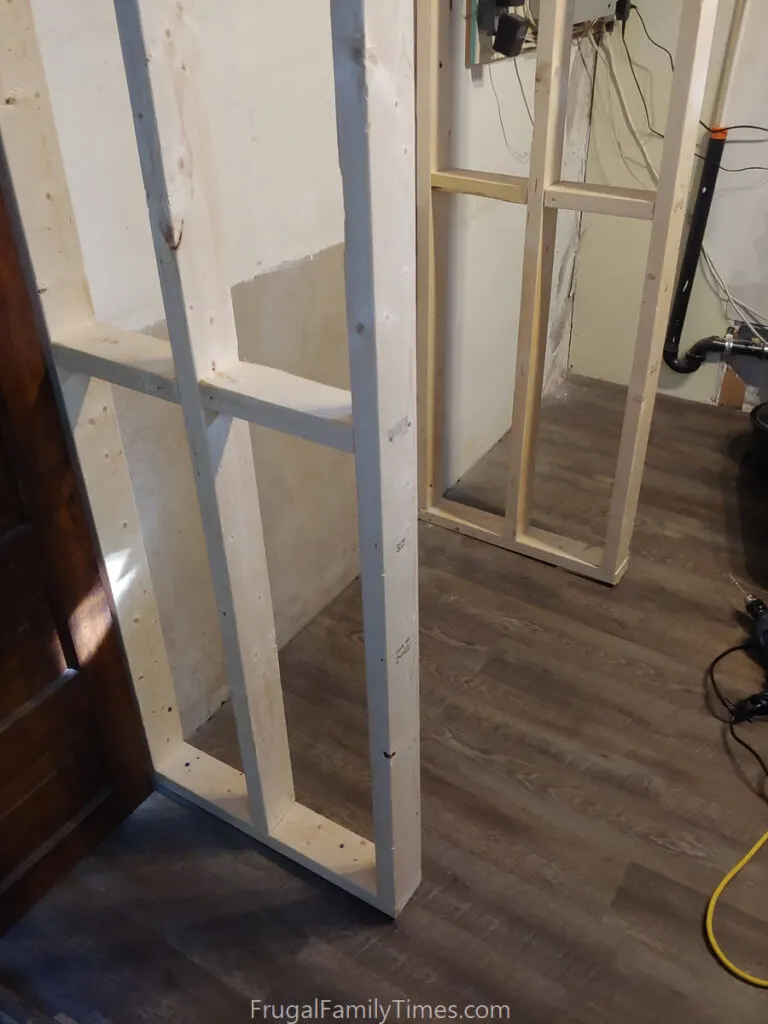
Next build the custom shelves

They are going to be BIG, so they needed more structure than a simple plywood panel as we’ve used in the past.


Our shelves were especially big, so I added a 2″x4″ to the middle for additional strength and rigidity.

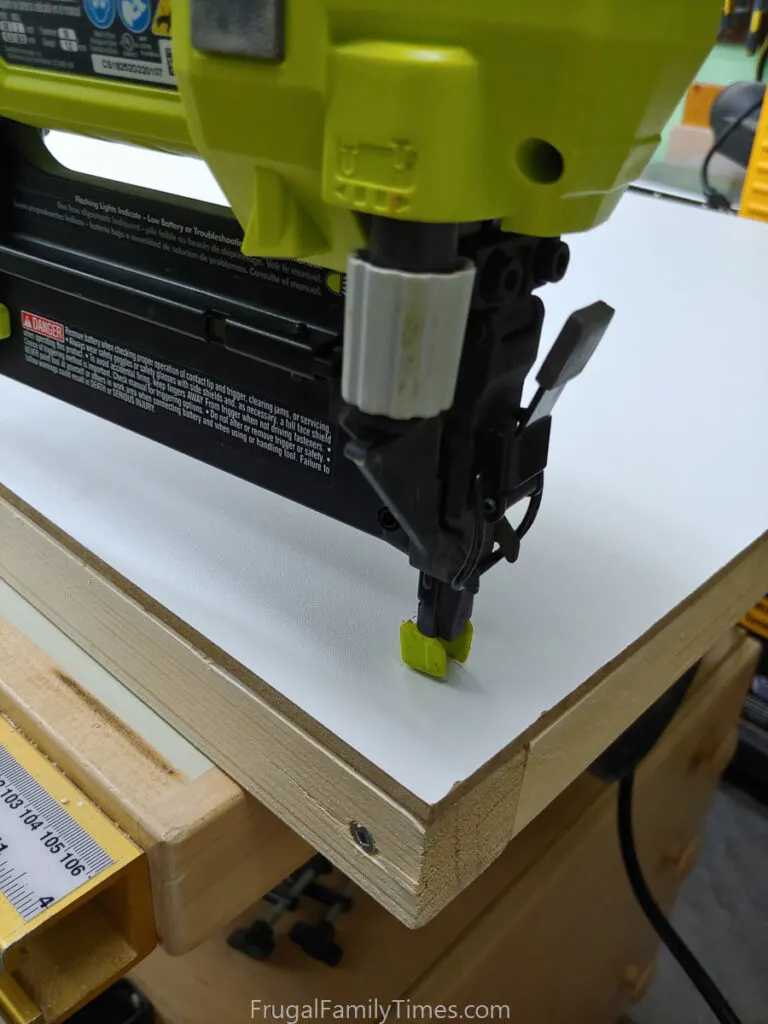
Glue and nail it to the 2″x2″s

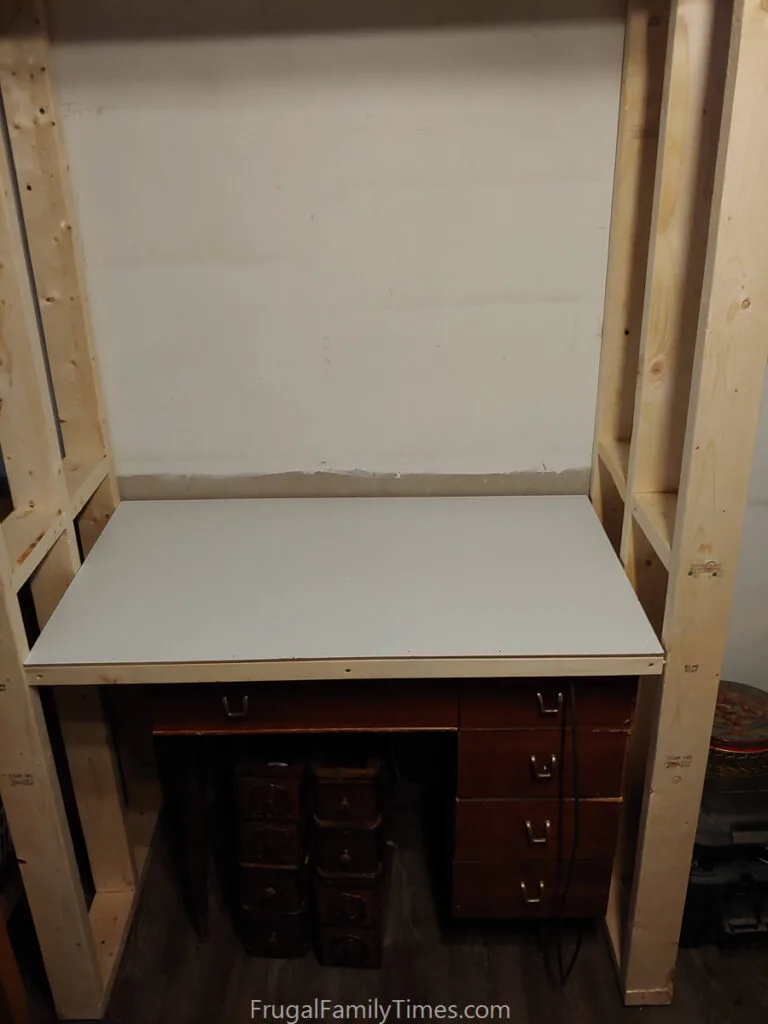
We wanted enough room to have Robin’s sewing machine fit under the bottom shelf for easy access, so that was what we used to define the bottom space.
The remaining shelves we distributed evenly in the rest of the space.
Some got minor height adjustments to allow for other specific storage containers.

If you want adjustable shelves, you could add additional 2″x2″ blocking at various heights and then slide the shelves into new locations as needed.
We were pretty happy with the spacing we landed on and screwed all the shelves into the wall frame sections.

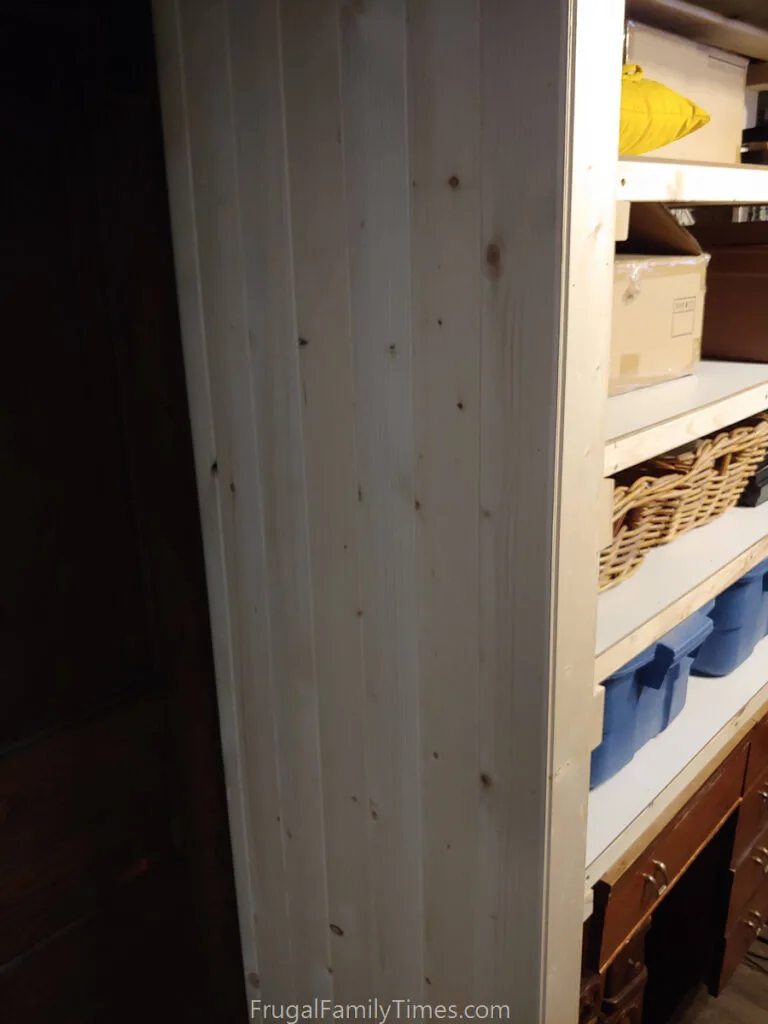
We wrapped the end and the small face sections in these tongue and groove boards (we have used these in a few other places in this room already), but you could use regular drywall board or panelling if you prefer.
Last, DIY Built in Cabinet Doors – a tongue and groove look on a budget!

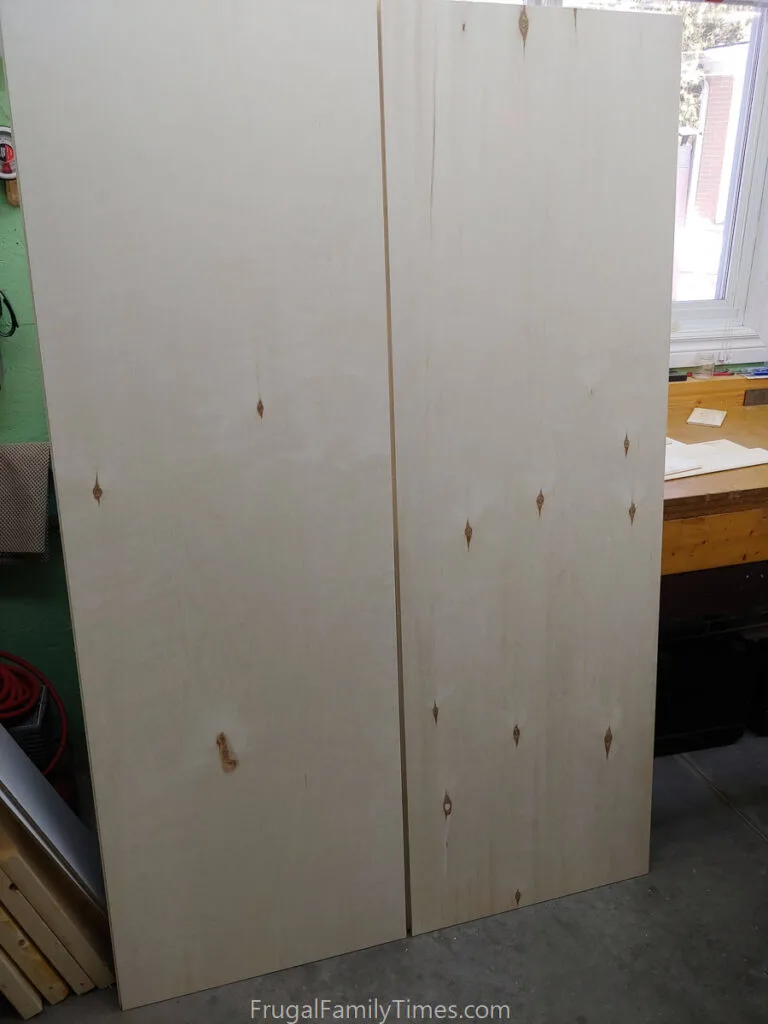
The initial plan was to have them made with T&G as well. But we realized Tongue and Groove wasn’t rigid or strong enough on its own, and that we would have to likely have a panelling backing to it. We thought, “Why not just make the plywood panels look like T&G?” So we did. This saved the cost of buying more T&G as well as plywood. Win!
Step one is to cut the doors to the size needed.
We need 4 huge ones. The size of your doors will dictate the material you use in making them. We needed big ones, but we also didn’t want to use a material that was too thick/heavy either. We ended up choosing 1/2″ plywood. If your doors are smaller, you may get away with 3/8″.

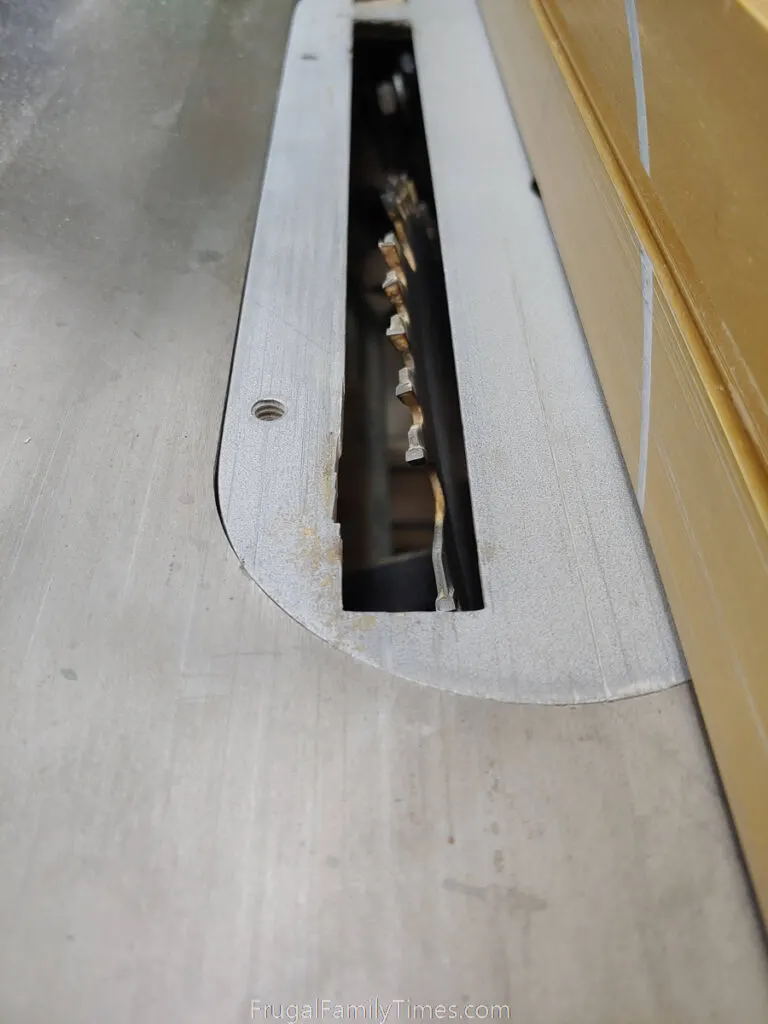
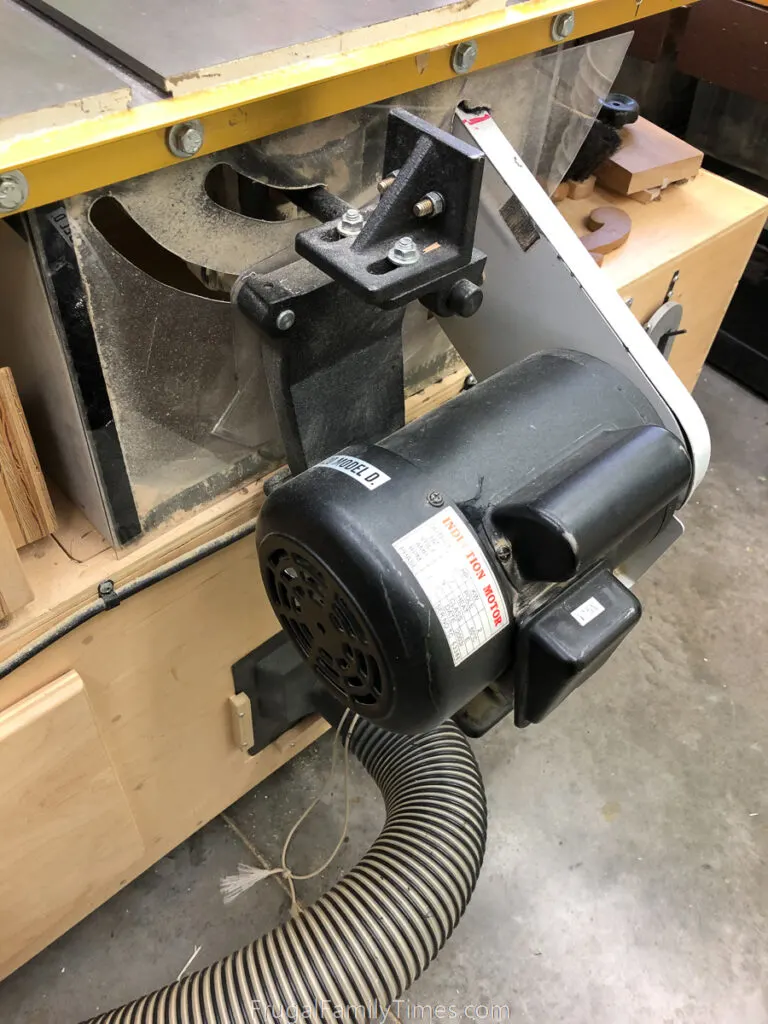
We found that tilting a table saw blade and having the blade just high enough to score the panel without cutting too deeply worked perfectly.
Do some experiments with scrap pieces to see what height of blade works best for your material thickness.

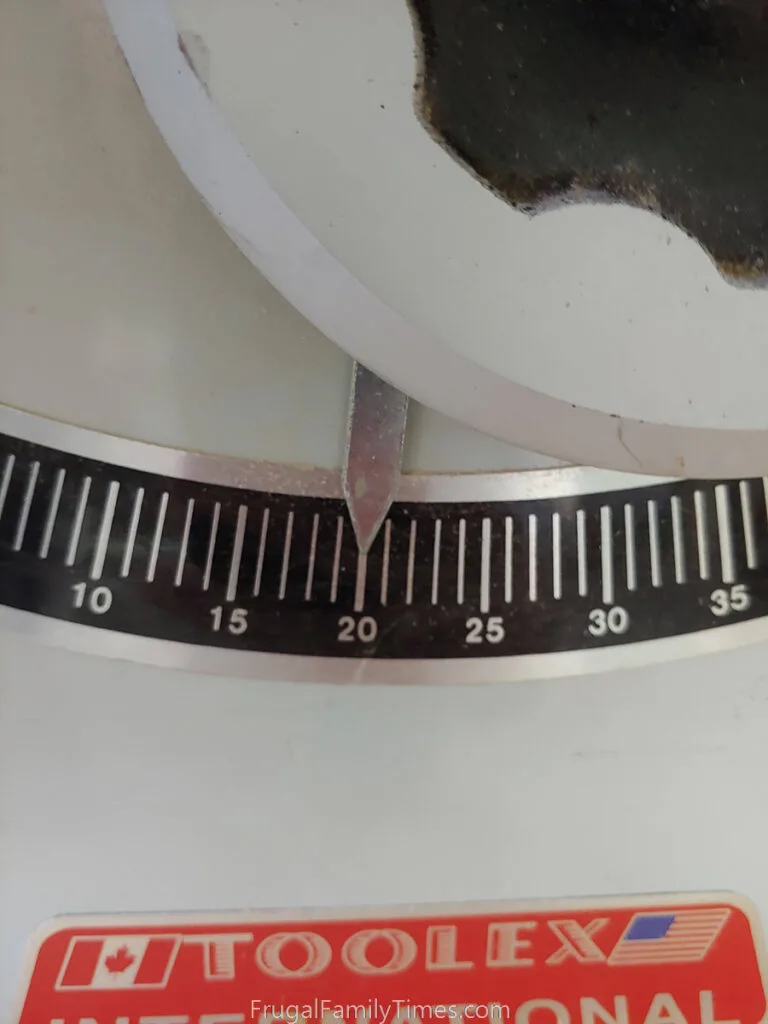

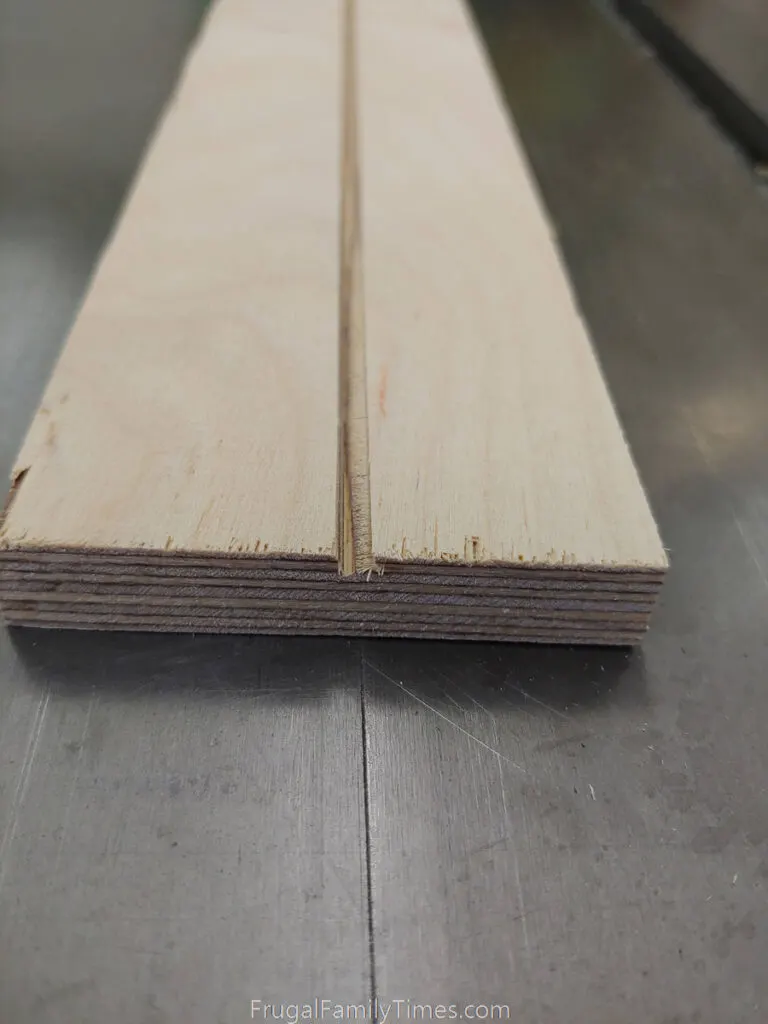
The blade angle creates the impression of a tongue going into a groove enough to fool the eye and it doesn’t cut deep enough into the plywood to ruin the strength of the sheet.
When you are happy with things, get a helper friend as we are going to be running your doors through the table saw many times to create multiple grooves.

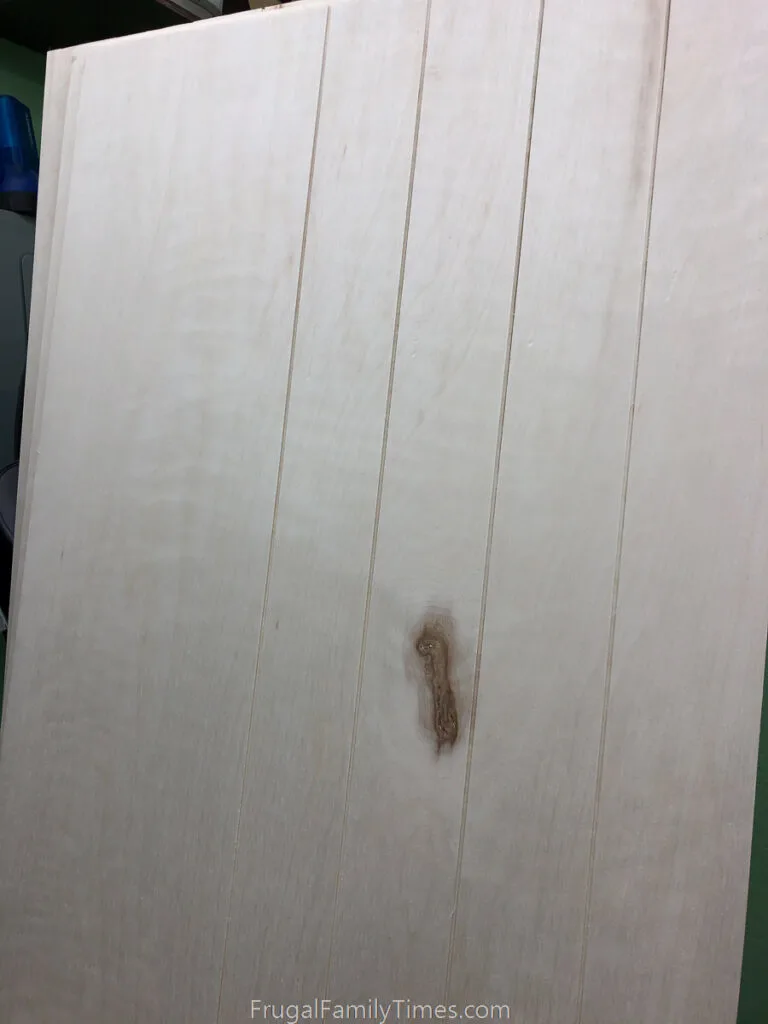
Then we kept adding that much more for each additional pass (3-1/2″, 7″, 10-1/2″, etc) to create the appearance that the doors were made up of a bunch of T&G boards joined together.
This is where you need a friend and a good table saw with a fence to guide you. One person will feed the sheet while the other pulls from the other side.
You’ll need to keep everything really smooth and consistent as you pass the doors through, as any minor wobbles or lifting of the board will create changes in the appearance of your grooves. We ended up with some small stuff and it didn’t impact the final product too badly, but still – be as careful as possible.

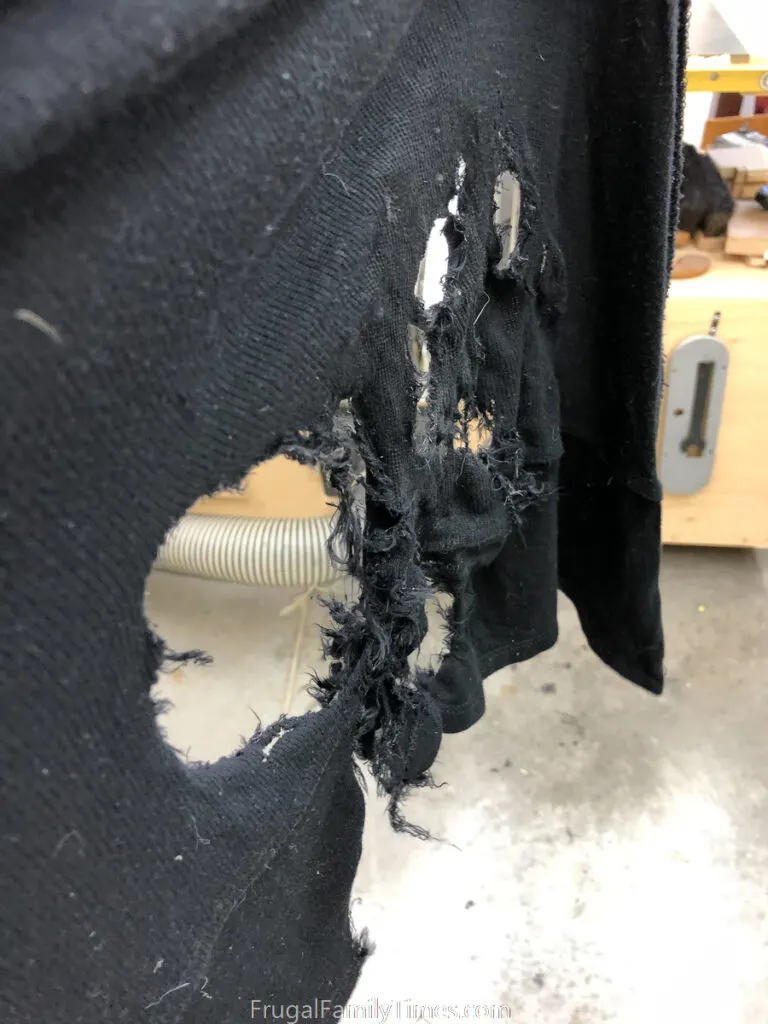
This is NOT a table saw blade accident. Robin’s long cardigan sweater got sucked into the…

So yeah, no one was hurt, but they aren’t kidding when they say there are multiple ways you can get hurt or tangled in power tools.
We were so focused on keeping the plywood sheets stable and straight as we passed them through that we didn’t notice the sweater getting sucked into the motor till it was too late.
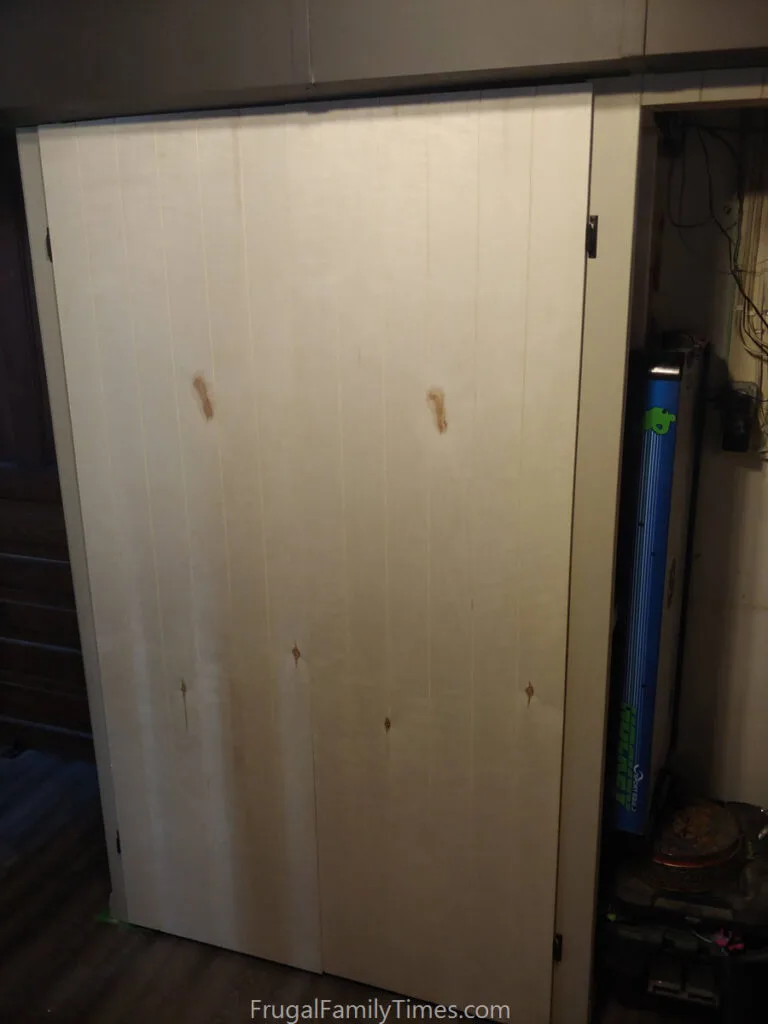
Basement Built ins – Hanging the Doors

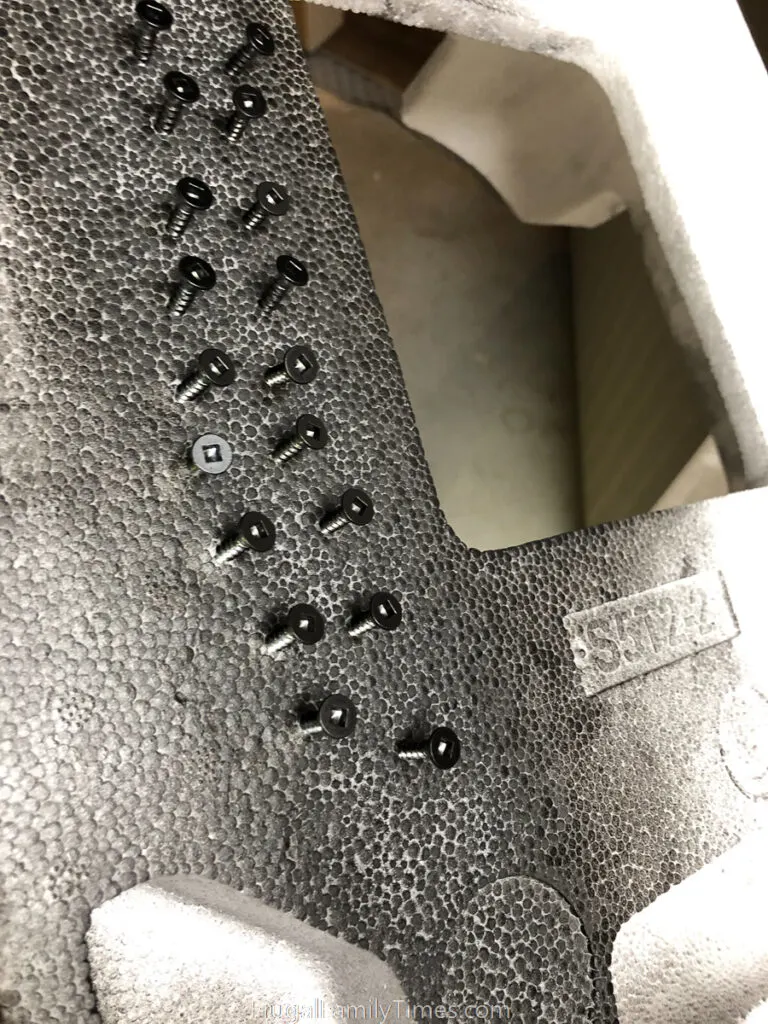
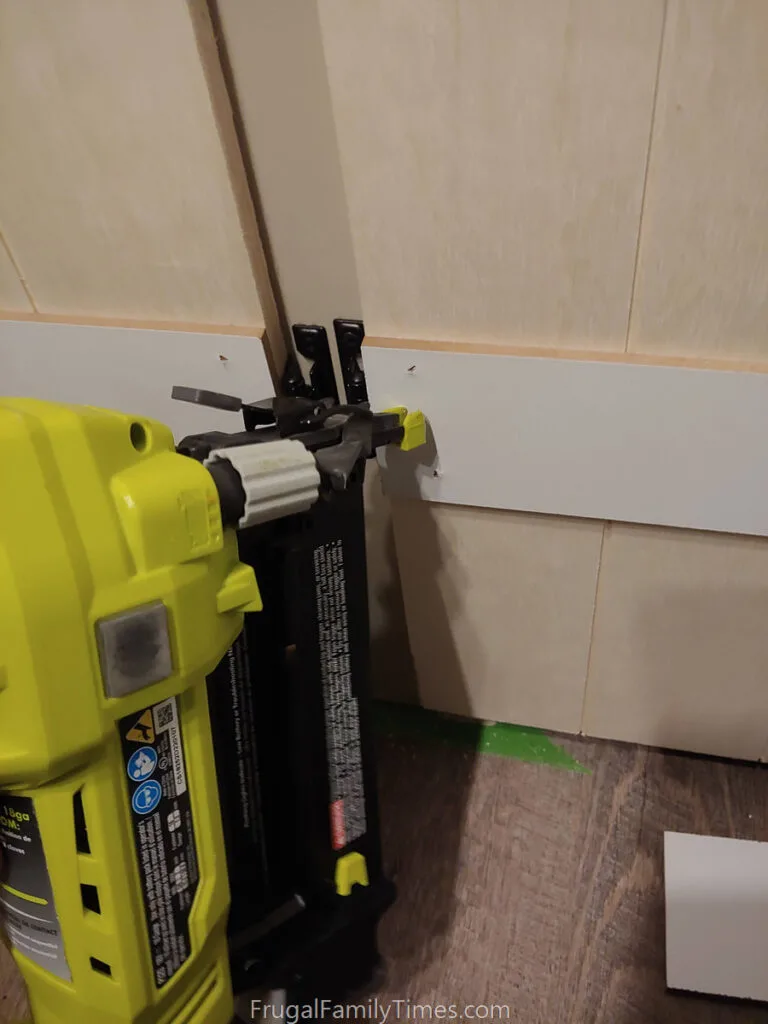
We wanted Robertson (square -AKA the only good) heads and longer lengths to support our big doors. We shoved a bunch into a piece of packing foam and spray-painted them black to match the rest of the hardware.

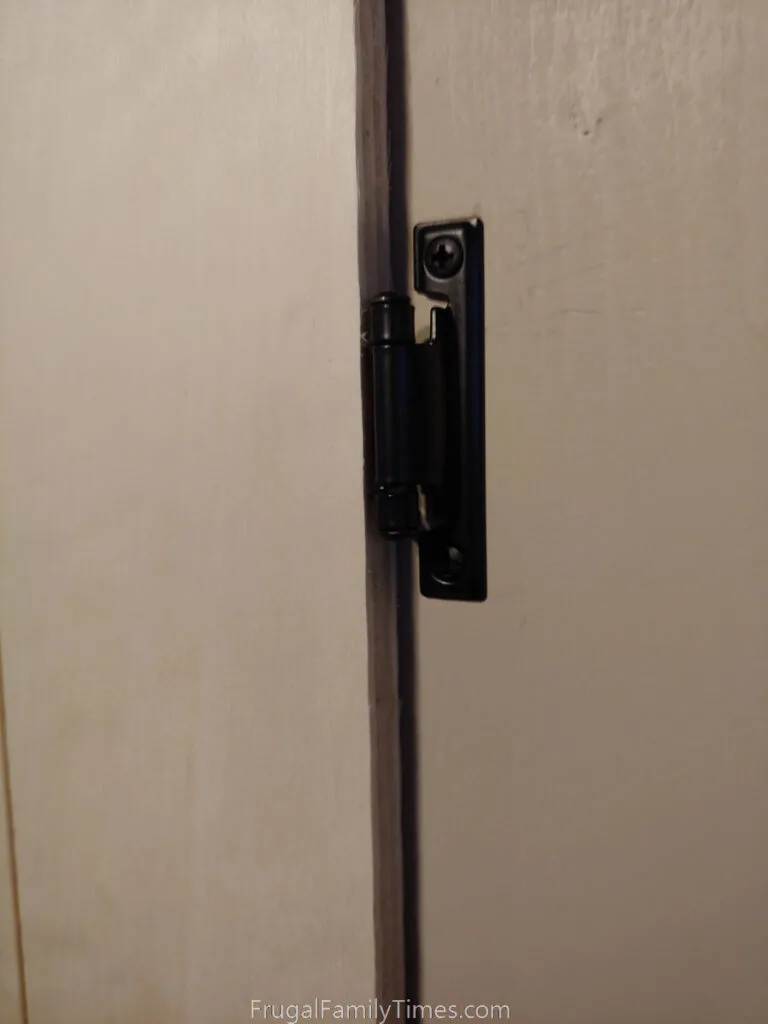
We used surface mount hinges so there was lots of room to move things in or out to make the doors all fit and balance across the space. This was a test with Philips screws – we used the better ones for the final mounting.


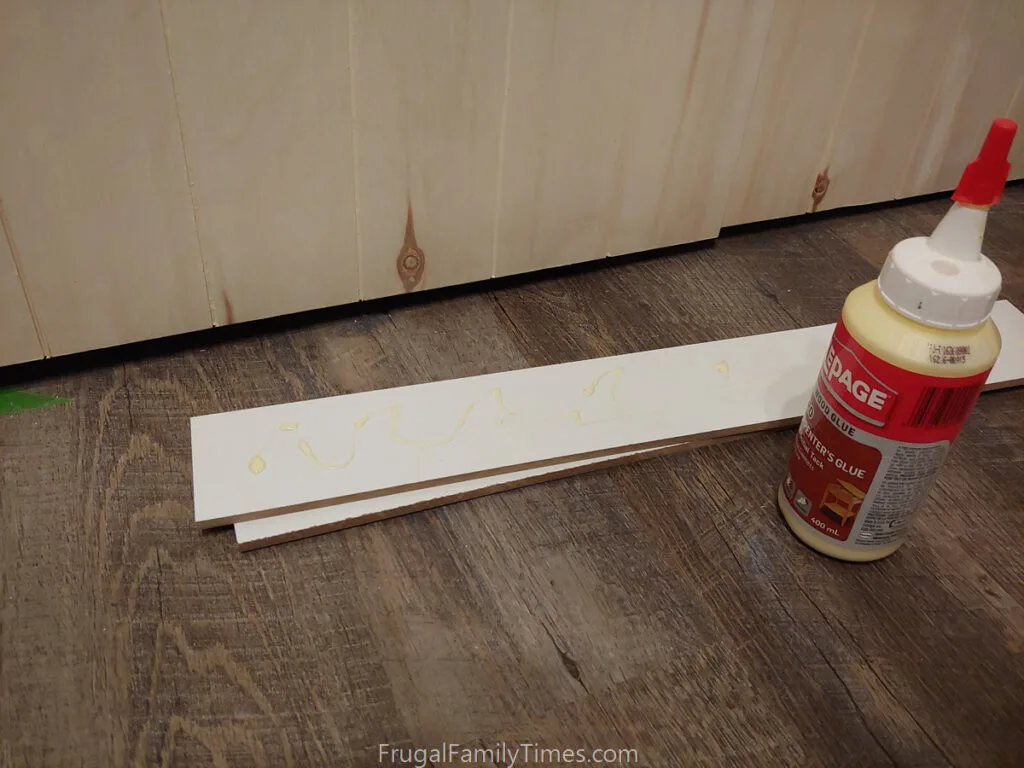
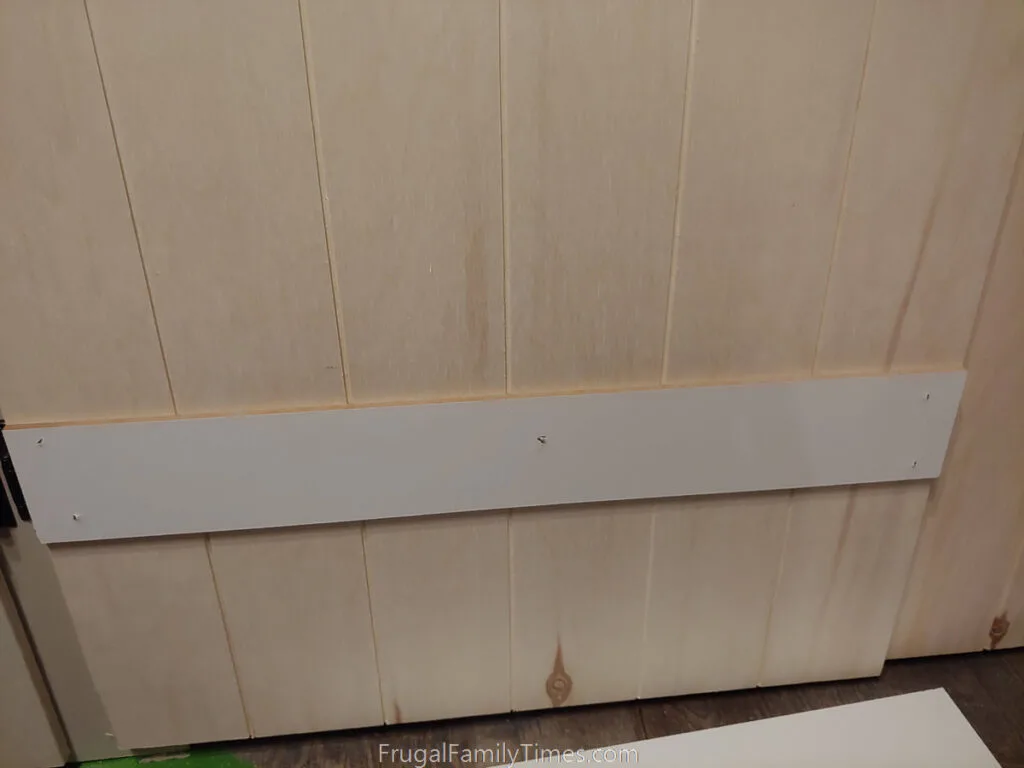
We just cut 3″ strips (the same width as the hinge height) of old 1/4″ MDF, but any thin-ish material would work.
Glue and nail to the door face.

Make sure they are level and line up with each other all the way across your doors too.


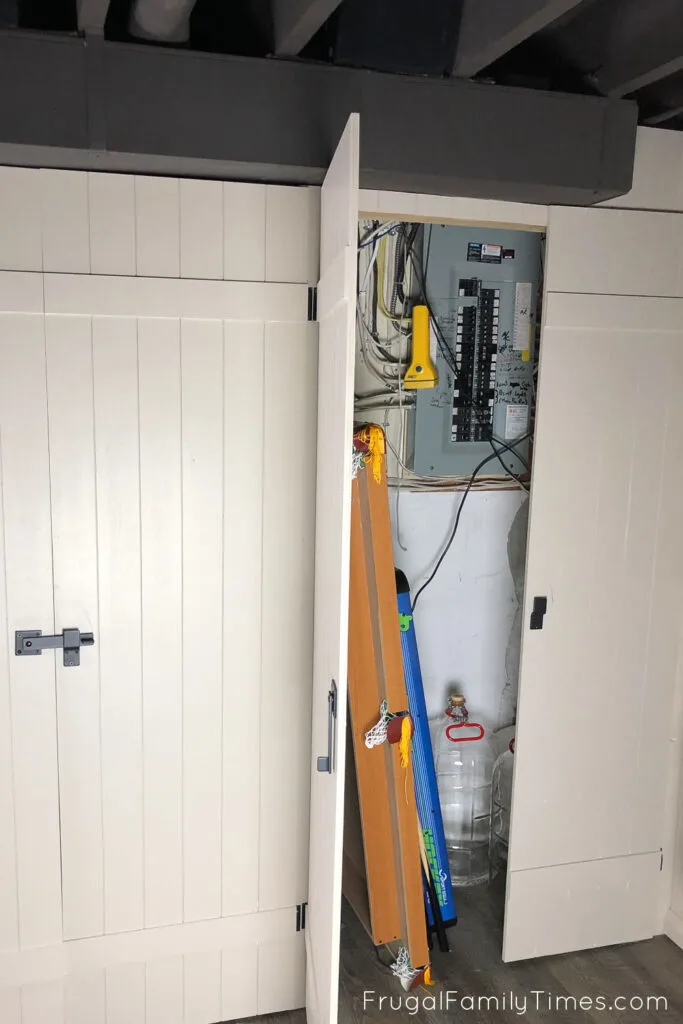
We didn’t put shelves in this part so that we could keep easy access to the panel and just store a few big things we use in this room: tiny pool table, air hockey table and bulky wine-making supplies.


Here you can see how we customized some of the shelves to hold specific containers.
We’ve got plans to organize this even better – but this is huge progress from before!

We’ve got so many more DIY Simple Built-in Projects for you!
- Our DIY under stair storage (that’s hidden!)
- Our DIY Media Cabinet
- Our IKEA window seat hack
- Our Built-in Stair Top Bookshelf and Planter (our very first DIY built-in!)
- Wall-to-Wall Billy Bookcase Built in


Robin and Ed are a DIY-loving couple with over 25 years of design and build experience. Also, Robin is a Nutritionist and former Registered Dietitian and Ed is an award-winning Business Educator. We share strategies for living a rich life on a DIY budget: creative money-savvy ideas for a stylish home, healthy meals and family fun. Our work has been published in the pages of Do It Yourself, Farmhouse Style and Better Homes & Gardens magazines.
Lynn Spencer
Thursday 18th of November 2021
Your projects always make me feel...well...not worthy! 😂 But seriously, you two are amazing! That storage area is truly beautiful and more than that...functional. My word is 'functional aesthetics'. Well done!
frugalfamilytimes
Friday 19th of November 2021
Oh, Lynn! You leave the best comments - you leave us with such warm hearts. Thank you so much. As far as "not" worthiness - no way! Your work always amazes me! Always so beautiful and well taught! :) Robin