

The Reveal: Our 3-Day DIY Kitchen Makeover on a Budget ~ under $1300!

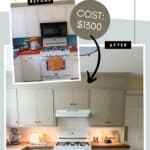
Ever wondered: How do I give my kitchen a cheap makeover? You’re in the right place! Today we’re revealing our dramatic DIY kitchen makeover on a budget! We’ve got all the details on the cheapest and easiest kitchen upgrades you can do yourself, too.
In just three days we gave this kitchen a warm, classic yet modern makeover that looks high-end – all while spending less than $1300.
If you’re wondering:
Why in the world did we just give ourselves 3 days and an incredibly small budget to makeover this kitchen?
or
Whose kitchen is this?
We’ve got all the details in this intro post:
Can We Even Do It?! The 3-Day, Low Budget DIY Kitchen Makeover We’re About to Attempt…
by Robin
This was not our first DIY budget kitchen makeover rodeo.
We did one a few years ago in our own kitchen which you can read all about here: Sick of your old kitchen? Here’s Our Oak Kitchen Update on a Budget! We’ve also fixed up the kitchen at our Mobile Home Makeover, which we haven’t shared here (for some unknown reason).
Our 3-Day DIY Kitchen Makeover on a Budget
1) DIY Kitchen Cabinet Upgrade

What is the cheapest way to redo kitchen cabinets?
The answer is simple: fresh paint and new hardware. That’s what made the biggest difference to these cabinets. The next simplest thing is to upgrade the cabinets with decorative trim and boxes. We did this too!
Painting Kitchen Cabinets
Painting cabinets is a great way to update them. You can disguise a lot of age and wear and tear while you drag your old kitchen into the current decade. We used this paint.
The colour is Cathedral Taupe. I love it! It’s warm, sophisticated and fresh while still neutral. The homeowners were leaning toward a very light cream (which would have shown all the cabinets’ many imperfections and age) or a medium blue (which would have looked a bit like a 90’s baby boy nursery with the yellow walls they wanted to keep). I pushed hard for the Cathedral Taupe colour. It was our most contentious decor choice, BUT I think we’re all happy I was so pushy!
This is our fourth time painting kitchen cabinets and Fusion Paint is the only one we’ll use now. The colours are beautiful and its durability has made us fans for life.

You betcha!
Adding Fresh Hardware
I’m a big believer in putting time and money into choosing hardware. If it’s something you touch, it needs to feel good in your hand. It goes without saying that it should look good too. But it doesn’t need to be expensive! The hardware here is proof.
I started by choosing these super affordable aged-brass-look pulls. They are modern, yet classic and the finish and feel are really good.
We chose the 5-inch drawer pull in hopes of covering the holes from the old pulls and so as to not require filling and sanding. If you’re choosing new pulls for your kitchen it’s a great idea to select ones that have the same spacing between the holes. If this is the case, you can swap them in really easily. (The weird “before” pulls were screwed into the drawer faces, so hole filling was required regardless.)
I then chose these antique brass look knobs to coordinate with the pulls.

Adding Height and Trim to the Cabinets
This was a bonus project that we talked the homeowners into – and we’re all glad they agreed. If your cabinets have a big gap between the top and the ceiling – this is the project for you!
By building a simple box above and adding crown moulding and simple trim these basic cabinets were transformed into something more custom and luxe. This project only took about an hour or so! We’ll be back with a tutorial soon.
2) Simple, Affordable and Easy to Install Backsplash

What is the cheapest and easiest type of backsplash to install?
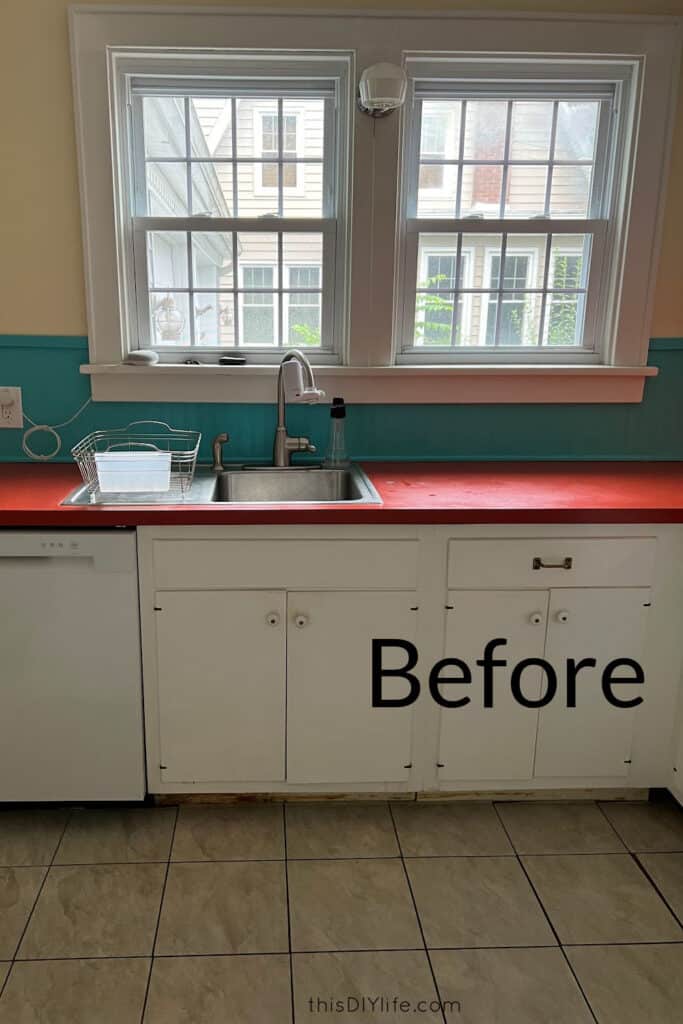
Beadboard! You always see this question answered as “peel and stick tile” but I disagree! That stuff may be easier to install than regular tile, but it is often MORE expensive than real tile. In this case, the backsplash is paintable beadboard wallpaper. Very cheap and very easy.
This wallpaper was in place for almost a decade and still held up really well – and this is a family that cooks pretty much daily.
Now, if we were to have a little bit more time and budget for this project, we would have done actual beadboard panelling. It would be sturdier for aggressive wipedowns etc. But, this kitchen already had beadboard wallpaper installed as a backsplash and our hope was to just reuse it.
This hope didn’t 100% come true. Despite our best efforts, while removing the old countertops by the stove, the wallpaper tore beyond repair. Luckily, they had the rest of a roll left over and we re-installed that whole back wall. (This wasn’t too tragic – we’ve done it before and wrote a whole how-to about it: How to Hang Paintable Beadboard Wallpaper)
It turned out that reinstalling it actually SAVED time. It only needed one coat of paint. That teal colour you see in the before shots? It took THREE coats of paint to cover (and there was still teal peeking through in some spots – which we left for them to fix as their punishment for choosing teal in the first place. 😜)
3) DIY Checkerboard Floor (Shhhh – it’s Peel and Stick)
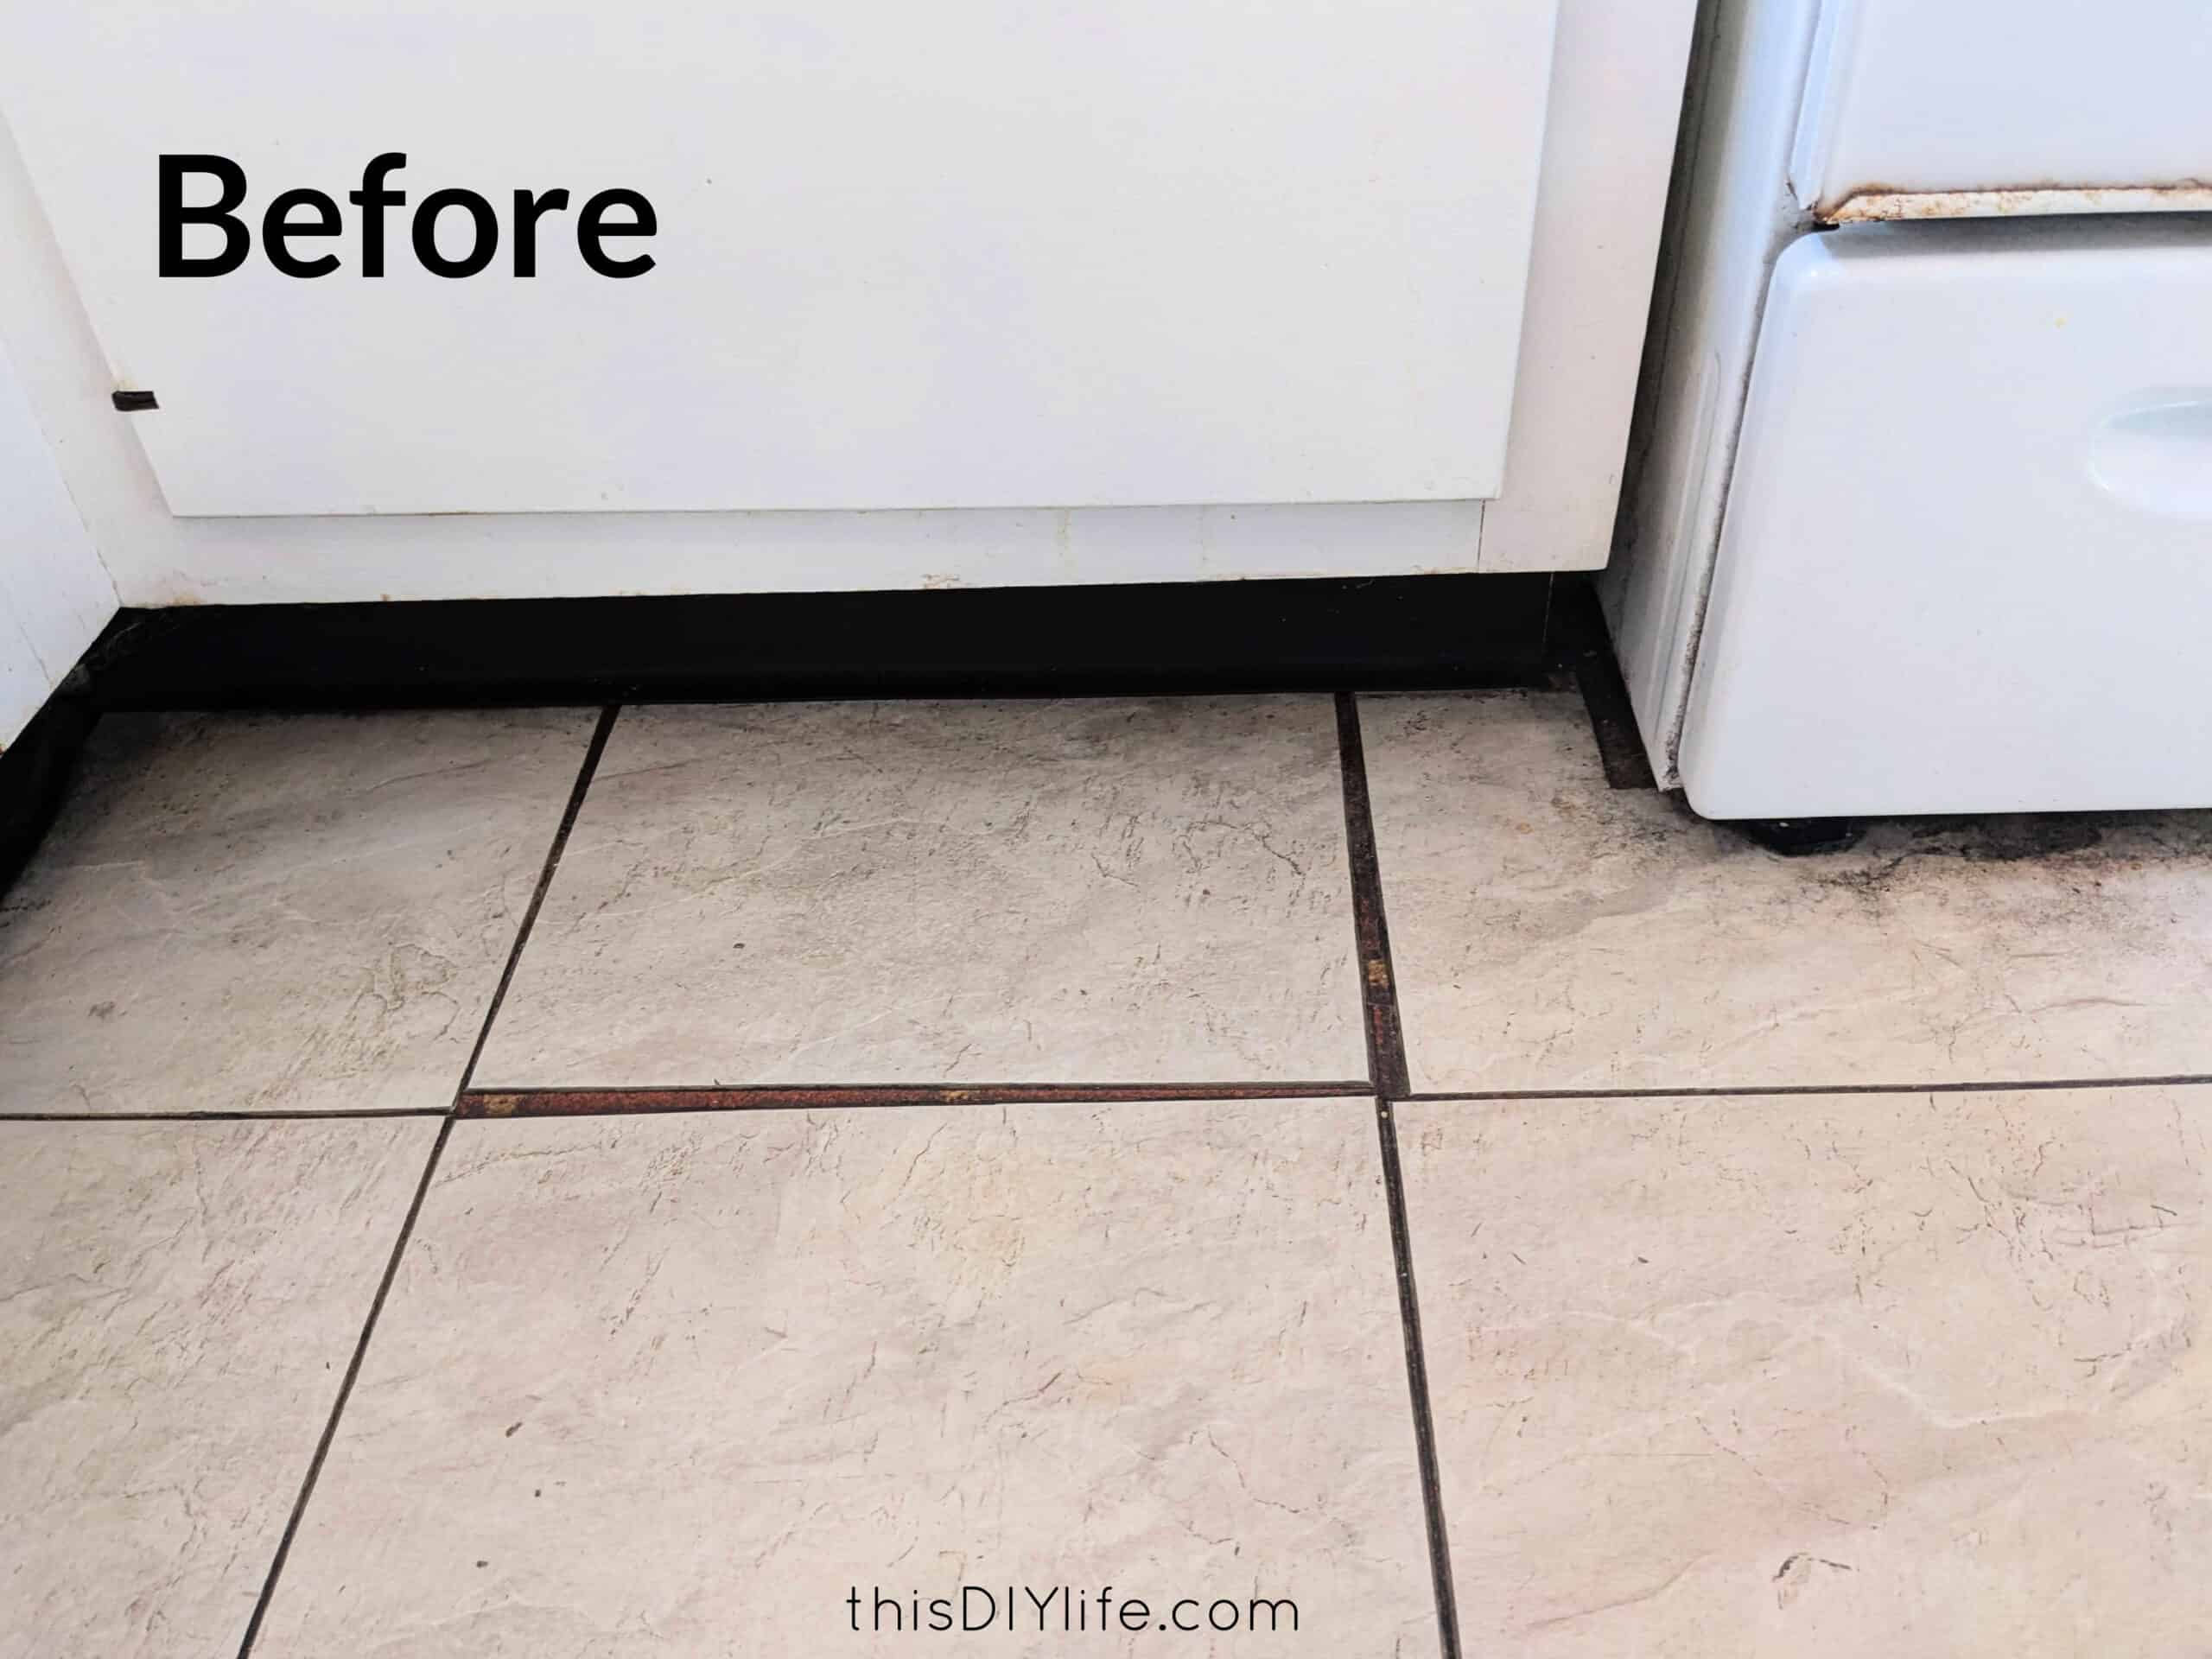
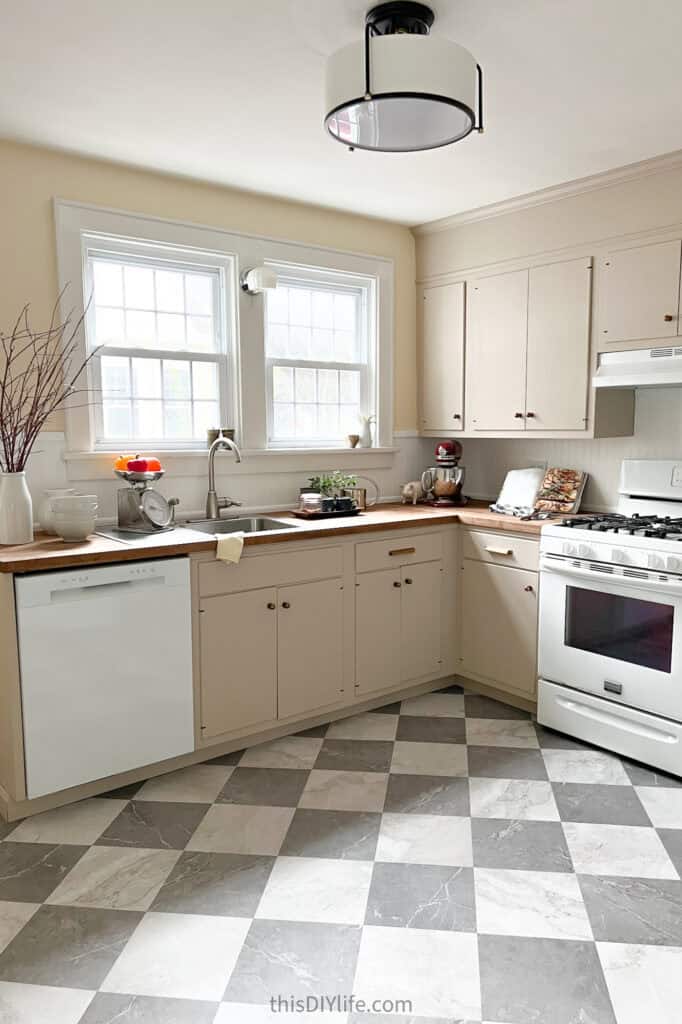
We used this light stone and dark marble peel-and-stick tiles.
(You might notice that same drunk person also hung the lower cabinet doors so that it’s impossible to make them line up properly. 😩)
Which flooring is the cheapest and easiest to install yourself?
Flooring doesn’t get cheaper or easier than peel-and-stick tiles. And the ones we chose for this kitchen are AMAZING. We would use them again in a heartbeat. Especially given they were only $1.29 a square foot!
We chose to do a classic, yet modern (detect a theme?) checkerboard pattern. The design uses this light stone and dark marble peel-and-stick tiles. The quality is excellent and they installed perfectly.
We chose to install them in a diamond pattern. (Well, I selected to do this and Ed went along with it knowing this was the most complicated choice possible – he’s a keeper.) It’s harder to install this way but looks more elegant. Because of the angles it takes more time to cut the edge pieces and there’s more wasted cut-off bits. But I’d estimate it’s maybe 10% more material and 20% more time. Worth it!
UPDATE
Here’s the completed project:
The BEST Faux Marble Checkerboard Floor Tile ~ and DIY Tips for Easy Install in a Day!
4) DIY Butcher Block Countertops (with Rich Dark Oil Finish)
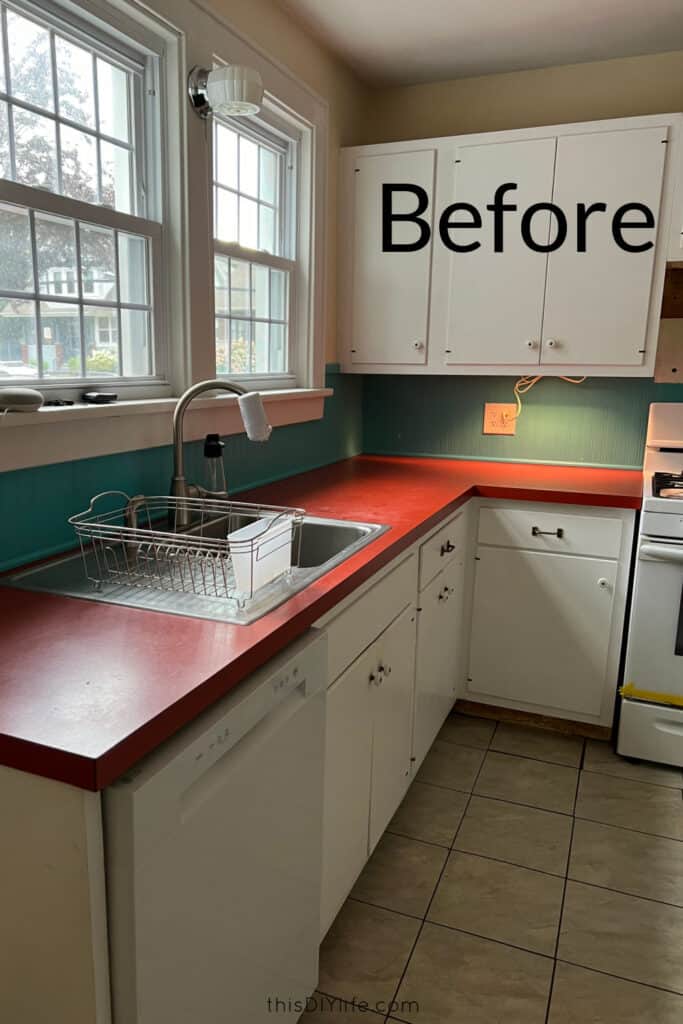
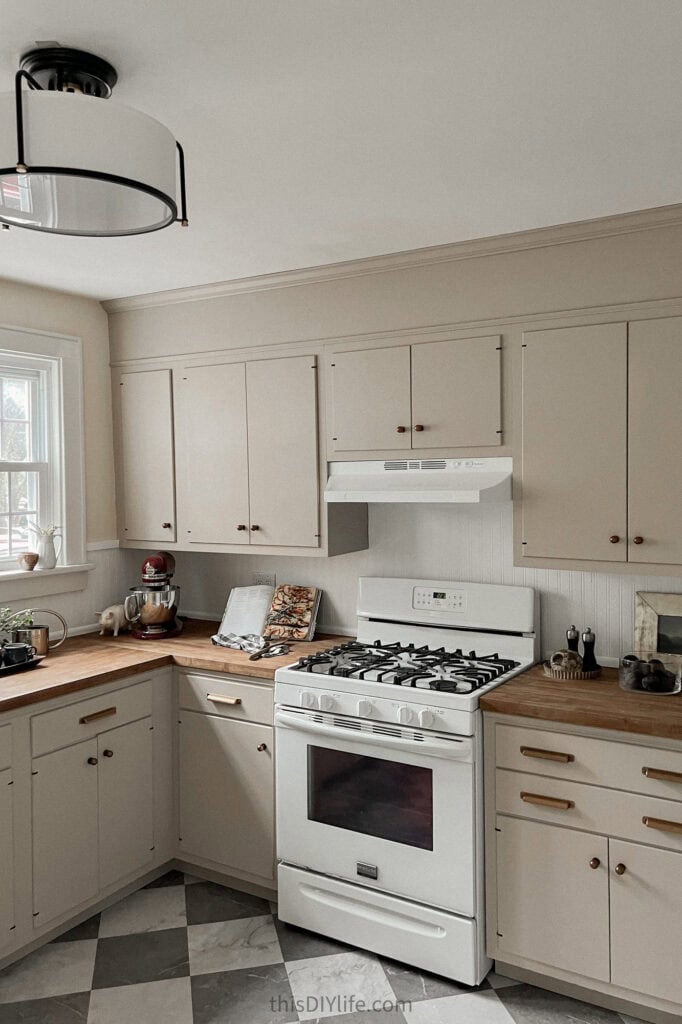
What is the best countertop material for the money – that you can install yourself?
We think butcherblock is the best affordable countertop material – especially if you’re installing it yourself. It is budget-friendly, yet still beautiful. And if you seal it properly with the right product it can be incredibly hard-wearing and just get more lovely with time.
Another affordable choice is laminate. Home decor shows and magazines have taught us that only the worst kind of destitute rubes use laminate – but it’s simply not true! If you choose well laminate can be really beautiful. We’ve had a marble look one in our kitchen at home for almost 10 years and it’s holding up well. You just need to use cutting boards and trivets to protect them – which is also true for butcherblock. (I feel a rant brewing in me about laminate snobbery – which I will save for another post.)
If this kitchen didn’t have a corner in the countertop, we’d have considered laminate – but a pro is best to fabricate corners – we wouldn’t touch that as a DIY.
We used these super affordable butcher block countertops (on sale!). They’re made of Hevea, which is a wood species we’ve never even heard of before. So clearly this was our first time using it. It turned out beautifully and was easy to work with so we’d recommend it!
I think the beauty of these countertops is enhanced with this wonderful warm finish. We found this very well-reviewed oil product that we’d also 100% use again. It will protect the wood from spills, it’s easy to apply and didn’t smell awful. Plus it’s food-safe and GORGEOUS!

There was enough leftover for additional coats, which the homeowners may choose to do. We would have done more, but time was too tight.
5) Upgraded, yet Affordable Lighting
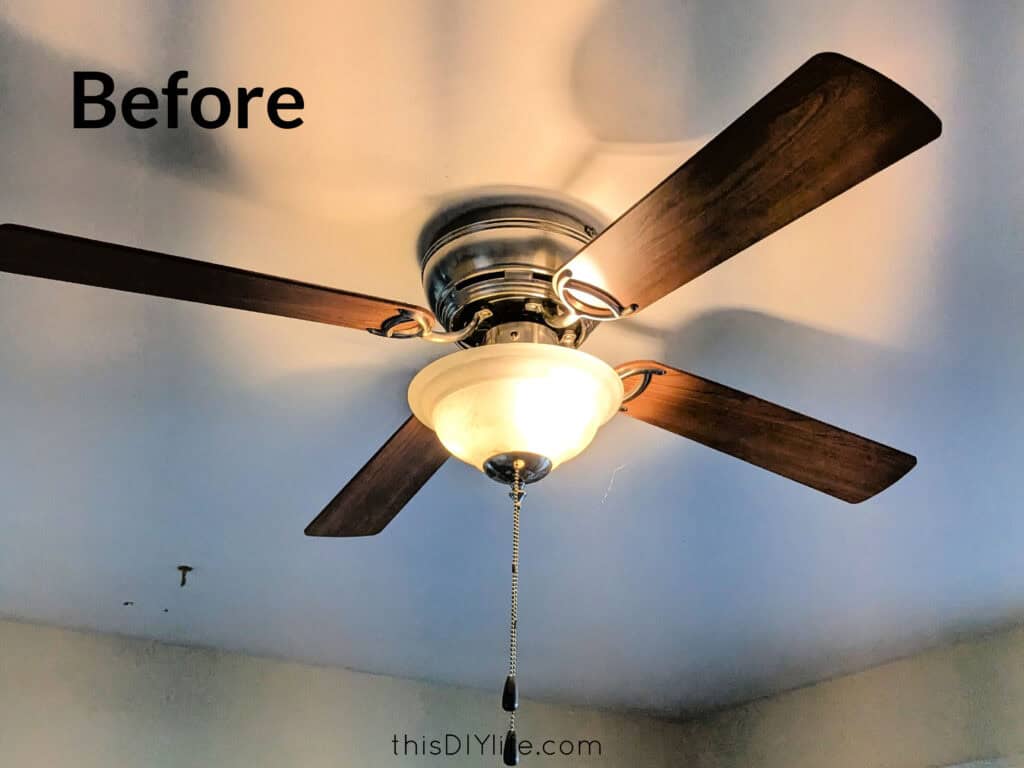
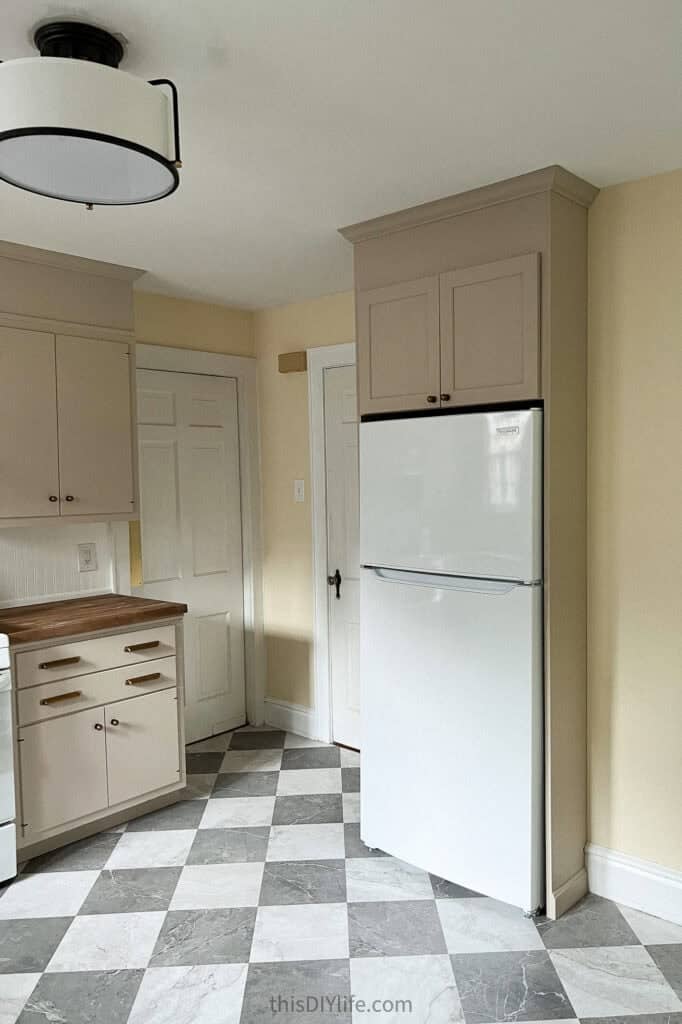
Lighting doesn’t have to be expensive to be beautiful. Take the lighting choices we made here for example.
The cheapest and easiest, of course, is to use what you have. That’s what we chose to do with the light over the sink area. It is a classic fixture that could be original to this old house. It can be tempting to swap everything for something modern, but vintage touches can be more charming.
We found this light fixture for under $100. (It’s no longer available, but this one is similar.) You can buy much more high-end and expensive ceiling lights, but why? It’s up so high, who is even going to notice the extra flashiness? If you can find a dupe for a designer light fixture go for it!
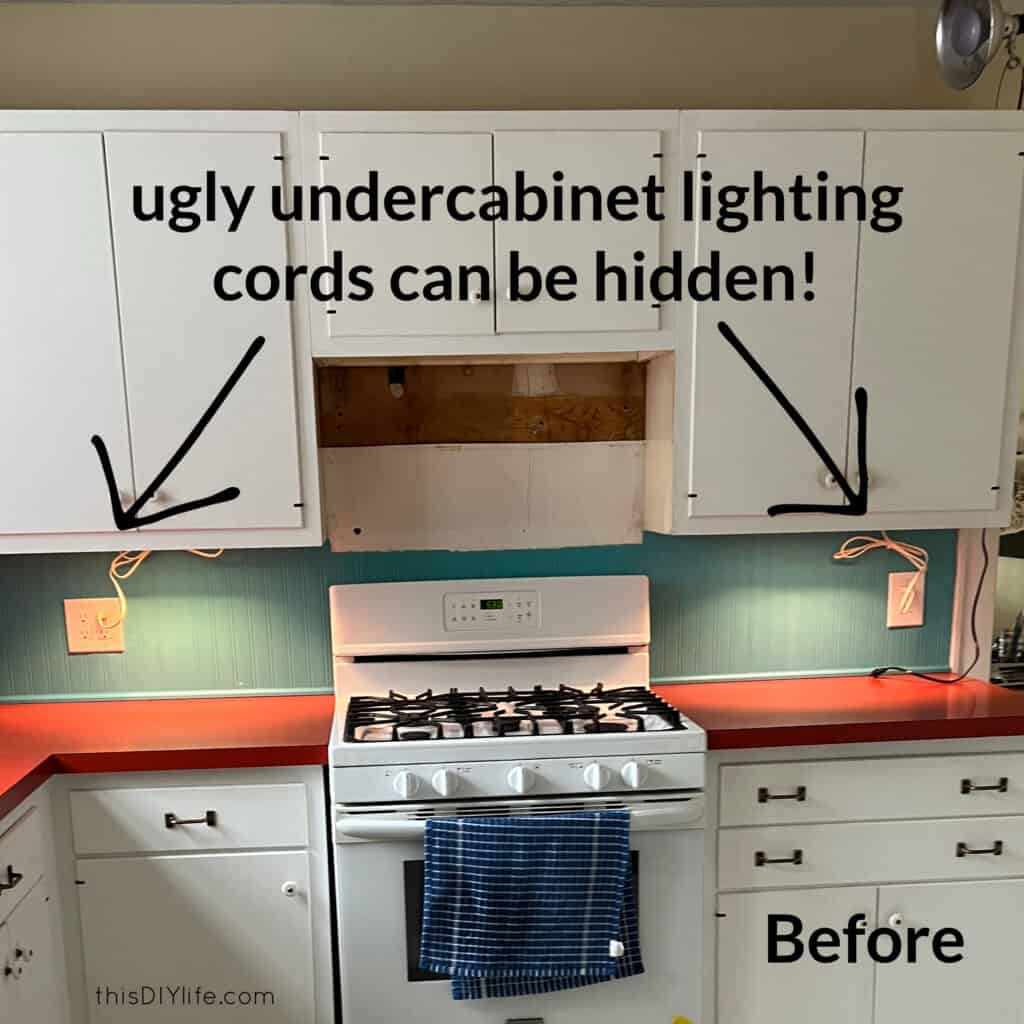
The last lighting change we made was to install the undercabinet lighting in a better way. The homeowners got things started by installing some really simple units – similar to these. As you can see in the before shots – the undercabinet lights are plugged into the backsplash area. This looked cluttered and low-end. With a couple of little tricks we were able to hide the wiring for a classier look.
Interested in learning how we did this? Let us know! We can explain it all later, but the only thing we needed to buy were these cord ends.
6) DIY Fridge Surround


How to make a freestanding fridge look built-in?
This is the project that almost didn’t get done. a) It took a ton of convincing to get the homeowners to agree to it. and b) We were running short on time and a bit stressed to get ready for photos and the reveal.
Ed was gung-ho though – we knocked it out in about 3 hours! All it needed was a second coat of paint later that evening. Here’s the full fridge surround tutorial.
If we had more time and money, we think building in a shallow run of pantry cabinets to the right of the fridge would make it look less like a lonely island. But we couldn’t. Maybe the next owners will…
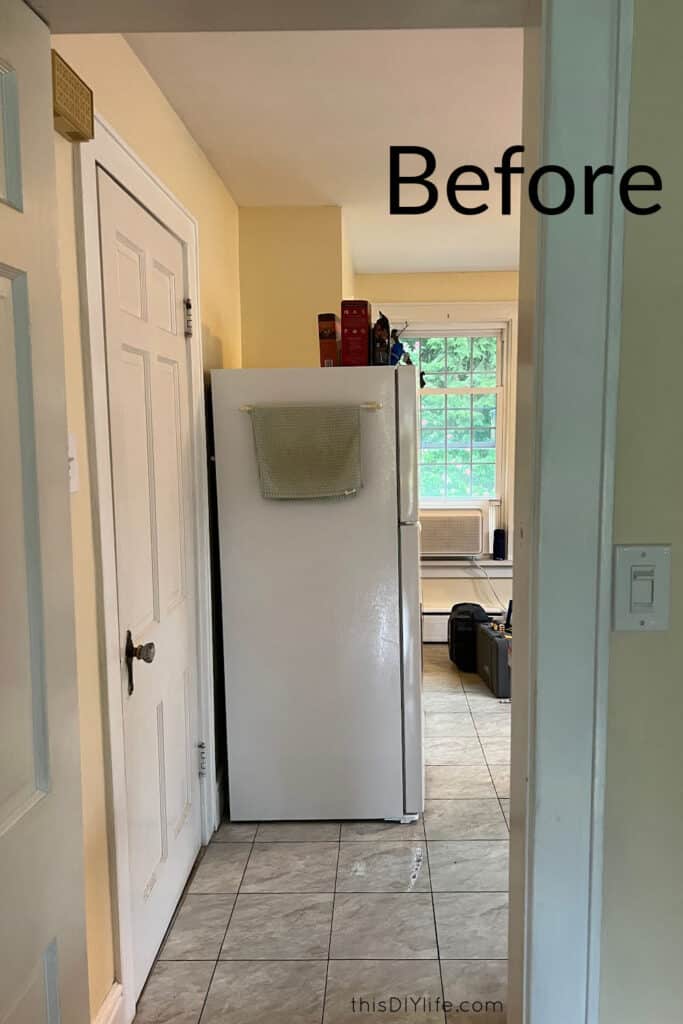
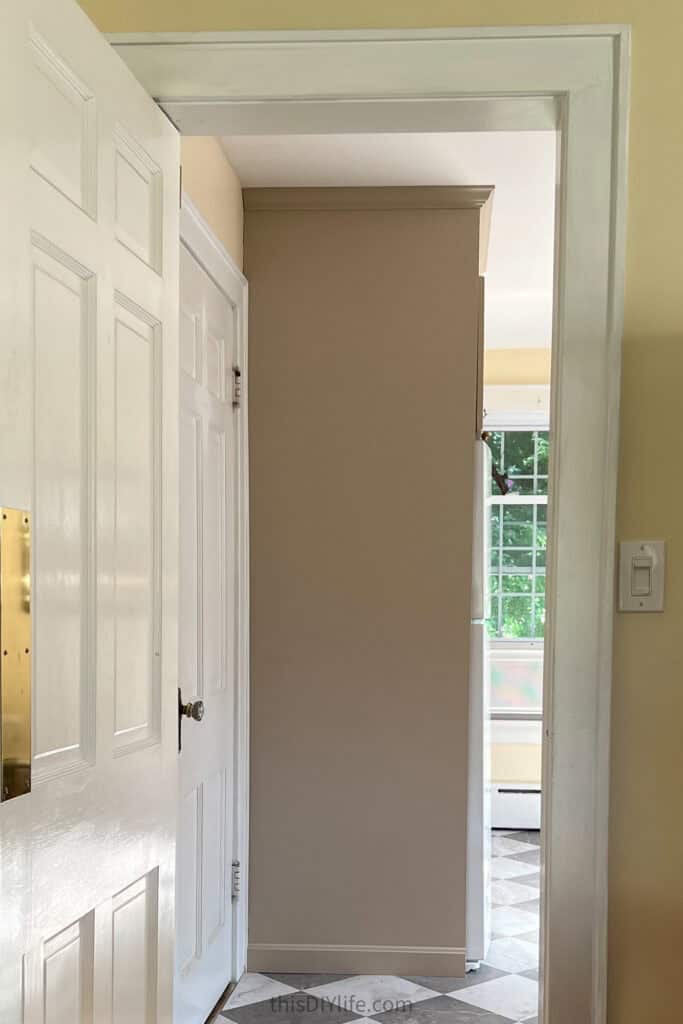
(Though I notice the fridge needs a bit of adjusting to be level.)
The final thing we did was install this very basic ductless range hood. Given more time and budget we would have done something more dramatic for the range hood, but c’est la vie.
UPDATE
Here’s the completed project:
DIY Refrigerator Enclosure ~ How to build an over the fridge cabinet the easy way!
7) Total Cost of Our 3-Day DIY Kitchen Makeover on a Budget:
- Paint and TSP Alternative for cabinets: $95
- Cabinet hardware: $70 (with some knobs leftover)
- Materials for cabinet upgrade: $40 (mostly remnant materials)
- Butcher block countertops, finishing oil, brackets: $500
- Fridge surround: $200
- Floor: $190
- Lighting and range hood: $200
- Total Cost: $1295
Not a lot of money to go from that to this…

We’ll be back with How-to Tutorials for all these projects! In the meantime check out more of Our DIY Kitchen Makeover Ideas…
- How to Hack In-Stock Cupboards to Make a Custom Kitchen (on a Budget!)
- How to Cut a Cabinet for Over the Range Microwave (Our Budget Kitchen Update)
- How to DIY Open Kitchen Shelves from Old Cabinets (a Beautiful, Budget Kitchen Update)
- DIY Refrigerator Enclosure ~ How to build an over the fridge cabinet the easy way!

Robin and Ed are a DIY-loving couple with over 25 years of design and build experience. Also, Robin is a Nutritionist and former Registered Dietitian and Ed is an award-winning Business Educator. We share strategies for living a rich life on a DIY budget: creative money-savvy ideas for a stylish home, healthy meals and family fun. Our work has been published in the pages of Do It Yourself, Farmhouse Style and Better Homes & Gardens magazines.


Good job, your kitchen looks great! In spite of everyone choosing stone countertops, I still love the look and feel of butcher block. I’m doing a full remodel of my 32 year old home that’s way outdated and the materials are very worn and am considering a wood countertop. Thanks for the tip about Hevea! Was Hevea the most cost efficient for you? I saw online that Rock Maple and Acacia are some of the top species of wood for countertops (acacia being waterproof). What other woods did you consider before you decided on Hevea? How often do you oil your butcher block countertop? Thanks!
Hi Kathleen! Hevea was the most cost effective option – that was real wood all the way through. That was what we wanted so that the end cuts would look clean (some really cheap ones are particle board in the middle). We didn’t consider many species simply because we were on such a tight budget. In our own home we have oak and they’ve held up really well.
The oil manufacturer labelling will advise how long between re-oiling. I think once a year is a pretty common recommendation – though we go a lot longer at home – perhaps three years or more. 😬
Happy projecting! 🙂
That is an amazing transformation. BRAVO! Love the taupe and the idea of shelving next to the fridge is a good one. I’d let you two transform my kitchen with as much time and budget as you need 🙂
Thank you so much, SuzyQ! Your comment means a lot to us! 🙂