

How to DIY Faux Board and Batten Paneling – the easy way!
By Ed and Robin
This spring, we saw another domino fall in our reno-cycle. You know, when you update one room (or even one thing in one room) and then it promptly makes another room seem tired and needy by comparison.
For us, it was the budget bathroom reno we did last spring. You might remember:
- we updated our vanity and
- did our medicine cabinet makeover,
- put in a new peel & stick tile floor (which looks 300% better than it sounds),
- put up some beadboard wallpaper and
- added discount and vintage hardware.
It’s fresh and happy, but suddenly our nearby front hallway and dining room started showing their age. The paint looked a lot more blah. The walls looked a little more dented (kids! husbands!). And in general, things just needed a little more love.
Enter the faux board and batten panelling and plate rail idea.
Robin had been entertaining it for a while (it actually started as part of another larger domino effect, involving curtains, chair reupholstering, a sideboard we found at the ReStore and a paint colour crisis). Confused? So were we, but it all came together.
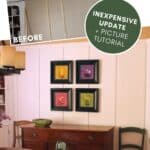
We pulled it off and are happier with the panelling look than we even imagined!
Here’s how it’s done:

How to DIY Faux Board and Batten Paneling
Faux Board and Batten Materials:
- Batten strips (3/8″ x 1 3/4″).
- We used Finger-jointed pine – a cheap option for anything you plan to paint.
- We did 1 every 16 inches, so get measuring in your room to find out how many you need
- Plate Rail (1/2″ x 2 1/2″ MDF):
- We kept the profile square and simple, as everything else wasn’t.
- The width also had to line up with a pillar, a doorway, two corner cupboards and a window. It would have been very challenging if we picked a more ornate profile. (And anything more than a bevel has Robin calling it “fussy”.)
Faux Board and Batten Steps:
Step 1: Draw your plate rail.
Get a ruler, long level and a pencil and draw a line on the wall.
Be sure to account for any weird openings, like doors with different heights and windows.
It is easy to erase and change at this point – take advantage of this.

(She’s also demo-ing her spooky, spooky translucent left hand.)


Step 2: Measure, cut and attach the plate rail.
This may involve some mitre cuts, so plan ahead. Do the long runs first, and mitre/overlap any joints. We borrowed a nail gun and used trillions of nails.
Countersink the nails and fill the holes.

Step 3: Prime and paint the rail and bare wall.
We did a test, based on what other blogs had said. Many people lamented not painting the walls before attaching the battens. We did one wall battens-first, then paint, and another wall of paint-first, then battens.
As much fun as it is to jump right into battening, the wall we painted and primed first painted easier and faster (mostly because you can roll the whole thing)

Step 4: Measure, Cut and Attach the Battens.
When planning out our battens, we treated each wall as a separate section, as our room was broken up with corner cupboards, doorways and Robin’s big “art” piece.
Yours will be different, but the same idea of drawing lines in place and eyeballing the whole thing still applies. Have we stressed this enough? Good – let’s move on!

When I build that time machine I am totally giving myself a swat in the back of the head… Anyhow, it was fun to see the project take shape so quickly.
Step 5: Fill the nail holes and sand your battens.

 , sweet coverer-upper of shoddy mitres, gaps in unsmooth walls and general maker-beautifuller of things…
Step 6: Prime, paint.
And if you are painting white, like us, repeat the painting part for 4-5 coats. Holy cow – it takes a lot of coats of white paint to cover. We did not expect this.

TaDaaaa…


We are absolutely in love with it. It makes the room feel fresh and finished. We are still toying with the idea of a new colour above the plate rail – maybe something more dramatic than beige – is there such a thing?
Any questions? Feel free to leave a comment.
More of our Dining Room Projects:
- How to Upgrade Basic Curtains ~ Custom Looking Drapes with No Sewing Machine Required!
- Drapes Too Short? 6 DIY Ideas To Lengthen Curtains ~ 3 are No Sew!
- How to Reupholster Dining Chairs – A Super Easy Beginner DIY Makeover Project!
- DIY Apothecary Cabinet Inspired Old Hutch Makeover (and where to find Apothecary Drawer Pulls!)
- Beautiful & Easy Faux Mercury Glass DIY Mirror Tutorial
- How to DIY Faux Board and Batten Paneling – the easy way!

Robin and Ed are a DIY-loving couple with over 30 years of design and build experience. Also, Robin is a Nutritionist and former Registered Dietitian and Ed is an award-winning Business Educator. We share strategies for living a rich life on a DIY budget: creative money-savvy ideas for a stylish home, healthy meals and family fun. Our work has been published in the pages of Do It Yourself, Farmhouse Style and Better Homes & Gardens magazines.

Robin Hicken is a Home Design and DIY Creator with over 30 years of experience, a Nutritionist and former Registered Dietitian.


It looks great! Thank you for the tutorial. A question though. Please forgive my ignorance, but doesn’t the wall texture still show through between the battens? We have a classy combo or orange peel and knock-down textures on our walls. Up close and in person, is it obvious that there’s no board and it’s just painted wall? Any suggestions for this dilemma would be appreciated, please!
Sorry for the delay, Elisabeth – technical glitch here 🙁 We were lucky and our walls have very little texture. I think with orange peel finish you’d want to put up thin panels of MDF first to hide the extra texture. 🙂
What a beautiful way to add character to any space!
We totally agree, Shauna. And it is so much easier and less expensive than it looks. Thanks for your comment! 🙂
It looks so lovely! Thanks for sharing!
Aww – thanks for your kind comment, Tamaira! 🙂