

How to Build Raised Garden Boxes DIY (Grow vegetables anywhere!)
by Ed
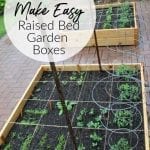
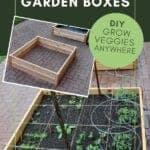
You can grow vegetables anywhere! We’re going to grow them in the driveway, of all places. First off we did this project: garden boxes DIY.
Why the driveway? Well, last time we talked about how (and why) we’re Growing Vegetables in our Driveway (read Part 1 here)
Today, we’re going showing you step-by-step how we built the raised bed garden boxes. It’s very straightforward – a build a beginner can do!

How to Build Raised Garden Boxes DIY
Our initial inspiration for these beds came from Ana White and her $10 cedar raised garden. Sadly, ours will cost more than Ana’s, but we have our reasons:
- We wanted a deeper bed. Planting on a warm, dry driveway will mean our soil will dry out quicker.
- Deeper beds = more soil = more moisture for plants.
- We wanted a stronger bed.
- Ana’s beds from fence boards are cheaper, if you can make that work for you, go for it. But, we imagined a kid sitting (or walking or skateboarding) along the edge of our garden and seeing a split or bowed fence board and earth and seedlings pouring out.
- We wanted to put some landscape fabric inside the boxes so the earth didn’t wash down our sloping driveway in the rain.
- We wanted something for the long-haul.
- These will be part of our house’s curb appeal. We wanted something attractive and durable.
- MOST importantly: We chose cedar.
- While Pressure-Treated boards would be less expensive, we didn’t want those chemicals leeching into the food we were going to all this trouble to grow.
Raised Garden Boxes DIY Materials List (per Box):
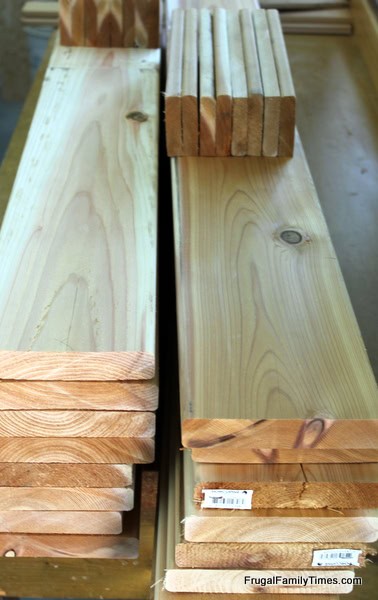
- 4 cedar deck boards (5/4″ x 6″ x 8′) ~ thicker and sturdier than fence boards
- 1 cedar fence board (1″ x 6″ x 4′) ~ these will be the corner pieces
- Outdoor screws/nails
- Landscape fabric
- Hammer and Drill
- Staple gun/staples
- Circular or Table Saw
- DIY rasied bed soil mix
Raised Garden Boxes DIY How to:
Step 1: Cut the Deck boards in half.
This should give you 8 four-foot lengths.
Step 2: Rip the Fence board down the middle
Do this yourself or get your building centre to do it for you – e.g. Home Depot will rip it for free.
Then, cut the resulting 1 x 3 into 11″ lengths. (The Deck Boards are not actually 6″ wide, due to finishing, so stacking two of them only makes the planters 11 inches tall.)
Step 3: Assemble the first level of your frame.
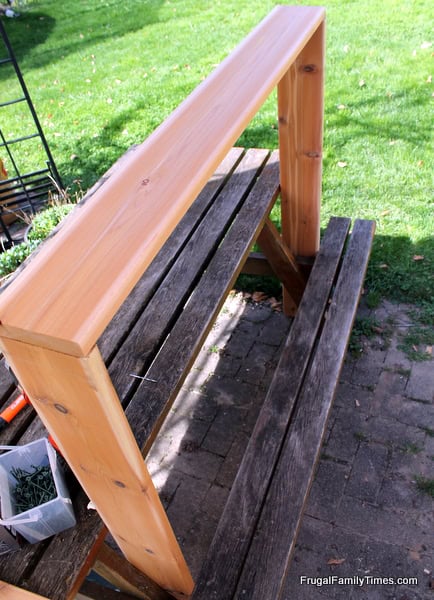
Arrange the deck boards into a box – it won’t be a perfect square since you are drilling into the ends, but it will be close.
I found our picnic table to be a near-perfect jig for holding the frame parts together. In absence of an old picnic table, you may have a friend that can hold the parts for you.
Assemble it with screws, making sure to pre-drill the holes first since you are working near the ends of the material and it splits easily.
Not to be mistaken with a dance I do at summer BBQs after a beer or two.
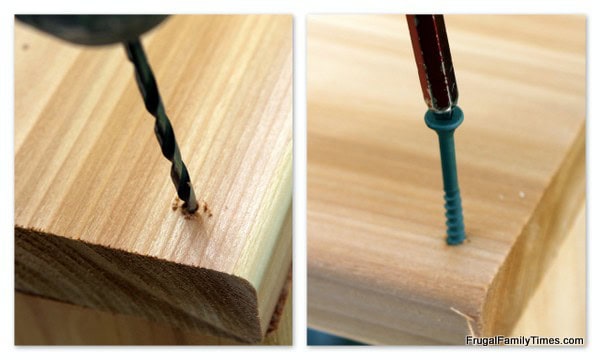
Split ends are not just something you hear about on Vidal Sassoon ads. Ba dum bum
Step 4: Repeat the above steps for your second layer.
Get the same friend to hold the two layers together, or use some clamps. Look the box over and make sure both layers are lining up all the way around.
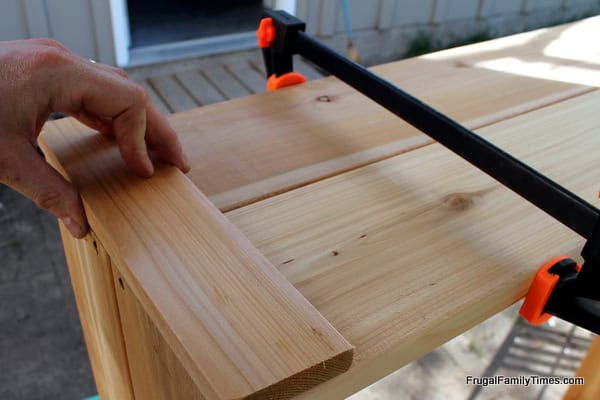
Step 5: Position the 11″ pieces of fence board on the corners
Cover the screw-joint (insert your own screw-joint joke here) on the corners of the fence boards. Check things over and drive some nails.
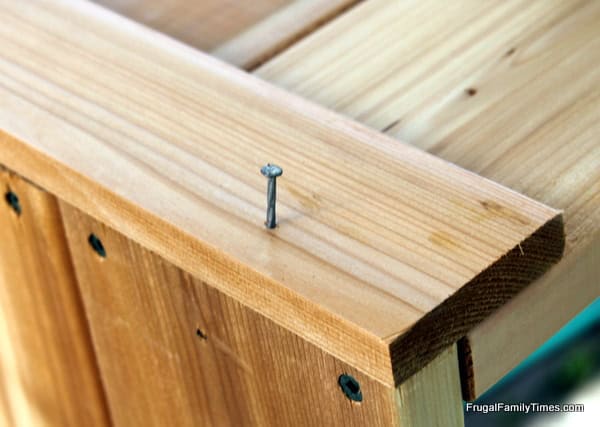
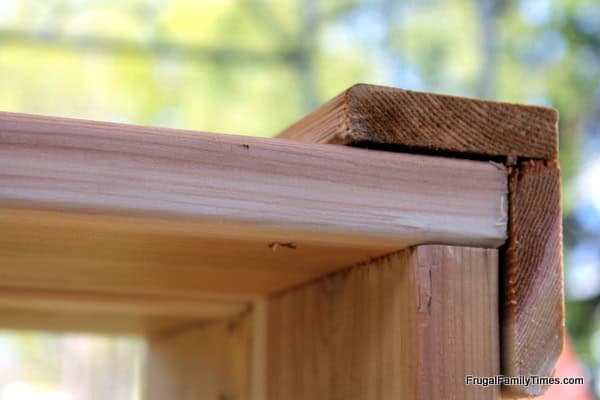
Not super-pretty, but solid and nice enough for what we are doing.
Step 7: Repeat on the other 3 corners.
The box in the foreground shows all 4 corners assembled and is ready to join its friend in getting lined.

Step 7: Line the boxes with Landscape fabric.
Carefully trim and fold the corners and staple it all into place.
Overlap by a foot in the middle of the box (unless you can find some 6-foot wide landscape fabric). You may be able to skip this step if your driveway is really level or if you are building your raised beds on top of earth.

Done!

Cost to build raised garden boxes (per box):
- 4 Cedar Deck Boards (9.83 each) = $39.32
- 1 Cedar Fence Board $4.49
- Screws/nails ~ $3
- Landscape Fabric ~ $25 for 100′ (we used maybe 15′) so $3.75
- Total Cost = $50.56/ box
Not $10 a la Ana White, but the closest retail product we found was this one at Canadian Tire, $50, the same cost as ours, but it’s smaller in size, unlined, not-natural wood and half the depth. We feel good about our choice.
Next time we will talk DIY raised bed soil mix and what to put into your frames to make them the optimal growth environment for seeds and seedlings.
After that, we’re talking about choosing and planting – and our plan to get our daughter to try more veggies.
(As far as planting – we are following the advice in this book – it’s pretty much considered the bible of raised bed gardening.)
Questions, comments or complaints? (Other than how white my legs are… gimme a break, it has been a long winter…. and tanning isn’t healthy… who am I kidding, this is as tanned as I ever get)
Keep reading here for more of our DIY Garden Boxes DIY – Square Foot Gardening experiences and tips!

Robin and Ed are a DIY-loving couple with over 25 years of design and build experience. Also, Robin is a Nutritionist and former Registered Dietitian and Ed is an award-winning Business Educator. We share strategies for living a rich life on a DIY budget: creative money-savvy ideas for a stylish home, healthy meals and family fun. Our work has been published in the pages of Do It Yourself, Farmhouse Style and Better Homes & Gardens magazines.




Hello, I did follow your instructions and bought the material at Home Depot (British Columbia April 2021). Everything went smoothly. Thank you for your design! The only difference was the price: the four cedar deck boards were 4 @ 22.31 = 89.24 plus one cedar fence at 26.22. However, the final product looks amazing. I cannot wait to grow my plants and veggies. Thank you again.
I’m so happy you let us know you made this, Mihaela! Glad it looks amazing. 🙂 I don’t doubt that it cost more – sadly these “unprecedented times” have made all lumber much more costly than when we first made ours. 🙁 Robin
Such a cool diy project. I'm fall in love.
I have been looking around – and I think this will be our winner for what we build this spring. How much did it cost to put soil in these puppies? Just trying to budget appropriately 🙂
Hi Amanda – this post we talk all about the great soil we used: https://www.frugalfamilytimes.com/2013/05/growing-vegetables-in-our-driveway-soil.html
It cost us about $33 to fill the first time. And then we add some composted manure each spring. Gets cheaper! 🙂
Thanks – that is super reasonable! Definitely an upfront investment, but less the next year. Thanks for sharing 😀
WOW! Just an amazing idea. I'm a gardener but never make garden bed box before. It's an a unique idea. I'm so excited to make it. Thanks
We love ours, Steven! Come back and let us know if you make them. 🙂
That's so cool, Adriana! We LOVE community gardens. Doesn't copper ward off snails? Could you edge the beds with copper? 🙂
Wow, what a lovely idea. I now can see a small garden in our future
Great! Come back and let us know if you do, Ivory. 🙂
These are definitely great for storage! What is the best planer to use for these boxes?
How great! I can’t wait to see the projects you did with the new saw! i will make for me new one.I love the progression shots! Your home is beautiful and shows so much love!
Hi, such a great idea! I'm thinking of adapting this for the roof. I was wondering if the landscaping fabric would have chemicals that might leech into the soil, would you know anything about that? Many thanks.
Great guide. I'll do it to plant some carrot and strawberry in my little garden. Your guide make me feel it is easy to do so I think I can do it well. Thanks so much.
Your guide is very detail and helpful. Thanks for sharing!
Thank Robin. This looks do-able. I can plant some carrots and squash.
The article you have shared here very awesome. I really like and appreciated your work. I read deeply your article, the points you have mentioned in this article are useful.
What could you suggest for building on an upper lever apartment patio?
In that case, given your limited space, I'd go with pots. Easier to move into the sun when needed and will still leave you space for sitting out there. 🙂
I just built this planter in 5' x 7' with weed control fabric and it's great! We needed 20 bags of soil to fill it. And I left one of the vertical pieces on each corner a little longer, so I can add a screen in the future if necessary (we have wild rabbits). Thank you so much!
That's so clever, Beverly! We're so happy the plans worked well for you. Thanks so much for letting us know! 🙂
You have two choices once it involves building a router table. Either you build one will|which will|that may fold in otherwise you can sit your router table on a clear surface. The folding one comes in handy if you lack cupboard space.
Here's some ideas that have helped a great many people: Google/Bing any aspect of DIY you're curious about. Hang out in home improvement stores such as Lowe's, etc and ask questions; get familiar with things. Whatever else you can think of that will give you information on doing what interests you.
What if you don't have a saw and have never used one before? Where does a beginner begin if he wants to DIY?
You'll need a saw! 🙂
Hi there…can we use pinewood to build these?
Pine won't hold up well outdoors – it will start to rot.
These instructions were awesome & simple!! I built 2 of the boxes today & they turned out great!! I'm so excited!! Thank you, you guys rock!!
How did I miss this?! That's so great – thanks for letting us know! 🙂
Great idea! What can you plant in these boxes? I'm looking to grow some carrots and squash.
Thanks!
Hi Stephanie – here's what we planted last year – including carrots and squash! This year we are doing virtually the same – except no pumpkins. This year we're doing zucchini. 🙂
http://www.frugalfamilytimes.com/2014/05/choosing-vegetable-plants-with-kids-our.html
Hi! Found your wonderful blog through Pinterest. I'm thinking about building a raised bed on the driveway of our new home. Quick question, how does it drain? Thanks!!
The landscape fabric isn't 100% waterproof, so water flows through it. It really just keeps the soil in place and the extra water drains away.
Thanks for the question,
These look really nice. Pinning for future reference!
Thanks, Rita!