
We may earn a commission on purchases made after clicking links on this page.
by Robin
We’ve made a simple DIY media cabinet built-in – it hides so much and it was pretty cheap and easy to make!

We’re a family of nerds. We love technology and gadgets. They’re fun to play and fiddle with.
BUT, I’m the least nerdy of the nerds and I hate looking at all that mess. The chords and the boxes and the doodads. Blech. The visual clutter drives me batty.
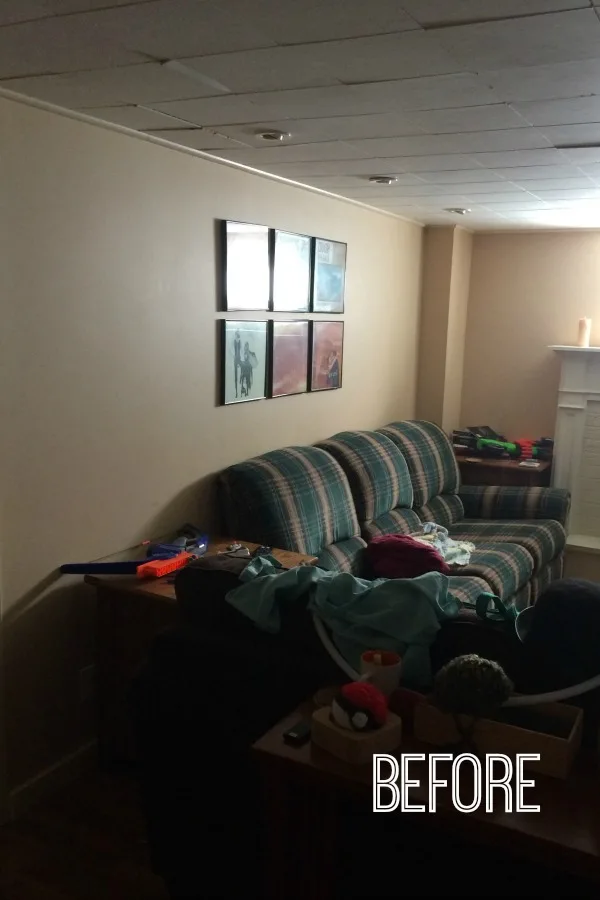
The last project we shared was a hidden TV cabinet (pictured above). This time we’re hiding all the rest of the crap essential gadgets that plug into it.
I wish we had a photo of this TV wall just before this unit was installed. It was like a black octopus with tentacles ending in other octopuses with tentacles.
So I set about designing an affordable and simple-to-make DIY media cabinet that looked tailored and functioned well.
I had a trick in mind where we could hide all the gadgets, yet still use them, through a decorative door with a secret. Here’s how we made our custom entertainment center DIY…
DIY Media Cabinet Built-in
Custom Entertainment Center Materials:
- 3 Kitchen Upper Cabinets (30×36) Ours were in-stock from Home Depot
- Home Depots are 12″ deep vs. IKEAs 15″ deep – this 3″ difference was important to us!
- Wood top: made with 2 – 2″x8″x10′ framing lumber
- DIY Reclaimed wood stain
- Faux brick panels
- Wood glue
- Door insert: Metal Sheet & Antique Brass Metallic Spray Paint
- Door material 1″x4″ Aspen
- Kreg Jig
- 1″ Melamine panels to rip for filler sections
- Euro hinge – 2 per door
- Forstner bit
- Brass look door hardware 10″ length
- Fusion Mineral Paint in Ash
How to:
Step 1: Make a Good Plan

In order to create balance on this wall, we decided to mimic the same box on the other end of this wall.

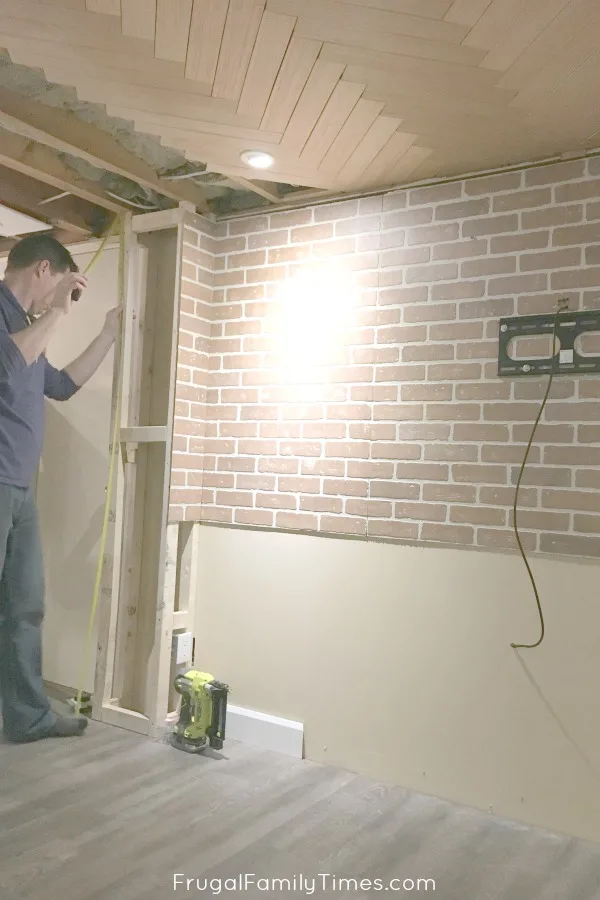
You can also see that we covered the top half of this wall with faux brick panels too. In our most boring of basements, we’re adding texture and character in all the spots we can.
Ed then used our faux bricks technique to make the fake brick panelling look real. It really works and couldn’t be easier!
Step 2: Hiding the Electronics Cords

Ed wishes that he did this step BEFORE we installed the brick panels.
With some NSFW language, he retrofitted a groove in the drywall behind the panels. This meant that we could run the electronics wires from our DIY Hidden TV Cabinet to the media unit invisibly.
I’m so glad he did! In a perfect world, you cut a 2-3″ strip out of your drywall, then hang the brick panel. That is definitely Ed’s suggested sequence…

Centre and hang the middle cabinet.
Step 3: Turning Kitchen Cabinets into a Custom Entertainment Center

We love to recruit the kids into our projects whenever possible – it gives them skills and they really enjoy it and I think it gives them a bit of pride that they had a hand in something cool.
My dad gets dragged into many of our projects, just by the fact that he’s got mad DIY skills. We need him so much less than when we first bought our home – but he’s roped into stuff when we’re stuck. We’re so thankful for him!

With the middle cabinet centred in the space and mounted to the wall with 4 screws into the studs, we worked our way out adding a spacer between the cabinets.
It was cut from a white melamine panel, clamped and nailed so it could be a straight edge for mounting to the next cabinet.

We used some spacers underneath to hold it to the right ‘floating’ height. We then clamped the two cabinets together, landmarked studs behind it and drilled 4 screws through the back to hold it in place.
All of this was then repeated for the other side. Done!
We decided to build our own doors after finding similar doors in stock were over $70 each. Each!
We needed six. $420 for boring, basic doors = not.going.to.happen. The premade doors weren’t going to be nearly as special.
Ed used this tutorial to build the simple, Shaker style, solid doors for the side units. We won’t repeat the same tutorial here, but below you’ll find the steps for how we built the centre doors with metal inserts.
Step 4: Hiding Electronics with Metal Screen Doors

I wanted to build doors that would hide the electronics but still let the remotes work. These metal inserts do exactly that, plus look pretty great.

I chose the “Union Jack” pattern to complement the criss-cross design of our Hidden TV Cabinet.
These sheets come in about a half dozen other patterns.


The one difference would be cutting the groove narrower for the metal panel than you normally would need to for a regular door. I found one pass through the table saw was all I needed width-wise.
Depth is another story – If your doors are smaller than ours, you will likely need to cut the metal panel down a bit. Ours were so close to perfectly fitting the panel so I just cut the groove deeper.
Go carefully and test fit – you don’t want the groove too deep or it will make the metal panel loose in the frame.

This allows you to check everything for fit, paint the areas closest to the metal, then take it partially apart again to insert the metal sheet.

Mine caught in a couple spots, but with some finesse and gentle prying, it went all the way in.

Again, there may be some finicky messing around to get the metal into the groove, but it all works out.


While this is showing a regular Shaker door, we did the same thing for the metal sheet insert ones.
Step 5: Building the DIY Media Cabinet Wood Top

You could use a table saw, circular saw or jointer/planer. We used all of them at some point.
Our issue was a workshop with less than 20 feet of workspace and a ten-foot board to work with.
When we finally got two clean edges to join, we glued, clamped and then pocket screwed them together with our friend Kreg.

For the install, we attached it with screws from underneath the cabinet tops to hold it down.
Step 6: Add Affordable Door Hardware

I was really impressed with these brass-look pulls – they are super affordable and look and feel pretty legit.

The final trick we did was painting the inside of the centre cupboard and shelves with this dark paint. The mostly black media players blend in and are virtually hidden.


That bugle. Ha! It’s got some legit funny family stories behind it. Currently, we blast it to announce dinner time to whoever is out puttering in the workshop. (Sorry, neighbours!)
Its previous role was in getting my dad in trouble at the trailer park when he’d signal Sunset and lower the flag each night. (But, maybe it was more the firing of his homemade cannon that led to his scolding. 😂 My dad…)
Other projects in our Basement Media Room Makeover…
- Hidden TV cabinet that makes the room feel bigger and brighter (inspired by Fixer Upper and Pottery Barn – at a fraction of the cost!)
- How to Make a Hidden DIY Projector Shelf ~ a Surprisingly Simple Project
- We made a tiny, high basement window look big and beautiful (for less than $50)
- Natural wood herringbone ceiling – the ultimate gorgeous basement ceiling idea on a dime
- How to add character to boring walls with grid panelling
- A timeless (and affordable) hollow core door makeover
- The best basement floor – and how to install it
- How to build a faux fireplace that looks real (with German schmear bricks!)
- and more!
It’s going to take us some time to get all these projects finished, photographed and posted – I can’t wait!!!
In the meantime, have you seen our other Basement Makeover Projects?
We turned a closet into a basement bathroom (Featured in Better Homes and Gardens magazine!) & made the coziest guest room that doesn’t feel like it’s underground.
Don’t miss a thing – scroll up to the top and subscribe to our weekly-ish newsletter for updates and sneak peeks.


Robin and Ed are a DIY-loving couple with over 25 years of design and build experience. Also, Robin is a Nutritionist and former Registered Dietitian and Ed is an award-winning Business Educator. We share strategies for living a rich life on a DIY budget: creative money-savvy ideas for a stylish home, healthy meals and family fun. Our work has been published in the pages of Do It Yourself, Farmhouse Style and Better Homes & Gardens magazines.
Stephanie Batt
Friday 19th of May 2023
Have you needed to replace any of your electronics?? How would you do this with floating cabinets and the cords in the wall?? I’m trying to get my husband on board with this, but he can’t seem to understand how this will work.
Robin & Ed Hicken
Sunday 21st of May 2023
Hi Stephanie! It's really quite easy to change out the cords when you replace electronics. You simply fish a wire down the hole, attach it to the new cord and pull it up through. And sometimes it's even easier, if your new electronics use the same cables (eg HDMI) as your old ones. :)
Amy
Friday 1st of March 2019
I love this! It gives me an idea for my great room. Also, very clever painting the cabinets dark on the inside, we've used the same wire mesh on a cabinet door but you could see everything inside and it looked awful. You have a great blog and you're full of wonderful ideas. Thank you for sharing them!
frugalfamilytimes
Friday 1st of March 2019
THANK YOU SO MUCH, Amy!!! You made my day. 😊 I’m so happy you like our ideas and I’m thankful you took the time to let us know. Have fun with your great room project!