


We may earn a commission on purchases made after clicking links on this page.

by Robin
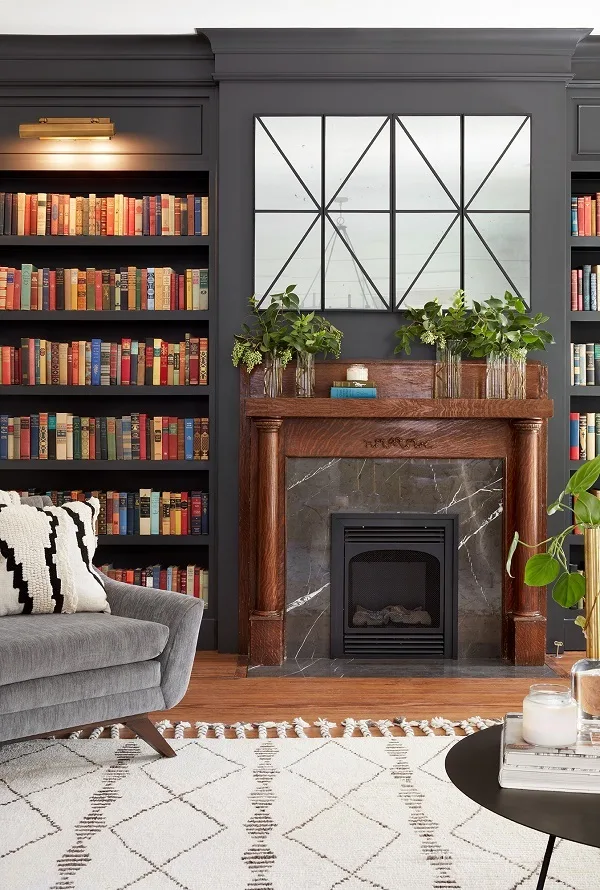
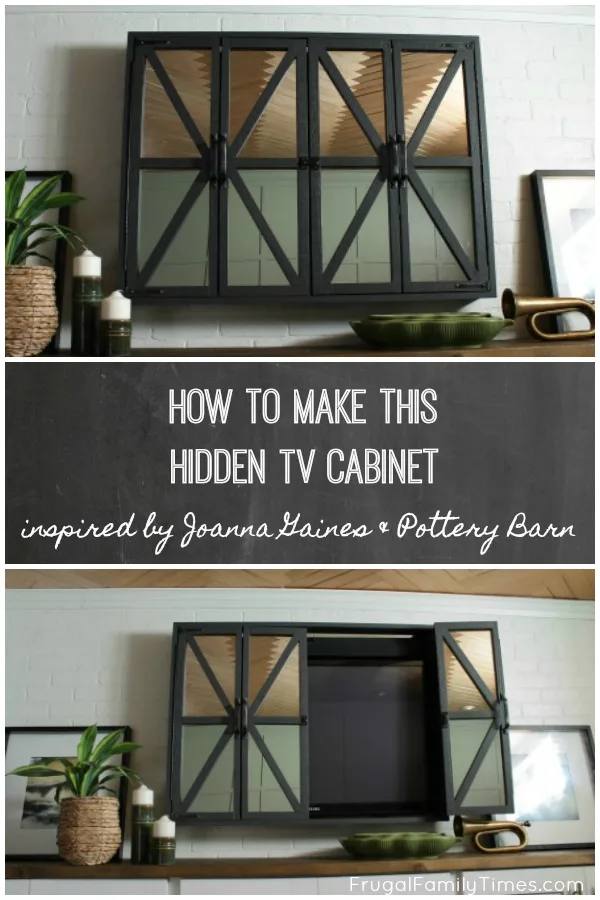
As I sat with my sadness watching the very last episode of Fixer Upper there was a moment where I perked up. Did you feel it too? That hidden TV cabinet!
They were showing the family their “Rockstar Renovation” and they paused in the living room. Above an ornate reclaimed mantel were some beautiful mirrors – gorgeous in their own right.
And then – they opened them to reveal the TV! I was awed and inspired.
I have a thing about hiding the TV. I try to do it in all my spaces. I just find they suck energy from the conversation and look like a bit of a black hole in an otherwise inviting space.
It’s just my thing, you may not feel this way, and that’s aok. Ed couldn’t care less.
When I saw this design by Joanna Gaines (that interior design sorceress) I knew I had to figure out how to make a hidden TV cabinet with mirrors! And when I stumbled across this affordable mirror I knew just how to build it pretty easily and really affordably.
Here’s what we came up with…

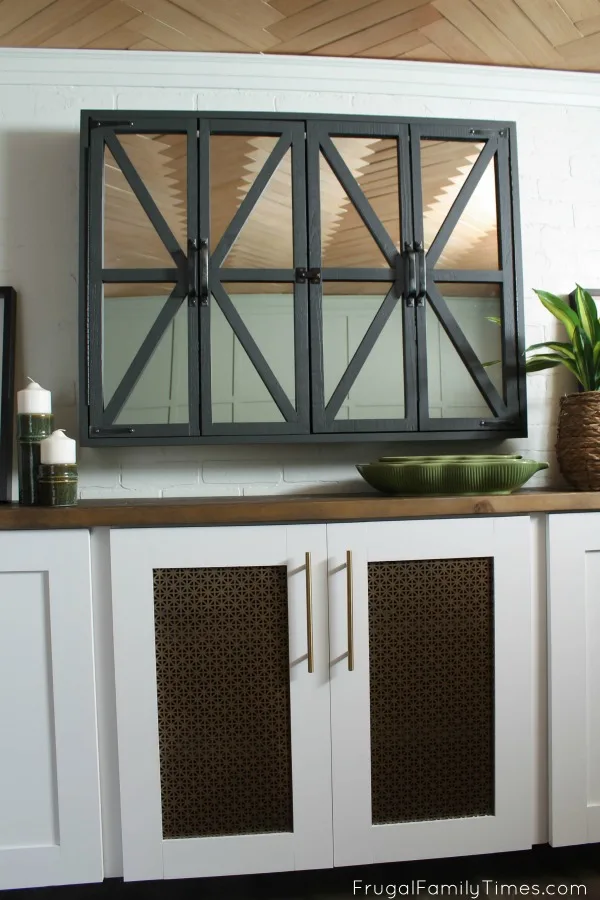
Ours is wall mounted, chunkier and not made of metal – we don’t have Jimmy Don on speed dial.
As I researched how to do this project, and whether it was worth it budget-wise, I stumbled across this one from Pottery Barn. The design is very similar – with a couple of important differences.
But what stopped me in my tracks was the price! Can you guess what this one goes for?
$599 USD! Plus tax! Plus shipping! (You don’t want to know how much it is in Canadian dollars. Approximately a mortgage payment.)
Ours cost decidedly less. It depends on what country you’re buying your supplies in, but we estimate the cost at 1/4 to 1/2.

⟹ Check out the other projects in our Basement Media Room Makeover!
- We made a tiny, high basement window look big and beautiful (for less than $50)
- Natural wood herringbone ceiling – the ultimate gorgeous basement ceiling idea on a dime
- How to add character to boring walls with grid paneling
- Media cabinet built-in – that only looks expensive
When we want a really big screen down here this is what we do:
How to Make a Hidden DIY Projector Shelf ~ a Surprisingly Simple Project
How to Make a Mirror Cabinet TV Cover
Here’s where Ed takes over to tell you how we made it:
Hidden TV Cabinet Materials:
- Wood and Iron Barn Door Mirror (x2)
- NOTE: The exact mirror we used is no longer sold – we’re so sad! This one looks very similar – it might be the same, but we can’t speak to the quality personally.
- 24″ Continuous hinges – aka piano hinges (x4)
- Pine for frame (see drawing below for sizes and cuts)
- Screws & screwdrivers
- Circular saw or table saw
- Wood glue
- Stud finder (for hanging securely)
- Fusion mineral paint in Ash
- Clasp to hold doors shut – we chose this one to coordinate with our faux shuttered window
Hidden TV Cabinet How to:


We made ours to fit a 43″ TV plus a soundbar – any tv smaller than this will work too.
Step 1: Remove Mirrors and Cut Frames in half


Before cutting the door sections in half, remove the backs, mirrors and any hardware that will be near the cut.
The mirrors are secured with hot glue, so work carefully to free them to avoid breakage. (Each frame comes with two mirrors already – so no mirror cutting is required for this project!)
Use the seam on the door as a centre guide.
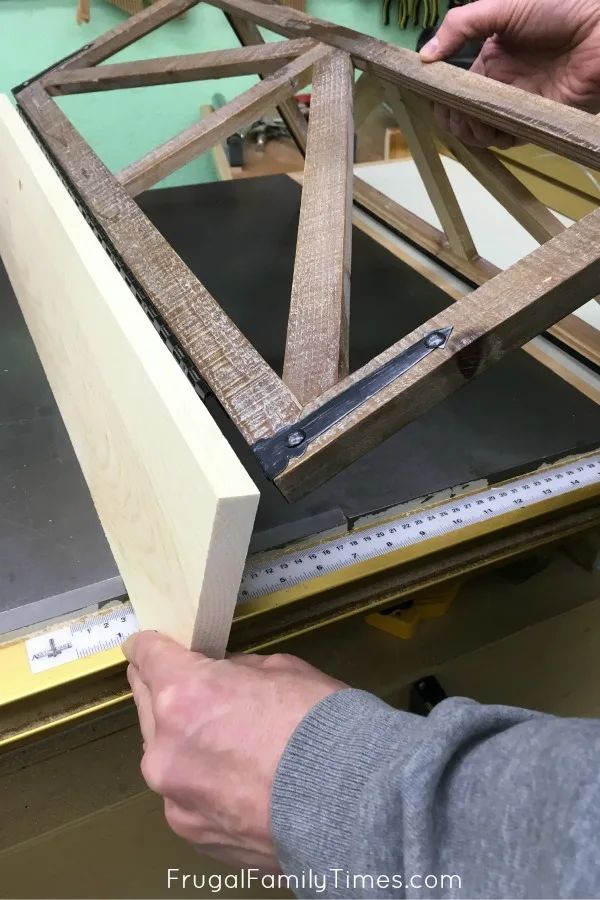
Step 2: Add hinge to newly cut frames


Position the hinge as shown above so that the two sections will hinge with their backs facing each other.
Carefully align, pre-drill and hand-tighten screws alone the hinge. The wood is very soft and screws could strip easily.


These will connect to the sides of your cabinet and should hinge open/out.
Follow the same align, pre-drill and hand screw procedure.
Step 3: Make Sides of TV Cabinet and Attach Frames

We used 1″x6″ pine, which is about 5-1/2″ deep. This provided enough depth for both our TV and soundbar.
Cut the side panels to 30″; this allows 1/8″ top and bottom for the hinged door sections to open and close without jamming.
Attach the door hinge section to the side piece with a few screws to verify the fit.
Step 4: Make Top and Bottom of TV Cupboard and Attach to Sides


Again, we used 1″x6″ pine, cut to 42-1/4″. Assemble the frame.


We also attached a piece along the back to hang the whole unit to the wall. The box just needs to support itself- not the whole TV, so 1″x3″x42-1/4″ piece of pine was adequate.
Step 5: Attach Doors and Ensure they Open and Close Well


Attach the doors (again – you’ll notice this common theme of: assemble, check, disassemble).
Ours bound a bit as the hinges flex and I had to plane it to make things fit. We were maybe a little overzealous in cutting things to exactly the ‘right’ size. Allow yourself a margin of error in door movement.
At this point, we also tried the unit in place briefly around our wall mounted 43″ TV to see how it fit.
Step 6: Remove Extra Hardware and then Paint


We used Fusion mineral paint in Ash – it holds up really well to areas where the doors might rub against the frame and various other dings and scrapes that life might throw at your cabinet.
And the colour is gorgeous! Even my man eyes tell me so.
After the paint dries, reinstall the mirrors to the frames by laying the mirrors back in place and attaching the hardboard backs again with the screws provided.
Step 7: Install the Hidden TV Cabinet


First, we hung our TV directly on the wall where we wanted it.
Then we anchored the cabinet over our pre-hung TV. We used two 2-1/2″ screws. The cabinet isn’t super-heavy, but you will want to anchor it securely and have help in making sure it’s level, drilling the anchor holes and hanging it.
Our sound bar covers the wall gap in the above image, but if any white space shows on yours, you can paint the wall the same colour as the cabinet to make it look like one solid unit.
Attach the doors (again).
Lastly, we added this shutter latch hardware and you are done!
This room has had a pretty dramatic makeover!


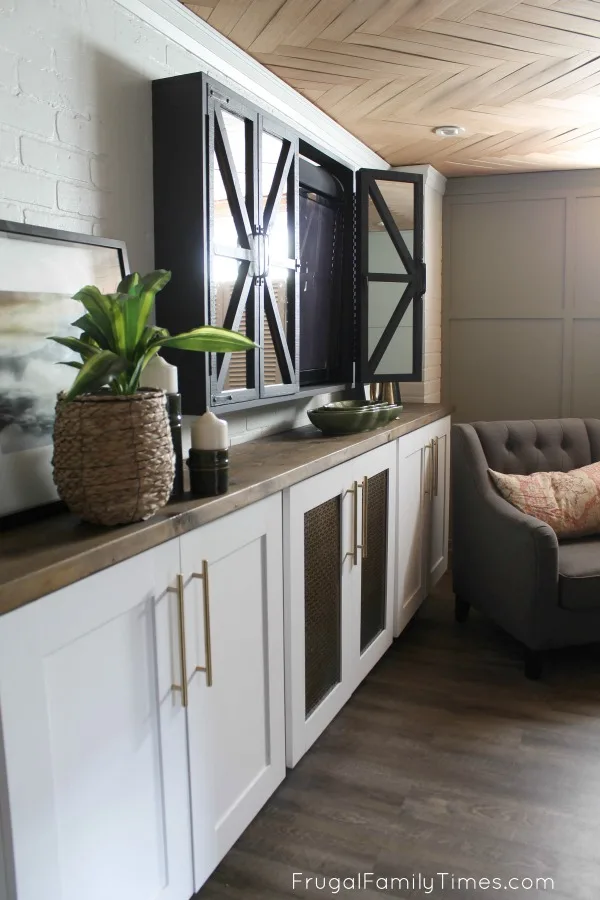
In person, it feels so cozy and charming – and nothing like a basement at all.
(That built-in media cabinet is dabomb, too – the tutorial is here!)
Faux bricks wall tutorial is here. The rest are below.
Other projects in our Basement Media Room Makeover…
- We made a tiny, high basement window look big and beautiful (for less than $50)
- Natural wood herringbone ceiling – the ultimate gorgeous basement ceiling idea on a dime
- How to add character to boring walls with grid paneling
- Media cabinet built-in – that only looks expensive
- A timeless (and affordable) hollow core door makeover
- The best basement floor – and how to install it
- How to build a faux fireplace that looks real (with German schmear bricks!)
- and more!
Have you seen our other Basement Makeover Projects?
We turned a closet into a powder room (Featured in Better Homes and Gardens magazine!) & made the coziest guest room that doesn’t feel like it’s underground.


Robin and Ed are a DIY-loving couple with over 25 years of design and build experience. Also, Robin is a Nutritionist and former Registered Dietitian and Ed is an award-winning Business Educator. We share strategies for living a rich life on a DIY budget: creative money-savvy ideas for a stylish home, healthy meals and family fun. Our work has been published in the pages of Do It Yourself, Farmhouse Style and Better Homes & Gardens magazines.
Anonymous
Thursday 23rd of January 2020
Thank you! Going to try and do this myself tomorrow. Mirrors arrived today and I will get the wood cut (may end up having to use 1x8 bc tv isn’t as flush to the wall as i had hoped it sits right at 5”). Hope it goes smoothly I’m a bit nervous to cut the frames.
frugalfamilytimes
Thursday 23rd of January 2020
That's so cool! I can't wait to see how it turns out! Will you email us photos? Please!!! Let us know if you need any more help to figure it out. Good Luck! :)
Anonymous
Monday 20th of January 2020
Wondering the same thing....was the mirror already in two pieces or did you have to cut it? Also, was it as simple as hot gluing the mirror back onto the frame?
frugalfamilytimes
Monday 20th of January 2020
Hi! Thanks for your questions - I've gone back into the post and made some changes to make the steps more clear.Yes - each mirror came with two mirrors in it - we did not need to cut any mirrors - just the frames.It was more simple than hot gluing the mirror back in - we find hot glue dries out and is messy - we simply reattached the hardboard backs to the frames with more screws to secure the mirror in place. :)
Unknown
Wednesday 6th of November 2019
Great project! Thanks for the tutorial. I'd like to attempt this, but am a little confused. Wasn't there a mirror and a backing that was removed before cutting on the seam? Did you reattach them? Did you cut the mirror? Backing? Thanks!
frugalfamilytimes
Monday 20th of January 2020
Hi! Thanks for your question - I've made a number of changes to the post to make it more clear.Yes - we did remove the mirror and backing before cutting the seam - and yes they were reattached. Each one came with two mirrors in it - we did not need to cut any mirrors.
Canadian abroad
Wednesday 10th of April 2019
If anyone is a design sorceress - it's you! I love the whole room (even better than Joanna's), and when I read that it was a basement, I almost fell over.
frugalfamilytimes
Wednesday 10th of April 2019
Oh my, “Canadian Abroad”! Such generous and kind words. You can’t know how much this means to me - your comment came at the perfect time to brighten my day. Thank you so sincerely! :) Robin
Carmen
Sunday 3rd of March 2019
HOLY WOW!! This is GORGEOUS!
frugalfamilytimes
Sunday 3rd of March 2019
Thanks so much, Carmen! We love it. 😊