

We may earn a commission on purchases made after clicking links on this page.
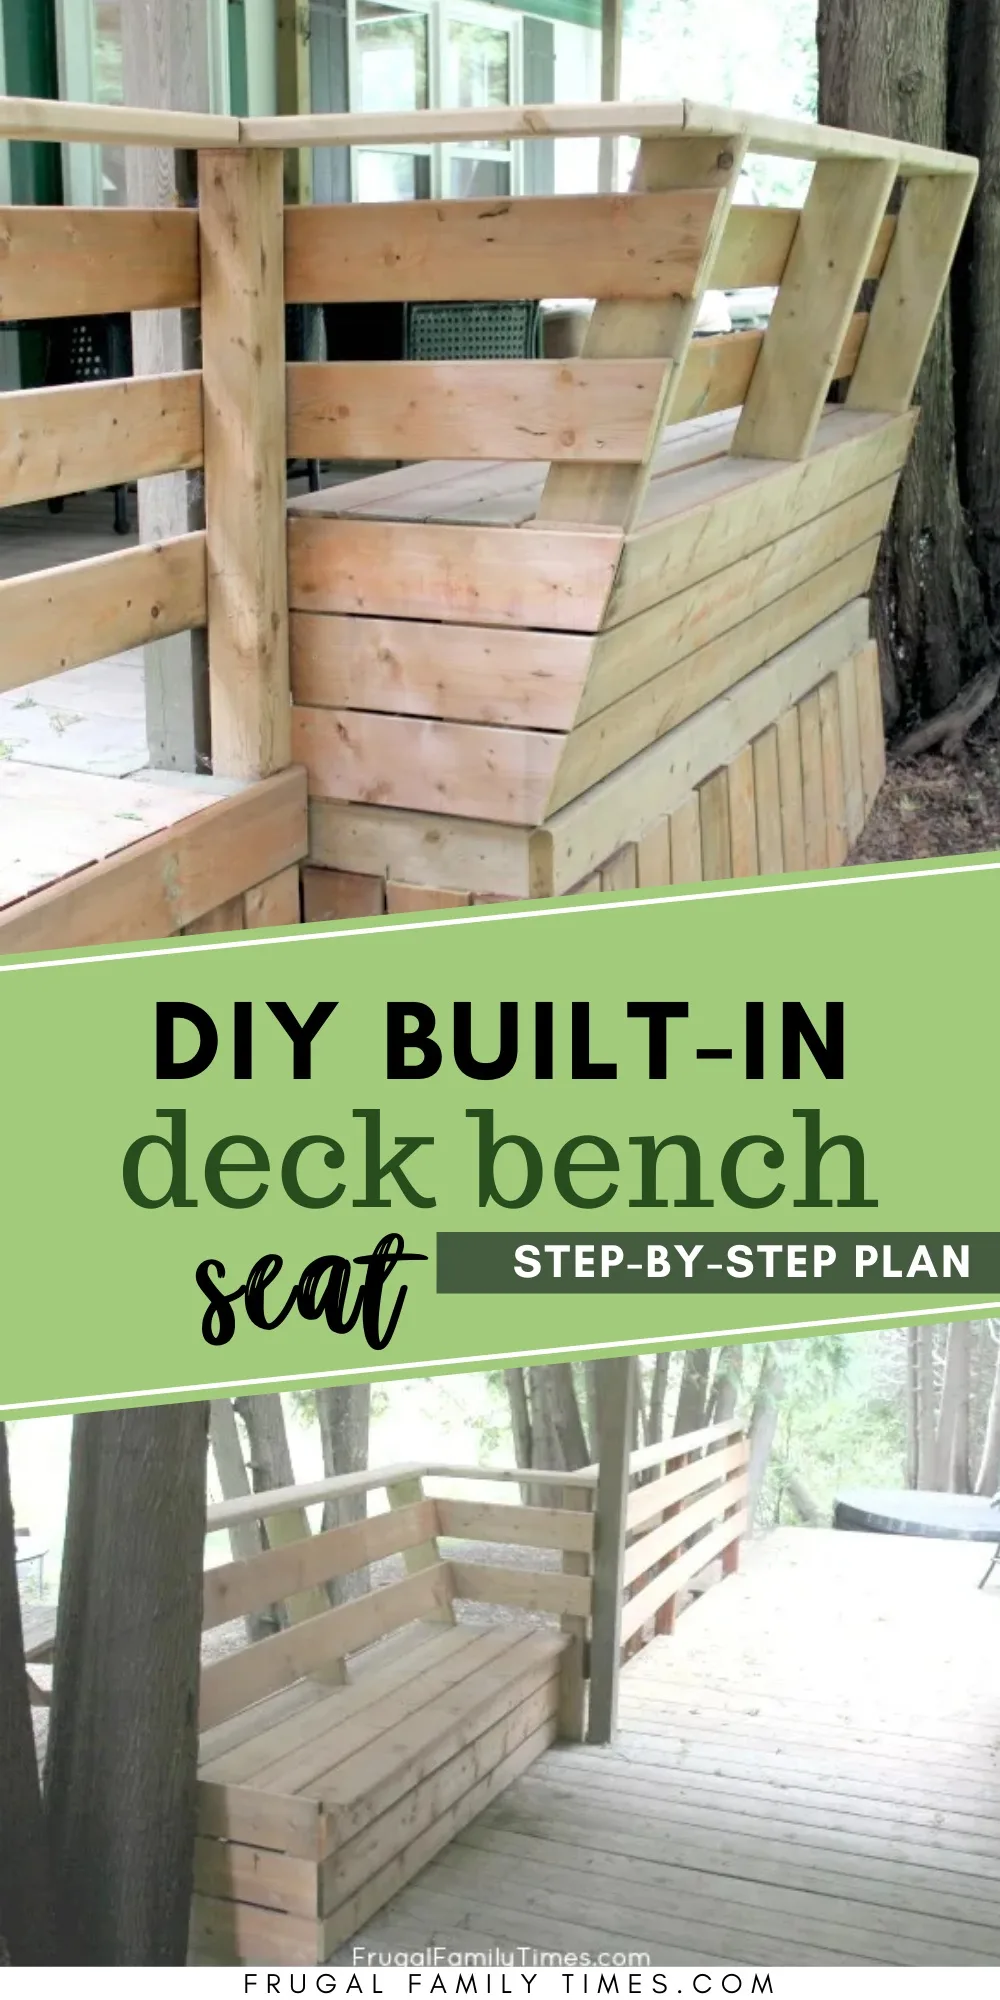
There are so many reasons to build a deck rail bench seat! Your deck will be bigger, more useful and so much more attractive. By adding a bench to an existing deck you can make a deck upgrade on a budget. Our tutorial for building deck rail seating doesn’t use a deck bench bracket – so it’s more affordable and custom. This DIY deck bench plan cost less than $200 – and made built-in seating we’re proud of.
Intro by Robin
Steps by Ed
Many of us inherit old decks when we buy new properties. Some are really nice – others are poorly made or designed. That was the case with our weekend place – our good ol’ Mobile Home Makeover project.
We love that it came with a deck – with a covered porch roof, no less.
What we didn’t love was that it was not structurally sound, kinda ugly and not completely safe. We’ve been working one project at a time to make our old deck better.

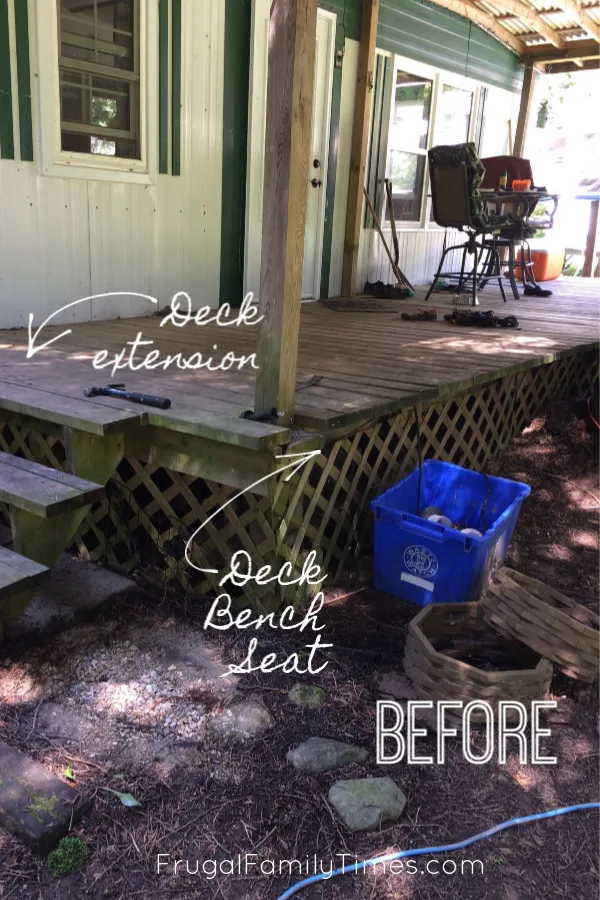
This old deck was crying out for a deck rail bench seat! (It was also begging for a deck extension – you can read about that here.)
There were a few reasons we decided that adding a deck bench to this existing deck was a good idea – and we’re so very glad we did! After building it we realized benefits we hadn’t predicted.
First the obvious reasons:
This deck is a pretty good depth – it’s as deep as it could be without removing trees.
It should be plenty deep for entertaining, but it just isn’t.
There isn’t a railing – so no one could feel comfortable unless sitting a few feet away from the edge.
So we’d end up pushing chairs up against the home and pretty much sit in a line. Weird for conversation and such a waste of space. I knew we needed an edge of some sort to max out the usefulness of the deck.
I also wanted to add table seating here to have outdoor meals under the porch roof – for shade and cover from the rain. But there wasn’t room for the table and enough chairs to be useful and safe.
The deck rail bench seat we built solved these problems and more! If you’d like your deck to be bigger, safer, more useful and more attractive – adding a bench to your existing deck might just be the DIY project for you.
We love how it turned out! It looks great and makes the porch area perfect for comfortable dining. The total cost – with railing and skirting – was less than $180. I think it adds many times that in value to the home.


How to Make a Deck Rail Bench Builtin
Tutorial by Ed
Deck Rail Bench Seat Materials:
10 – 8′ x 5/4″ PT Deck Boards
1 – 8′ x 4″x4″ PT Fence Post
2 – 36″ Fence Post anchor spikes
5 – 8′ x 2″ x 6″ PT lumber
2 – 8′ x 2″x4″ PT lumber
6 – 8’x1″x6″ fence boards (for skirting)
Deck Screws
How to build a deck railing bench?
1. Make a Mock-up of your Deck Bench Seat


The mock-up was super-helpful to decide the seat height and angle for the backrest. Since the whole unit was being grafted onto the existing deck, we also used our mockup to check for structural strength and appearance. Worth the extra effort!
2. Build the Base of the Deck Bench


This is basically a small deck that you are going to build out of 2″x6″ and then anchor to the joists on the main deck. Ours is 70″ x 24″ – part of that 24″ will be overlapped by the existing deck boards.
(Please avert your eyes from the mess underneath. Broken cinder blocks are what the previous owners used to “support” deck. We’ve since added actual structural support and just left their mess underneath to hide it.)
3. Anchor the Deck Box Frame to the Deck and Ground


Position your Fence Post anchors and push them down by hand as deep as they will go – be careful to keep them straight.


Cut sections of 4″x4″ fence post, secure into the post anchor spikes and drive the spikes the rest of the way in using a mallet or sledgehammer.
The heights of these posts will vary with your ground – ours were between 24″-30″ tall. We cut them to the height of the base of our seat – your measurement will be specific to your deck.
4. Add Sloped Back for Bench


We are now going to start on the parts that people will see, so take your time and get all of your angles correct. I can’t tell you the specific exact angle we did for this, because we didn’t measure. We simply adjusted the mockup until we found a comfortable angle, then scribed it onto the boards.
This is made with 2″x6″ boards, cut to about 4.5′ long and anchored to the frame with screws.
5. Build Deck Bench Seat and Railing


We attached a temporary top rail to stabilize things while working and to verify the back was level too.
6. Build Seat Base Uprights


Anchor securely and add some scab pieces of off-cuts to stabilize until the rest of the boards are in place.
7. Add the Deck Bench Seat Boards


Add deck boards on the seat. Face the bench with deck boards as well.
8. Build Railing Top


Now for some fancy mitre cuts. Use a circular saw (unless you have one of those gigantic sliding mitre saws).
Trace a line and cut the mitre freehand – you’re amazing!
You’ve just tied your deck railing seamlessly (almost) into a new bench seat!


You’ll amaze yourself at how you can clean up less than perfect mitres with a good sanding.
9. Finish the Deck Bench Seat Back


Add more deck boards as backrest/ wraparound railing. Use a level and measure thrice!
There are lots of stupid angles to keep an eye out for.
10. Build Skirting Around Base of Deck Bench Overhang


A big improvement from the wonky lattice.
11. Finish Skirting around the front of Deck Bench Seat


You’re done! Grab a cold drink and a book – this bench seat needs proper testing.
If you’re interested in adding onto a deck – here’s how we built the deck extension you see above. What a difference these projects have made to how the home looks and feels! We also added a DIY Deck Planter to the other side of the old deck – and it looks fabulous.
Keep reading for more of our budget DIY ideas!
- More Deck Projects (and Outdoor Projects)
- More from our Mobile Home Makeover, like the DIY Arbor that Solved Our Curb Appeal Problem


Robin and Ed are a DIY-loving couple with over 25 years of design and build experience. Also, Robin is a Nutritionist and former Registered Dietitian and Ed is an award-winning Business Educator. We share strategies for living a rich life on a DIY budget: creative money-savvy ideas for a stylish home, healthy meals and family fun. Our work has been published in the pages of Do It Yourself, Farmhouse Style and Better Homes & Gardens magazines.
Unknown
Thursday 19th of September 2019
LOVE THIS!! You guys are so creative! This is brilliant!
imsovintage
Wednesday 18th of September 2019
I love your deck bench! It is a great idea and I wish I had seen this while still at my old house!Your tutorial shows that this can "easily" be done and I appreciate the details!
Mary
Wednesday 18th of September 2019
Really really cute and practical. Have to ask, didn't you all have trouble with termites? My house was under contract for over 10 years until they finally found "THE" place they were coming in, I HATE TERMITES, and I know what they can do to a beloved home! Any wood has to be at least 4" off the ground or they will come right up the wood. Please be diligent in watching for those hateful little beasts. I put nothing in the ground that isn't 4" or greater off the ground. Other than that I love your spirit!