We may earn a commission on purchases made after clicking links on this page.

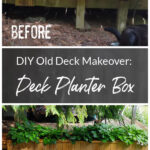

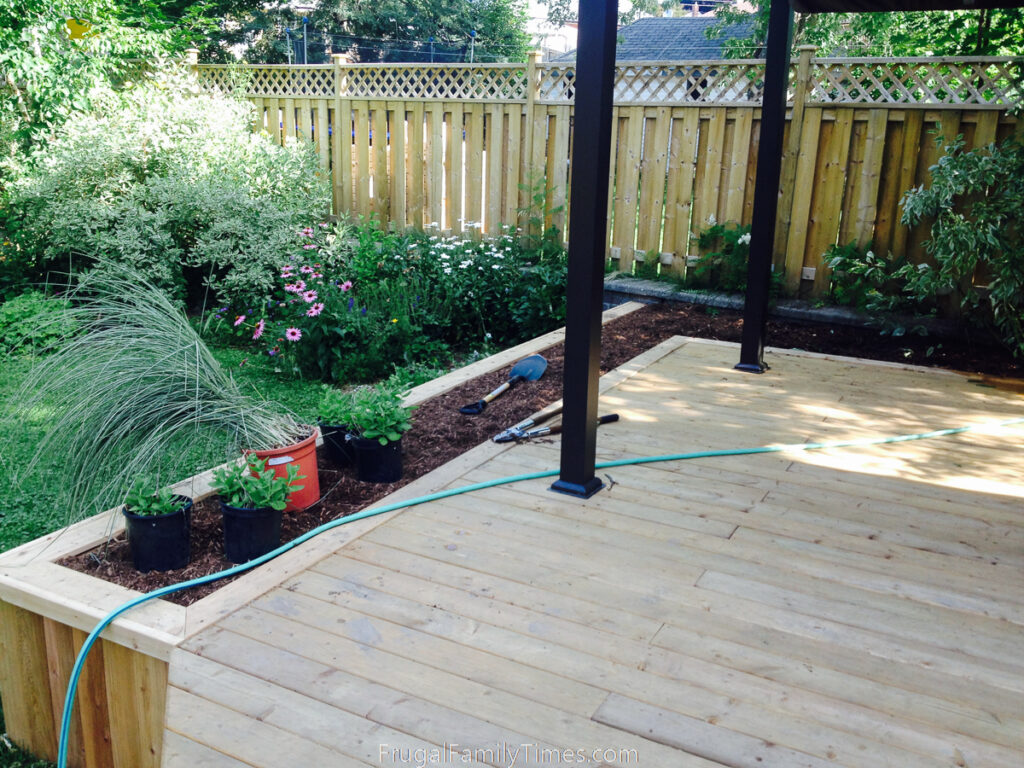
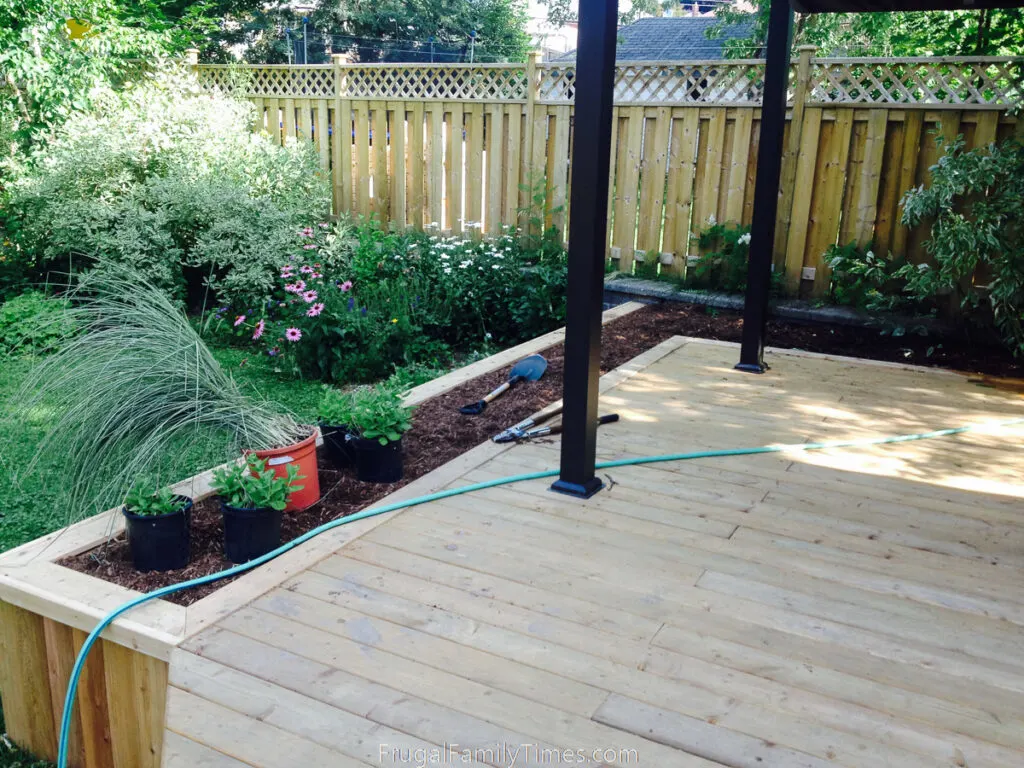
We designed and built this wood DIY deck planter box to disguise the ugly, old edge of our deck and make the whole deck look bigger and feel safer. It worked really well – and only took an afternoon to build it! Keep reading to learn how to build a planter box for your deck with style and function and on a budget.
Do you have an old deck that could use some sprucing up to make it more attractive and functional? We’ve been doing just that.
When we bought our weekend place years ago (aka our Mobile Home Makeover), we knew the entire place, including the deck, needed a lot of work. We’ve done lots to the deck already – and each project makes the whole place look better and better:
- First, we built a simple hot tub deck in an afternoon. It was a simple and affordable project to hold our fun, new hard sided portable hot tub.
- Next, we built our DIY deck extension and added a wide solid place to BBQ and entertain.
- And then, we figured out how to build a deck rail bench on an existing deck and made a cozy place to have meals and play games.
What remained to do was fixing up this eyesore…

There was some janky-looking lattice covering up this even jankier deck construction.
We had our work cut out for us to make this old deck solid and handsome.
I knew just what I wanted to do!
Years ago we built this deck in our backyard. It’s low enough that it doesn’t require a railing, but I wanted to make it feel more safe and look more beautiful.
(We used Lowes deck designer free software to design and build our materials list for this deck – free and highly recommended!)


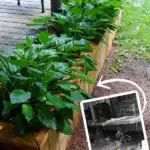
Plus the deck planter makes the whole thing feel so much bigger and safer.
Now when we have our morning coffee in the chair you see above – we don’t worry about tumbling off the side.


This is where Ed takes over to tell you how he fixed up the deck and built this awesome DIY wood planter!
How to Build a Wood DIY Deck Planter Box
Materials
- 4″X4″ Pressure Treated lumber – length TBD based on the size of your bed.
- 2″x6″ Pressure Treated lumber – length enough to cap the bed when completed
- 1″x6″ Pressure Treated fence boards – to wrap the completed box
- Galvanized Spikes – I bought mine in 8″ and 6″ lengths
- Various deck screws and galvanized nails
- Landscape fabric weed barrier
- Soil (and rocks, etc to fill)
- Plants (in this case 5 hostas)
How to:


Once filled, your new raised bed will be a very permanent fixture so do your under-deck maintenance now, while you still can.
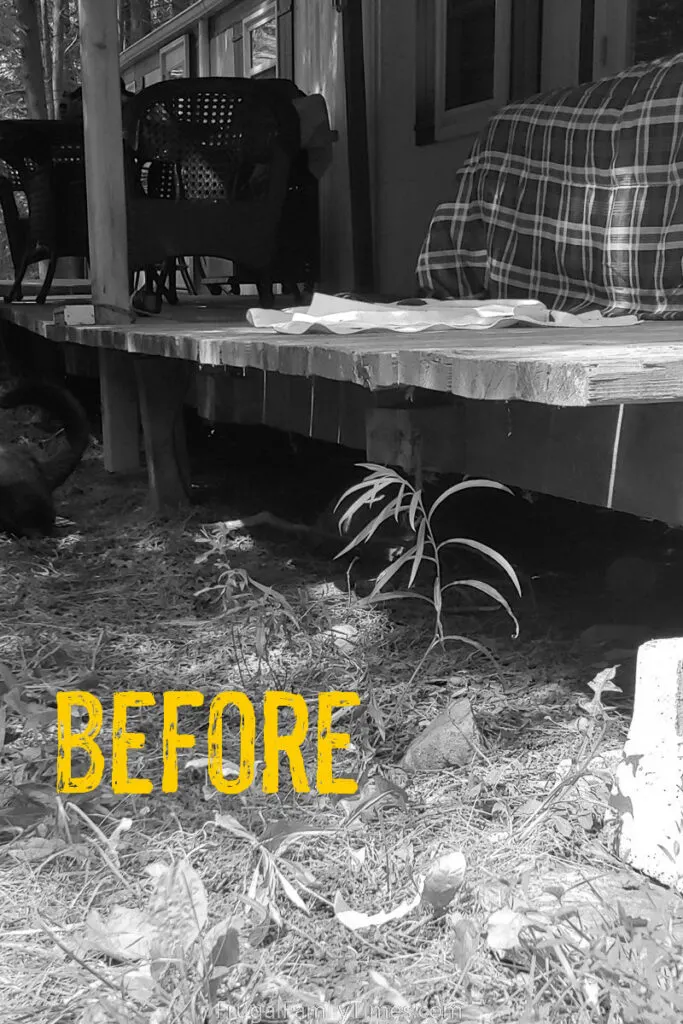
If you’ve inherited a deck, you’ve likely inherited a problem or two.
As you can see this 4″x4″ is sitting on bare earth, which means it will rot. Not a great quality in a structural member. So our old deck needed some upkeep before anything else.


I needed to do that with the middle post, too.


I wanted to level the deck as well as make sure the post was actually in a deck block versus – have I already mentioned this? – bare earth.


Also, check to make sure your levelling doesn’t accidentally mess with something else.
In our case, the mobile home door opens out, and onto this deck. If I jack too much, there is a chance that the door won’t open.
We are fixing other people’s mistakes here, so we had to split the difference between a perfectly level deck and a usable front door.
In the end, it worked out well.


When I have a chance to make something not dangerous anymore, I try to take it.
In this case, it meant adding a carriage bolt through to make sure the post actually supported things, like, you know, the deck.


Our material came from an old deck that was in a bad location (a wet area of the property that floods each spring) and it was gradually rotting. (See above: built right on the bare ground)
While I wouldn’t build a house out of these salvaged 4″x4″s, they are perfect for the raised bed frame.
I loosely stacked them to get a sense of how it would all line up, any cuts I would have to make, and any levelling I would have to do.


Our bed was small enough that I could build these separately, then carry them to their final location.


Try and get everything as square as possible here, because next, we need to make them level and the ground is already uneven enough.


The weight of the soil pushing against the sides won’t be that great, but these points also give extra spots to nail the layers together with.
Take time to get this layer right. If you do it well, the rest is fast and easy.


I predrilled and spiked them together in several spots, then I would choose different locations on the next layer to keep things secured all over.


If the ground is perfectly level all the way around, you might be able to cut them all the same. Ours wasn’t.


We also filled the bottom with some rocks from our forest so we didn’t need to buy quite as much soil to fill it.
The soil itself is a mix of topsoil and bagged composted manure. Starting to look finished here!


Because my mitre saw can’t cut mitres this long, I had to scribe them and then cut them by hand with a circular saw.


The total cost for plants: $0!
If you’ve got a friend who gardens it may be worth asking them if they have any plants they need homes for. Our friend Judy gave us these from her beautiful yard! (Thanks again, Judy!)


Your eye is drawn to these lush green plants – instead of the formerly sad and wonky looking deck.


You can find all our DIY Deck Upgrade projects here.


Outdoor Visiting in Winter – The Physical Distancing Porch Set Up We Never Knew We’d Need


Adding onto a Deck: Our Simple DIY Deck Extension

How to Make a Deck Rail Bench – Simple DIY Builtin Deck Bench Seating Tutorial


How to Build a Deck for a Hot Tub – for $250 and 2 Hours Work


We Built a Deck!: Free Online Deck Designer Software