We may earn a commission on purchases made after clicking links on this page.
Have you got a small deck that you’d like to make bigger? A deck extension can be a great way of adding onto a deck without a huge deck remodel. That’s what we did easily and on a budget. Our DIY deck extension was built in a weekend and we added double the space to our deck – without digging post holes or pouring concrete. Also included is how to match old deck boards to new ones, stairs, railing and skirting.
Intro by Robin Steps by Ed
The deck remodel at our weekend place is coming along so well! We’re finally sharing how we made the simple deck extension!
If you’re interested in adding onto a deck – simply – this is the post for you!
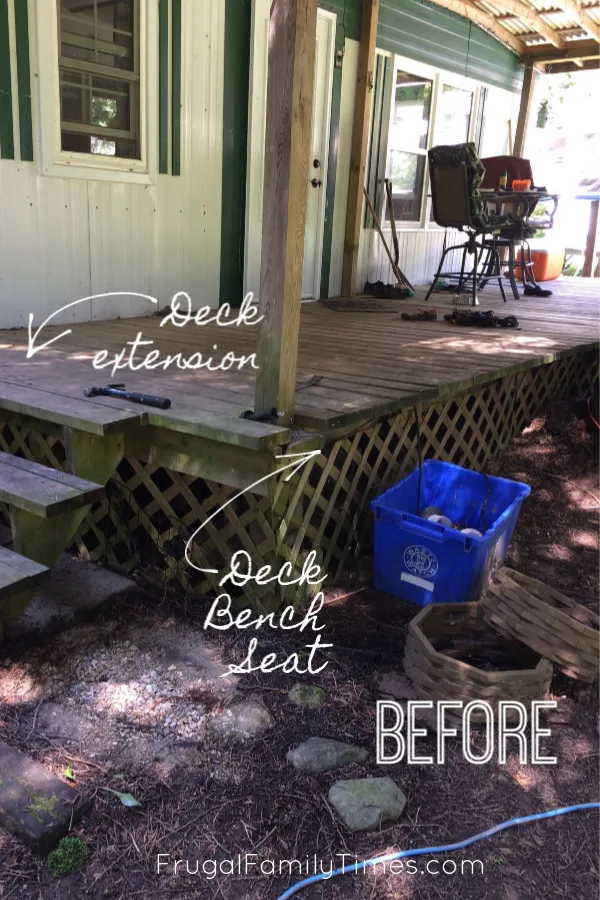
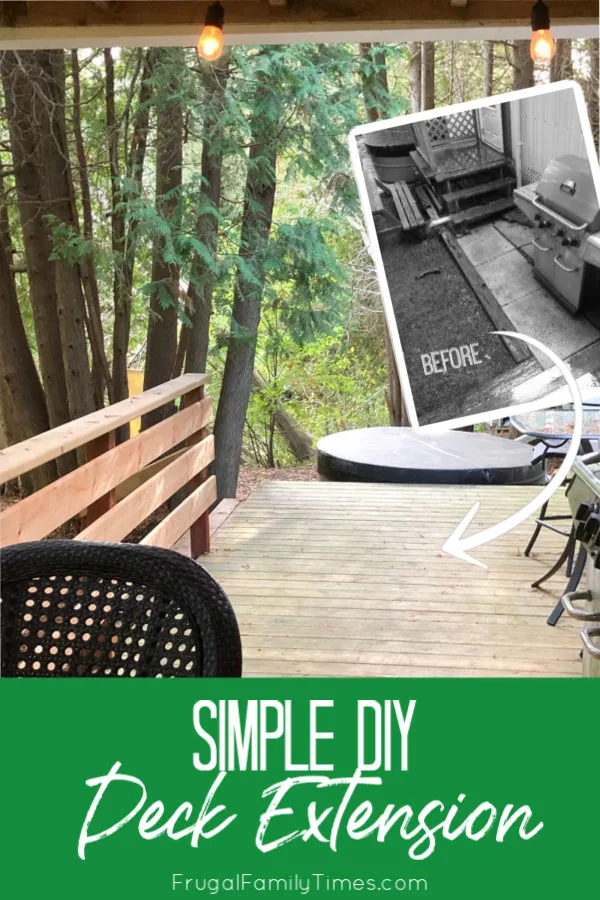
Above you can see a shot of the deck when we first purchased or riverside mobile home in the woods. (Have you been following along with our Mobile Home Makeover?)
It was a nice enough size and came with a roof over it. The roof was made well – the foundation of the deck was dubious (more on that here). We’ve been working over the last few seasons to make the deck work best for our family.
We’ve already shown you two of our deck rehab projects:
- The first was when we built a super simple Hot Tub Deck for our portable hot tub.
- The second was the Deck Rail Bench Seat we added onto the existing deck to create a spacious eating area.
- (Update: we later added this DIY Deck Planter to upgrade the old part of the deck)
This time ’round we’re showing how we made the deck live even larger with a DIY deck extension.
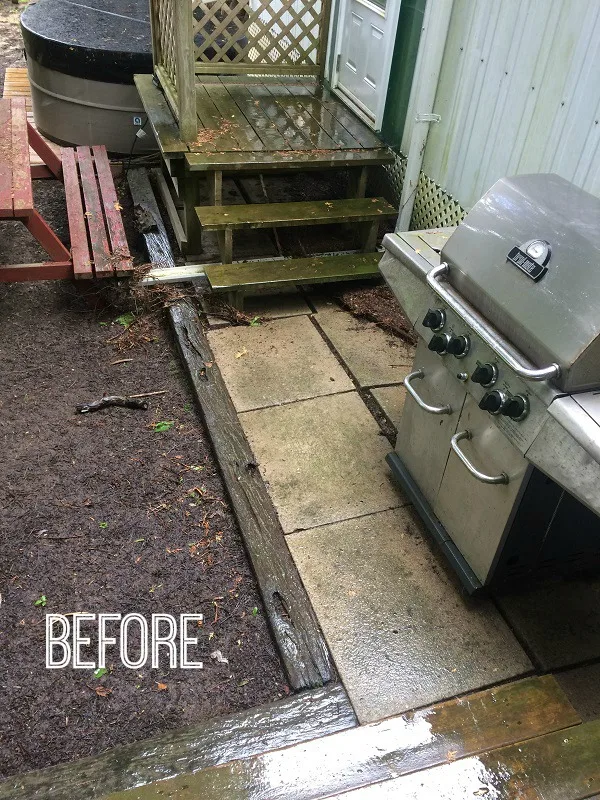
At the bottom of this photo, you can see what I termed “the Stairs of Death”. When wet, these steep steps caused at least a half dozen different people to fall on their butts.
The patio stones weren’t level which meant hot dogs rolled willy nilly on the grill (our dog didn’t mind that one).
The route to the hot tub was down the stairs, over the railroad tie and then tiptoeing on the bouncy picnic table bench. Needed improvement.
Want to see what it looks like now? Of course, you do!
TA-DA!
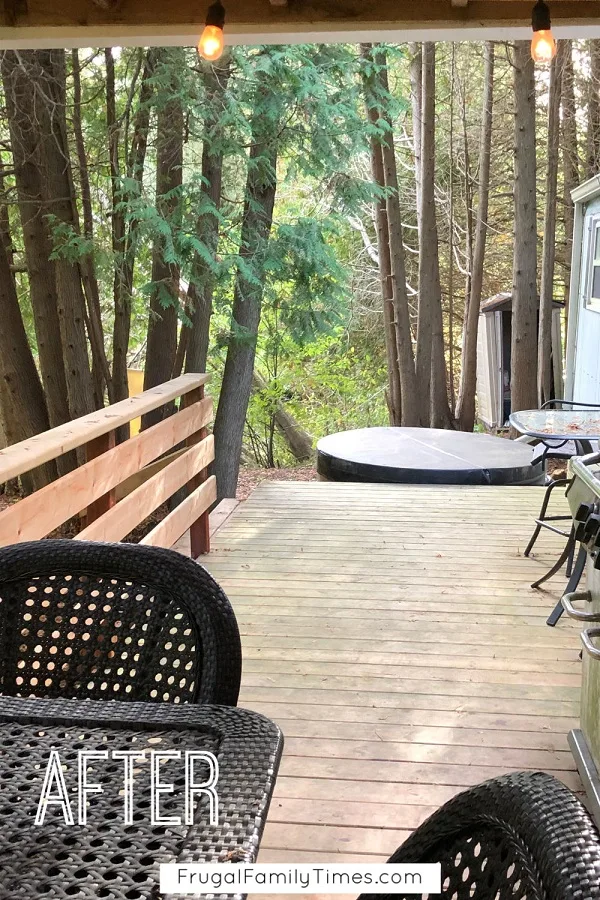
No Stairs of Death!
A level and comfortable place to barbecue!
A graceful entry to the hot tub!
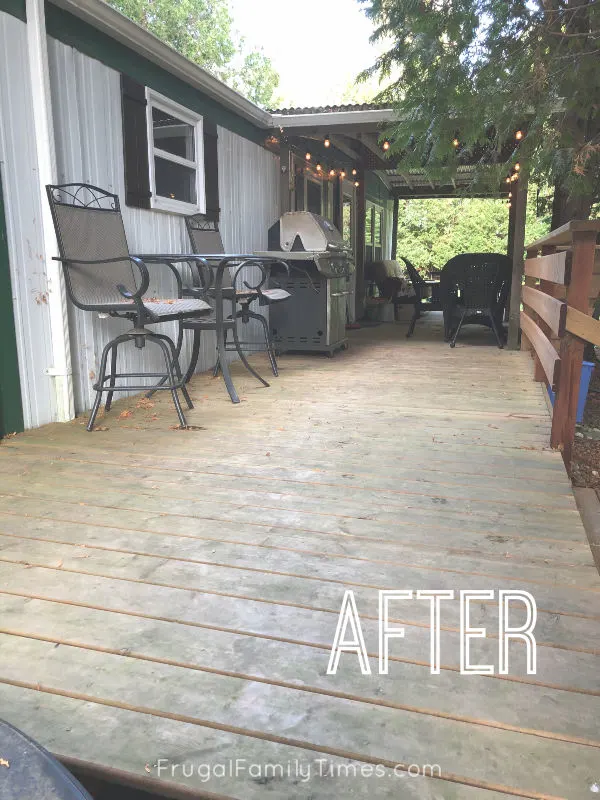
It makes the whole mobile home feel so much larger! We plan on some new furniture for this end and really take advantage of the new area (that bar set came with the place and is a bit wonky).
(Yeah, the deck could use a wash – lots of cedar dropping residue – kinda wish I did that before photography. Real people being real here.)
Adding onto a Deck: How to Build a Simple Deck Extension
Steps by Ed
This deck extension works because it isn’t too high and there is an existing deck to join on to. It is built on the ground – so no holes to dig. It will move with frost heave, but the deck blocks will allow you to shim things up a bit if it goes too out of level for you.
Our extension is approximately 8′ x 14′.
Robin sometimes gives me grief (rightly so) for letting standard 8-foot stock material influence my whole design, but in this case, it really makes sense. The current deck was already 8-feet deep and the distance from its end to the hot tub worked out too.
Materials for Deck Extension:
- Patio Pavers and Deck Blocks – enough to replace any piers you would normally dig. We have 9 in ours, but you can opt for more if you’re going larger or have stability concerns.
- 1 or 2 – 8′ x4″ x 4″ Pressure Treated (PT) posts for levelling and securing the frame in Deck Blocks – you can use leftover pieces to build the railing and the bench seat.
- 6 – 8′ x 2″ x 4″ PT for cross-bracing and keeping things square and plumb while assembling
- 6 – 8′ x 2″ x 10″ PT to sister together into beams for your deck.
- 8 – 8′ x 2″ x 6″ PT for joists.
- ~30 – 8′ x 5/4″ x 6″ PT deck boards
- nails, screws etc
Building a Deck Extension How-to:

Start with a bed of gravel (for drainage). Rake it level and tamp/compact as densely as possible.
We then reused large patio pavers, plus a few others we bought as a surface to put the deck blocks on. This isn’t strictly needed – lots of people used deck blocks right on the ground – but this distributes weight more evenly and has handled two Canadian winters very well so far.
We located ours in rows about 6 feet apart with the blocks spaced about 3 feet from each other in the rows. This is more frequent than actual posts would be dug/located for added strength/stability.
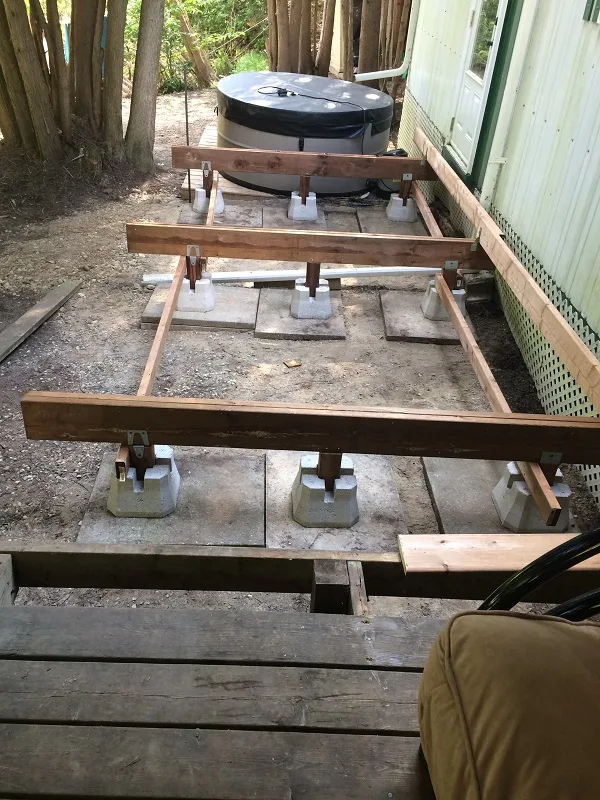
Look at the height of your old deck and work backwards: You’ll have 5/4″ Deck boards, the 2″x 6″ joist and the 2″ x 10″ beam distance to make up (all those are nominal measures only – check your own stock and verify the true dimensions).
You may also have a door that you’ll want to open. You’ll also want a slight slope away from your building for water drainage. Go slowly, cutting the 4″ x 4″ and the galvanized post caps to join/mount the beams to the deck blocks. Each piece of 4″ x 4″ will be different and will be your ‘wiggle room’ to make everything line up.
Use the 2″x 4″ as bracing to keep it all square and put a joist or two in place to check for level.
I also suggest screws for assembly so you can take things apart when you need to change something.*
*(you WILL need to change something at some point)
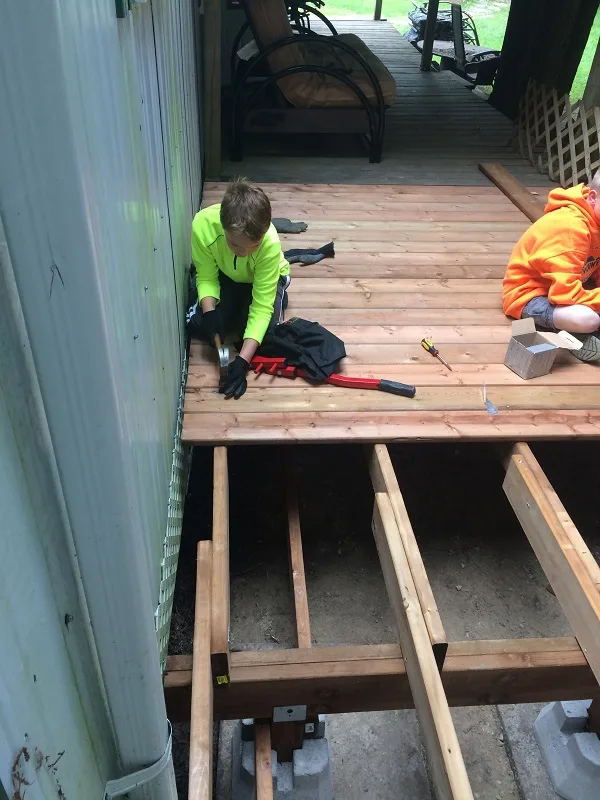
Pictured here are my overlapping joists. I did not put blocking in place – I felt that it was enough that the joists are connected to the old deck at the end, to the beams with hurricane ties and overlap each other by up to two feet.
Why does the overlap vary in the picture if the deck is square? Well, we had originally planned to make a curved end that followed the hot-tub edge, so I staggered the joist ends to make that happen. (We changed our minds and cut everything square. Robin was concerned about safety – as the stairs would not reach all the way to the end of the curved deck.)
Finally, I normally use screws to put deck boards down, but we A) had a bunch of galvanized nails and B) had extra kids and hammers so we put everyone to work laying and nailing deck boards.
Final pro-tip – some Pressure-treated lumber doesn’t react well with metal (like the sheeting on our mobile home). None of the new deck materials contact the building directly – this has the added benefit of avoiding adding any new holes or water pooling points on the building.
Matching Old Deck Boards to New Deck Boards

We used this All-in-One Deck Cleaner and a scrub brush to clean the old deck and then after a year the boards look quite seamless!
We were concerned but we didn’t need to be. (Scroll up a bit to see a finished shot from the other angle. You really can’t see much difference in deck board colour!)
Next, we added stairs to our Deck Extension

We levelled and laid out patio stones, bought 5 pre-cut stair stringers and joined them to the deck beams with some scabbed in material.
Then we added 5/4″ deck boards for stairs and risers. We’re big fans of wide stairs here, so this flight is almost the full 8′.
Last, we added skirting and a railing:

Ours overlap the rim joist by 6″ and I notched about 1.5″ of the 4″ x 4″ so it would sit partially on the deck. All posts are then secured to the joist with 2 carriage bolts that lag all the way through the overlapped joists.
The horizontal parts of the railing are 10-foot lengths of 5/4″ deck board, topped with a 2″ x 6″ board to rest a drink on. We made these railing boards line up with the back of the deck bench seat for a seamless look. You can see how it all lines up in the bottom image.


This is where the new deck meets the old deck – with the addition of our Deck Bench built-in.
Keep reading for more of our budget DIY ideas!
- More Deck Projects (and Outdoor Projects)
- More from our Mobile Home Makeover, like the DIY Arbor that Solved Our Curb Appeal Problem


Carolyn
Saturday 26th of December 2020
I just tackled my first deck by myself and I agree with the screws lol. Learned a ton and yes I had to take things apart a few times. The 2x4s used to keep everything level and square while constructing base is brilliant! I so wish I would have seen this earlier. I did a few things different but I am confident my deck will probably outlast my grands. The outcome is stunning and that bench seat! Amazing job, thank you for sharing. I am now a follower 😊