
We may earn a commission on purchases made after clicking links on this page.

by Robin
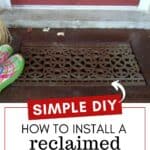
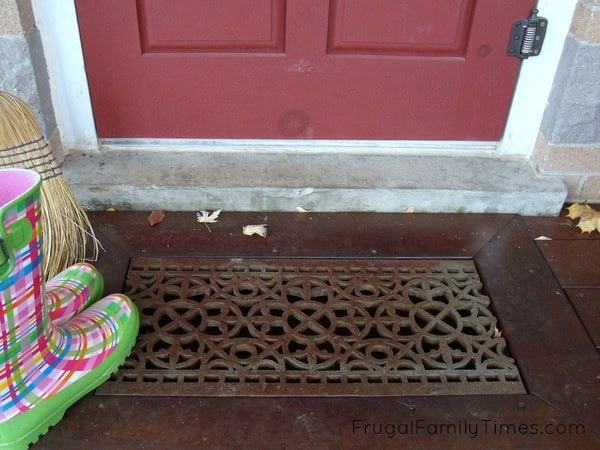
One of the first things that visitors see before they are welcomed into our house is our reclaimed iron metal grate door mat. When we built the new front porch, we incorporated this unique, permanent, welcome mat and are still in love.

Besides looking distinct there are some advantages to this cast iron door mat:
- Our outdoor metal door mat needs to be replaced.
- It’s been around for decades already and it will be around for decades more. We paid about $70 for the piece, which is a lot for a welcome mat, but we will never ever need to replace it.
- This will be the last welcome mat we need to buy. Unless we tire of it, but I don’t see that happening (forever and ever as long as we both shall live).
- Shoe crumbs fall right through it.
- OK, I made up the term Shoe Crumbs, but you know what I’m talking about, all the gravel, leaves, dirt and crud that falls off your footwear. This stuff falls through the holes and doesn’t get tracked into the house. Yay, for less housework!
- A couple of times a year I lift the mat and sweep out the Shoe Crumbs (is that term going to catch on?).
- It’s got a story.
- I love the stories that reclaimed materials bring with them. Where were they before? How we found it? Like many things we’ve used in our home, this one has a fun story.
Here’s the story and how we did it:

If I could remember the book I first saw this idea in I would reference it here. (It was 6 long years ago when we were designing our second-storey renovation and we weren’t bloggers, so referencing original sources was not on our radar.) It was likely a book from Taunton Press. They publish the most incredible home books.
The application I found was a modern grate built into a deck, much like the grates you see in the sidewalks over subway lines. It was a grate idea to steal (Punny?)
After we tore the roof off our house we decided to blog for our family and friends about our adventure. That blog is no longer online, but here’s a piece of what we wrote about this project back in 2007:
I am so relieved that I remembered the grate before it was too late.
At 4 o’clock I looked up from my work and realized, “Oh, crap, I forgot to pick up that iron grate! We need it for tomorrow, and the store is probably going to close soon!”
So I quickly ran out of work and flew to Artefacts (architectural salvage). As it turns out, the grate was still out getting cut-down to size, so rather than Ed divorcing me over putting this off so long, I decided to drive out to the blacksmith in Floradale.
The blacksmith was able to make the cuts and I left, Grate-Full.
The blacksmith was fun – there was a filthy, burly guy with dreadlocks sitting on the ground polishing up a suit of armour (apparently they rent it out a lot for wedding proposals, a Knight in rusty, dirty armour wouldn’t fly with these fellas).
Minutes later I drove away with our rusty old grate in the back of the van, tucked under the flooring samples I should have returned on Monday.
A few weeks ago we were chatting with one of the owners at Artefacts about this idea, and he got kinda jazzed and said he had the perfect thing in the back for us.
It’s an iron grate that used to be in the floor of a greenhouse. It’s lovely and the perfect size for our needs. Just don’t wear stilettos to our house.
Here’s how we installed our metal grate door mat:
1. First off, we just plain lucked out with the size. Our iron grate was the same depth as our deck boards. If you replicate this idea you will need to measure carefully. (Do as we say, not as we do). If your grate is too low or too high, you could have a tripping accident every time you come in and out.
Also, make sure it will hold a lot of weight. This grate was originally used for the floor. You can find lots of interesting wall grates from old homes, but they likely won’t stand up to outdoor conditions or hold people’s weight.
2. We had a small concrete porch that we were building our new wooden porch over top. Below the old porch is our cold cellar. Ed made a pressure-treated frame over the top of the concrete to nail the deck boards to.
See below:
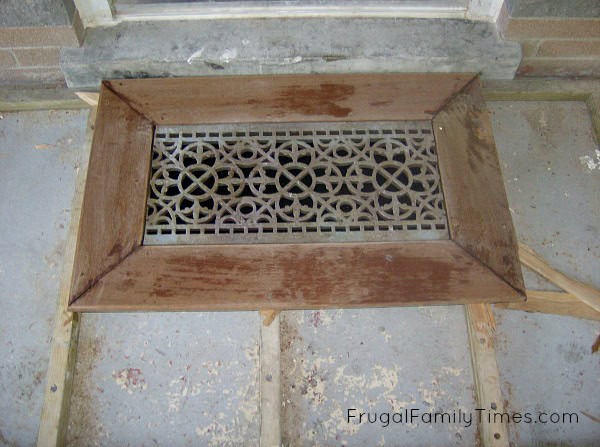

The greenish boards = pressure treated strapping attached to the concrete
The brown boards = ipe (Brazilian walnut) decking
3. Then Ed laid the iron grate over the pressure-treated strapping. In the photo above it looks like there is nothing below the grate. It’s an optical illusion. We’ve painted the concrete and the strapping black underneath the grate.
4. Next Ed framed around it with the ipe decking boards. This was a slow process, he needed to trim the boards to fit and cut the mitres. The frame pieces were then screwed in place.
5. Once this was done, he continued the deck boards as he normally would, butting them up to the mat’s frame.
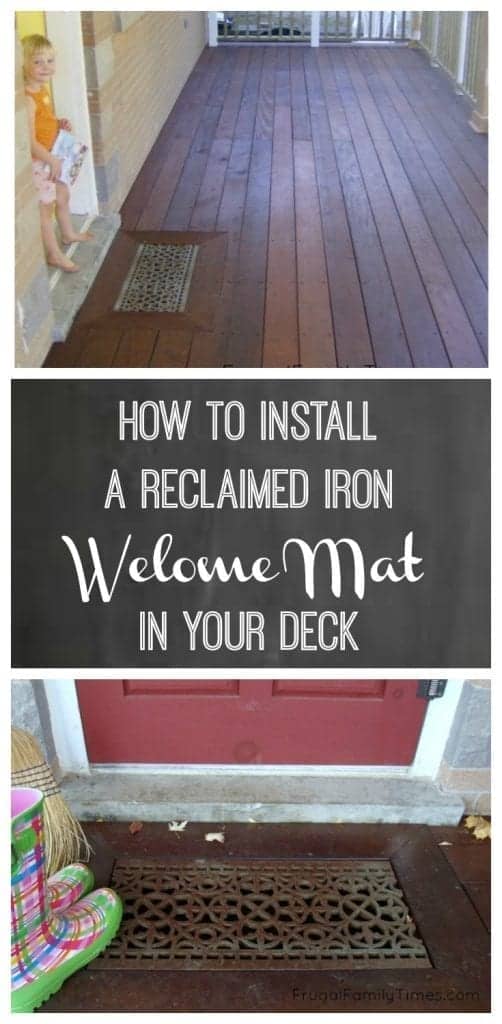
We love it! As you can see in the lead photo, it wears like iron (duh, it is iron). You can see virtually no change in the patina of the grate from 2007 to 2012. That was our worry, that it would rust a lot. If it did rust our plan was to seal it or paint it with a rust-proof product. Thankfully, it didn’t come to that!
When we pay off our debts and save up enough we are planning on building a deck on the back of our house. (UPDATE: in 2014 we did build a DIY deck! We designed it with free design software.) I am totally planning on finding another vintage piece of iron to do the same project again. Or maybe something more modern this time around?
Here are more of our Outdoor Project ideas & Tutorials, including this section of all our DIY Deck Upgrade Projects.
This DIY Arbor Solved Our Curb Appeal Problem ~ Here’s How…


Easy DIY House Number 8 Wreath Craft: 5 minutes and less than $20!


Wood DIY Deck Planter Box to Upgrade an Old Deck with Plants and Style

Outdoor Visiting in Winter – The Physical Distancing Porch Set Up We Never Knew We’d Need


Adding onto a Deck: Our Simple DIY Deck Extension

Unknown
Wednesday 14th of November 2012
Awesome idea, I love it!
We've just been complaining about how our mats wear out so quickly because water puddles under them. We might have another project on our hands now.
Thanks for sharing!
frugalfamilytimes
Wednesday 14th of November 2012
Glad you like it, Christina! We have never regretted this project for a moment. I checked out your blog - love your projects! :)
Lisa from Iroquois
Saturday 10th of November 2012
Love your welcome grate! Especially as I was just grumbling about cleaning the nooks and crannies of the welcome mat the other day.
frugalfamilytimes
Saturday 10th of November 2012
Thanks, Lisa! We really like the easy clean feature. Really appreciate your comment! :)