


We may earn a commission on purchases made after clicking links on this page.
Intro by Robin Steps by Ed
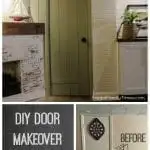
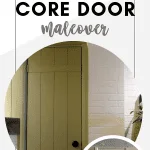
How can I make my flat door look better? You’re in the right place! We have a DIY hollow core door makeover for you that’s beautiful, easy and affordable! A plain door no more.
As you can see, our basement was a mess. (Nerf guns? Random tubing? A bowler hat?) Yet, somehow even in it’s full-of-junk-ness it still manages to be boring looking.

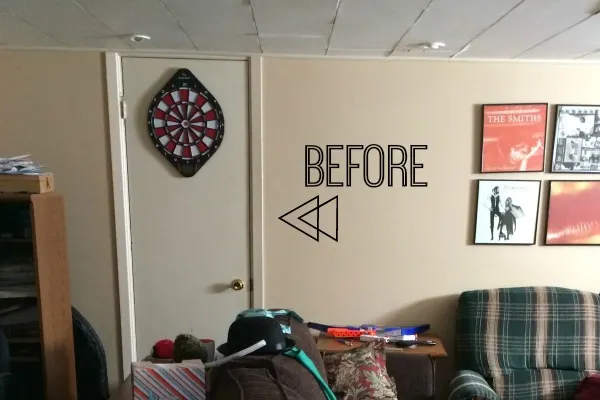
It doesn’t get blander than the door you see above. It’s an old flat door circa the 60’s. It’s also full of the dings that the digital dartboard had promised WOULDN’T happen.
It’s time for some DIY interior door makeover magic!
Like most people in most places, we’ve been binge-watching Netflix. Lately, we’ve been drawn to UK crime dramas. We just finished Hinterland and before that was Shetland. There’s so much to love about these dramas: the scenery, the stories, the beautifully crafted characters (especially Shetland) – who look like REAL people with rich relationships.
But, as usual, I get distracted from it all by the homes. It’s not unusual for me to completely lose the line of the plot after noticing some lovely trim work or a paint finish.
I’d make a truly terrible real detective:
“Keep back, Robin you almost stepped in the pool of blood around two dead bodies, destroying valuable evidence!”
“Again?! I’m so sorry! But did you notice that stained glass – it’s remarkable!”
There are so many ideas to borrow for our basement makeover! This time I was inspired by the tongue and groove handmade doors you see so often in the crofts (farmhouses) in the countryside. They’re timeless.
Timeless is a word that could describe our inspiration for our Basement Media Room in particular. So far we’ve added a few other timeless elements:
This DIY hollow core door makeover fits nicely with those design features. It’s beautiful. It was incredibly easy to do – we knocked it out in about an hour! And so affordable – the materials cost less than $25 (about $50 if you include the new door handle set). Check it out…

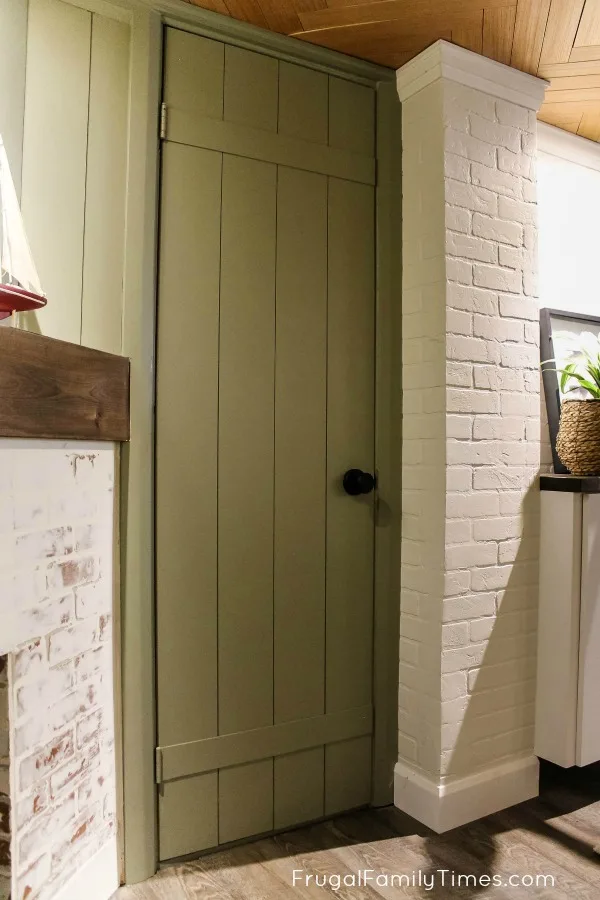
It looks like it’s been there for decades and helps give the basement the presence and interest it was sorely lacking before.
I went back and forth on whether to paint the door white or the same green as the walls.
I’m so happy I chose the green!
It would have robbed from the built-in DIY media cabinet and the fireplace if it was painted similarly. This way it recedes and is more charming in that it doesn’t demand attention. It ties in well with the vertical shiplap we did above the fireplace.
(And can you believe the bricks on that pillar aren’t real? Heck, that pillar isn’t real!)


DIY Door Makeover
Flat Door Makeover Materials:
- 1/8″ MDF panel – we had ours cut to length, and then in half at Home Depot to fit in our car
- Adhesive (we like this one)
- Nails and nail gun (we love this cordless electric nailer)
- Primer and Paint (we used Milk Thistle from Behr – same as our wall colour)
- This interior door knob set is classic with a contemporary edge. Love it!
Hollow Core Door Makeover Steps
Steps by Ed
1. Prep Your Door and Determine Your Sizes


Measure the door for width and height to determine your panel sizes. Our door was 24″ wide and we wanted 1/8″ gaps between each panel. This meant cutting four 5-7/8 panels.
2. Attach the Vertical Panels


We just eyeballed the 1/8″ gaps between the strips.
(Don’t do what I did first and use nails that are too long – we inadvertently nailed the door shut and created a future tetunus hazard. Lucky we checked after nailing the first one in place.)
3. Attach the Horizontal Strips


We used the hinge width (3″) as the guide for how wide to make the strap.
Shoot some nails through. (Impress your friends by doing it all fast and blurry as above.)
4. How to Cut Holes for Door Knob


How did I cut that doorknob hole so neatly in the right-hand side panel?
Well, the thing about doorknobs is the plate hides a lot, so you have a margin of error.
I attached the panel to the door, then used a hole saw to drill out the piece over the old doorknob hole. You could also do it with a jigsaw, but you’d need to fit it in place first, mark the hole, then remove it to cut on a secure bench.
5. Prime and Paint


I love how the door is interesting but doesn’t steal attention from all the other eye candy around it. The door looks like it’s been hanging around for a century, instead of about a week.
(All the details on all the other projects found below 👇)
Other projects in our Basement Media Room Makeover…
- Hidden TV cabinet that makes the room feel bigger and brighter (inspired by Fixer Upper and Pottery Barn – at a fraction of the cost!)
- DIY media cabinet built-in – that only looks expensive
- We made a tiny, high basement window look big and beautiful (for less than $50)
- Natural wood herringbone ceiling – the ultimate gorgeous basement ceiling idea on a dime
- How to add character to boring walls with grid panelling
Easy drapes to make a room feel taller - The best basement floor – and how to install it
- How to build a faux fireplace that looks real (with German schmear bricks!)
- and more…


Robin and Ed are a DIY-loving couple with over 25 years of design and build experience. Also, Robin is a Nutritionist and former Registered Dietitian and Ed is an award-winning Business Educator. We share strategies for living a rich life on a DIY budget: creative money-savvy ideas for a stylish home, healthy meals and family fun. Our work has been published in the pages of Do It Yourself, Farmhouse Style and Better Homes & Gardens magazines.
josie
Sunday 23rd of January 2022
so pretty! did adding the extra material from the panels effect how the knob screwed in at all?
frugalfamilytimes
Monday 24th of January 2022
We had no trouble at all with the handle, Josie!
Jackie Wallace
Friday 10th of September 2021
I love how this door turned out! I am a big fan of the green! I would love to do this to our pantry door soon. We are doing some kitchen cabinet refinishing next month so maybe after that! Thanks for sharing your beautiful home.
frugalfamilytimes
Saturday 11th of September 2021
That sounds like an amazing pantry door update, Jackie! - I still adore this green! :)
Lynn Spencer
Monday 19th of October 2020
Once again, another fantastic home improvement diy by Robin and Ed!
frugalfamilytimes
Tuesday 27th of October 2020
Thanks so much, Lynn! We love and appreciate your support so much! :)
The Smiths
Monday 6th of May 2019
How did you get your door knob to fit, since the mechanics of it are meant for a standard width door? Did adding the additional material on the front side effect the handle function?
Jane
Monday 6th of May 2019
So cute! Love it.