


We may earn a commission on purchases made after clicking links on this page.
Intro by Robin Steps by Ed
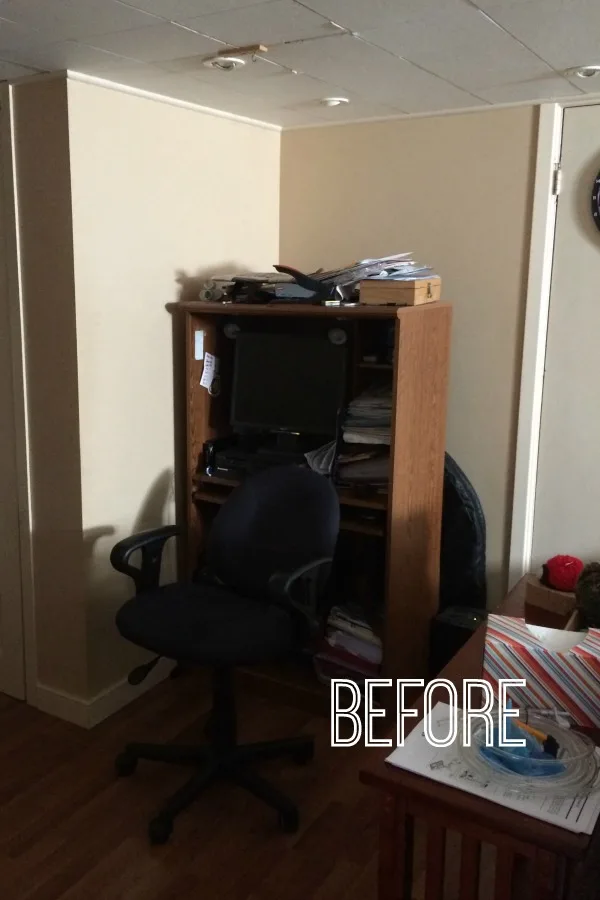
When we embarked on our basement makeover we knew that our Basement Media Room would absolutely need a source of heat – basements can get so cold in winter! And what’s prettier than a fireplace? Early on we decided that we would figure out how build a faux fireplace for this room.
Why choose an electric fireplace? And why build a DIY corner fireplace?
We toyed with the idea of getting a gas insert installed. They can be so beautiful and instantly warm with a button.
This idea didn’t last long – the cost for one thing, but mainly the problem was the venting for the gas unit.
The walls we needed the fireplace to go one are below our big front porch. Not a great place for a heat vent! The only wall with venting potential was the only wall with a window (remember how we made that basement window look bigger with old bifolds? If you haven’t seen it – you must check it out!)
So that left us with an electric fireplace.
We knew we’d want to build the mantle and fireplace surround ourselves. Because you know we love to build stuff, but also because then we could absolutely customize it to our weirdly shaped space.
We found and purchased an electric fireplace insert (this one is similar) that gave a flickering flame effect that we found quite realistic. (Ours is no longer available but this one gets great reviews).
A corner fireplace?! What were you thinking!?
As you can see in the photo above – we put the fireplace in the corner. That wasn’t my original plan at all!
Our original plan was to build a fireplace into the centre of our built-in entertainment center DIY. But, as I began to live with the idea in my mind I liked it less and less.
It felt like would be way too much going on in one small area – not doing the TV or the fireplace feature enough justice. (Especially when our hidden TV cabinet turned out so well! That baby needs space to shine!)
One day we dragged the fireplace unit into the corner while we worked. And I had a big lightbulb sort of moment. We didn’t have anything great planned for this small corner – and it can be viewed from the media room (well, duh) and from our future Hobby Room Pub. Win!
I was still a bit reluctant though. I had a pretty ignorant bias against corner fireplaces. I thought they looked weird and awkward – I was so wrong!
Yeah, but how do you make a DIY corner fireplace look good?
After scrolling Pinterest for corner fireplace ideas, I figured out what makes a corner fireplace look best.
In my opinion, the awkward-looking part of the fireplace in the corner is, well, the corner. When the walls above the fireplace meet in the corner it creates a big, empty, triangular space that’s tricky to make look good.
So below, you’ll see how we worked around that.
Our faux brick German schmear brick treatment…
We’ve used faux brick paneling in our basement a few times now. We can’t seem to help ourselves. Previously, each time we used Ed’s method for how to hide seams in brick paneling and also we painted it.
We wanted a brick faux fireplace, but we didn’t want to do the exact same thing again. Enter the German schmear technique – it turned out pretty darn great and was quite easy!

It’s barely recognizable. Keep reading to see this corner now…
. Also we built a faux reclaimed wood mantle. A corner fireplace can look great and here's how.")
How to Build a Faux Fireplace in a Corner (with German Schmear Brick treatment)
Faux Fireplace Materials:
- Fireplace Electric Log Insert with Heater
- faux brick panelling
- 1×8 pine (for mantel)
- 2x4s and 2x6s
- screws, nails and nailer (we love this cordless one)
- drywall compound, scraper, sandpaper
- Fusion mineral paint in Ash
How to Build a DIY Corner Fireplace:
Steps by Ed
Step 1: Build the Electric Fireplace Insert Box

We used a piece of rough stock, 1″ pine we had from a previous project and cut it slightly larger than the electric insert we ordered.

I angled it up at the back to create the illusion that it was going up a chimney and not just a flat ceiling. Stagecraft magic!

We propped it up on different things to test various heights and depths for the overall fireplace before we cut a single board. Highly recommended!
Step 2: Build the Faux Fireplace Base

Since the firebox base was strong enough to support the insert, we just needed enough structure to hold the box where we needed it.

This meant screwing it in place in a couple locations.
Screwheads will be hidden later with drywall compound, so don’t worry about being inconspicuous.
Step 3: Build the Fake Fireplace Surround

We used 2″x4″ for the sides and 2″x6″ for the top to give the mantle lots of options to attach to.

There really wasn’t much; some 2″x4″ to connect the actual walls to the face and give it support is really all I tried to do.
Step 4: Attach the Faux Brick to the Fireplace

You’ll need to look at the bricks in your firebox and line up the mortar lines with the brick panel you’re attaching to the face. I had to do several re-cuts to line things up – the German Shmear will hide some sins, but the human eye would definitely notice if the lines weren’t matching up.
Step 5: Cover the Faux Bricks with German Schmear

We’ve done a similar technique on faux brick panelling a few times already now, but this one had a couple new skills – start with this tutorial first with a couple of changes:
How to German schmear:
First, you’ll want to cover a lot more of the panel than when you’re just hiding seams.
We’ve found that just having a few bits of red brick peeking through are enough for the effect.
You’ll also need to sand it a bit to knock off the occasional compound peak. After sanding, wipe it down with a wet cloth and you’re done – no painting required!
Secondly, I did a solid coat of drywall compound on both the firebox base and the mantle ‘baseboard’ to create the effect of them being solid cement.
It was waaaaay easier than regular drywall as you don’t need to get anything smooth.
6. Build the Faux Reclaimed Wood Mantle


We found 1″x8″ pine was the right size. I cut the corner angles for the top and tried them in place, then mitred the corners of the front edge to hide the seam as much as possible.
Try it in place regularly and check everything over before you join the two sections.


If you have trouble, consider attaching them to your surround in two pieces and finishing them in place. It will mean your house smells like wood stain/finish, but it might save your sanity.

Starting to look not-fake. When the mantle fits, stain/finish with your favourite style.
Of course, we finished ours with our usual homemade reclaimed wood stain – it’s the same stain we used for our DIY media cabinet top – so it ties into the room perfectly.
Step 7: Cover the Corner Fireplace Frame

Lots of corner fireplaces don’t have this, but we think it makes it look more real – like an actual chimney is behind it. It was built from 2″x4″ and drywalled with leftover blueboard simply because I had leftover blueboard.
Not exciting, but I still should’ve taken a photo. Sorry, Robin and readers!
Step 8: Cover the top of the wall with vertical shiplap
Vertical shiplap is great to add the illusion of height to a basement (or any space).
We decided to use our own vertical shiplap tutorial to add interest over the mantle and alongside our faux fireplace. It ties in so nicely with the hollow core door makeover we did right next to it, too!


Other projects in our Basement Media Room Makeover…
- Hidden TV cabinet that makes the room feel bigger and brighter (inspired by Fixer Upper and Pottery Barn – at a fraction of the cost!)
- DIY media cabinet built-in – that only looks expensive
- We made a tiny, high basement window look big and beautiful (for less than $50)
- Natural wood herringbone ceiling – the ultimate gorgeous basement ceiling idea on a dime
- How to add character to boring walls with grid panelling
- Our DIY hollow core door makeover
- The best basement floor – and how to install it
- and more…
New! We recently finished the fireplace of our dreams!
You can find the whole project here: Beautiful Venetian Plaster DIY Electric Fireplace Wall Tutorial


There are so many fabulous fireplaces you can make! Check out some beautiful projects here:
How to Put a Fireplace Anywhere! 20+ DIY Electric Fireplace Ideas, Mantels and Surrounds that Wow
You can find all of our Basement Media Room Projects here…


Robin and Ed are a DIY-loving couple with over 25 years of design and build experience. Also, Robin is a Nutritionist and former Registered Dietitian and Ed is an award-winning Business Educator. We share strategies for living a rich life on a DIY budget: creative money-savvy ideas for a stylish home, healthy meals and family fun. Our work has been published in the pages of Do It Yourself, Farmhouse Style and Better Homes & Gardens magazines.
jerry
Monday 28th of March 2022
Do you think a screen curtain in front of this would work as good, as I have a corner cabinet made for something else and I am wanting to turn it into an electric fireplace. Also does the faux brick discolor any due to the heat? Looks nice BTW
frugalfamilytimes
Monday 28th of March 2022
I don't know if I'm picturing the screen curtain properly - like a metal screen? That would work. Our faux brick has not discoloured at all. The fireplace insert doesn't get hot enough to do that. Happy projecting! :)
Brittney Scott
Saturday 6th of November 2021
Love it! The insert doesn’t get too hot to be in the box? That’s my only worry- I really want to do this!
frugalfamilytimes
Monday 15th of November 2021
Not at all, Brittney! The insert is wide open on the front where the heat comes out. It warms the room, but not the fireplace. :) Let us know how it goes! :)
Lynn at Nourish and Nestle
Thursday 6th of February 2020
You guys never cease to amaze me! That looks fantastic!! Thanks for the how-to!
frugalfamilytimes
Thursday 6th of February 2020
Awwww, thanks, Lynn! That means so much to us - thanks for taking the time to comment! :)
Kathleen The Fresh Cooky
Tuesday 4th of February 2020
Love the look of this!
frugalfamilytimes
Thursday 6th of February 2020
Thanks, Kathleen! We like it too! :)