
We may earn a commission on purchases made after clicking links on this page.


by Ed
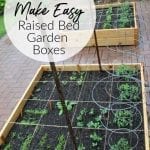
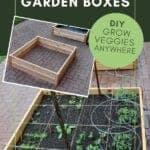
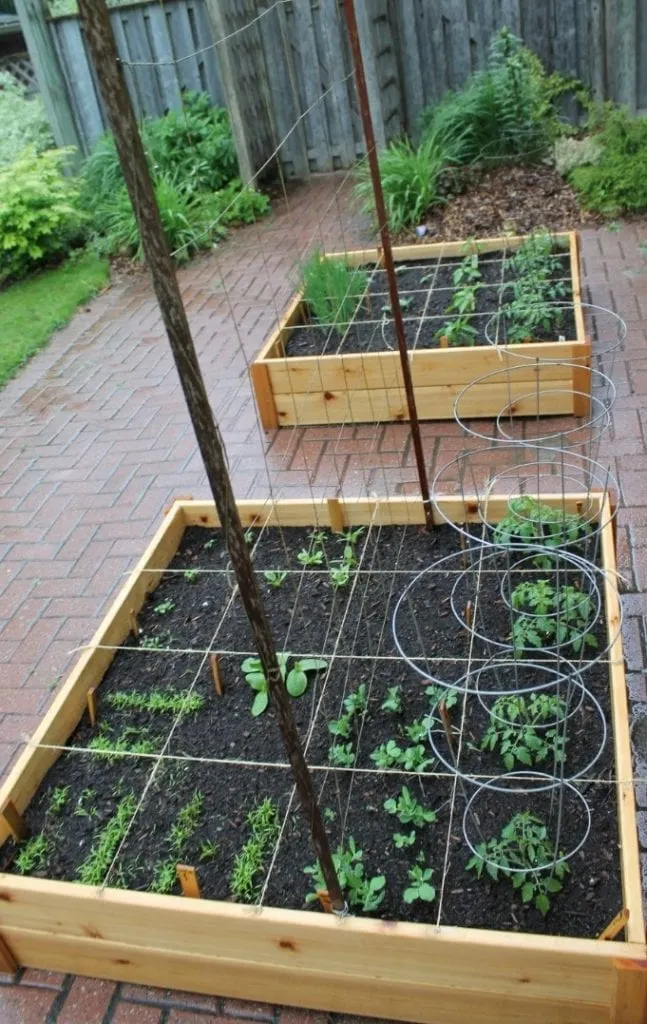
You can grow vegetables anywhere! We’re going to grow them in the driveway, of all places. First off we did this project: garden boxes DIY.
Why the driveway? Well, last time we talked about how (and why) we’re Growing Vegetables in our Driveway (read Part 1 here)
Today, we’re going showing you step-by-step how we built the raised bed garden boxes. It’s very straightforward – a build a beginner can do!

How to Build Raised Garden Boxes DIY
Our initial inspiration for these beds came from Ana White and her $10 cedar raised garden. Sadly, ours will cost more than Ana’s, but we have our reasons:
- We wanted a deeper bed. Planting on a warm, dry driveway will mean our soil will dry out quicker.
- Deeper beds = more soil = more moisture for plants.
- We wanted a stronger bed.
- Ana’s beds from fence boards are cheaper, if you can make that work for you, go for it. But, we imagined a kid sitting (or walking or skateboarding) along the edge of our garden and seeing a split or bowed fence board and earth and seedlings pouring out.
- We wanted to put some landscape fabric inside the boxes so the earth didn’t wash down our sloping driveway in the rain.
- We wanted something for the long-haul.
- These will be part of our house’s curb appeal. We wanted something attractive and durable.
- MOST importantly: We chose cedar.
- While Pressure-Treated boards would be less expensive, we didn’t want those chemicals leeching into the food we were going to all this trouble to grow.
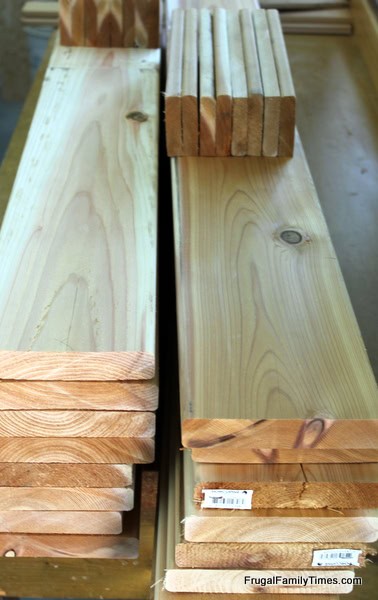
Raised Garden Boxes DIY Materials List (per Box):
- 4 cedar deck boards (5/4″ x 6″ x 8′) ~ thicker and sturdier than fence boards
- 1 cedar fence board (1″ x 6″ x 4′) ~ these will be the corner pieces
- Outdoor screws/nails
- Landscape fabric
- Hammer and Drill
- Staple gun/staples
- Circular or Table Saw
- DIY rasied bed soil mix
Raised Garden Boxes DIY How to:
Step 1: Cut the Deck boards in half.
This should give you 8 four-foot lengths.
Step 2: Rip the Fence board down the middle
Do this yourself or get your building centre to do it for you – e.g. Home Depot will rip it for free.
Then, cut the resulting 1 x 3 into 11″ lengths. (The Deck Boards are not actually 6″ wide, due to finishing, so stacking two of them only makes the planters 11 inches tall.)

Step 3: Assemble the first level of your frame.
Arrange the deck boards into a box – it won’t be a perfect square since you are drilling into the ends, but it will be close.
I found our picnic table to be a near-perfect jig for holding the frame parts together. In absence of an old picnic table, you may have a friend that can hold the parts for you.
Assemble it with screws, making sure to pre-drill the holes first since you are working near the ends of the material and it splits easily.

Not to be mistaken with a dance I do at summer BBQs after a beer or two.
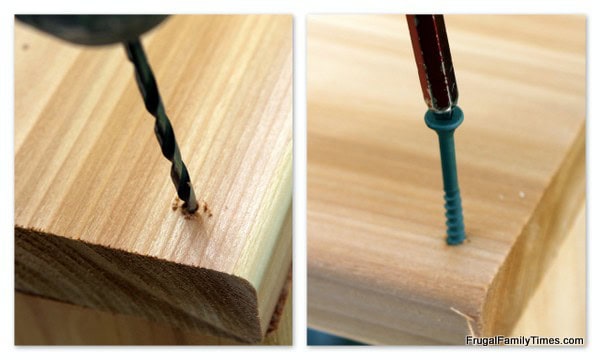

Split ends are not just something you hear about on Vidal Sassoon ads. Ba dum bum
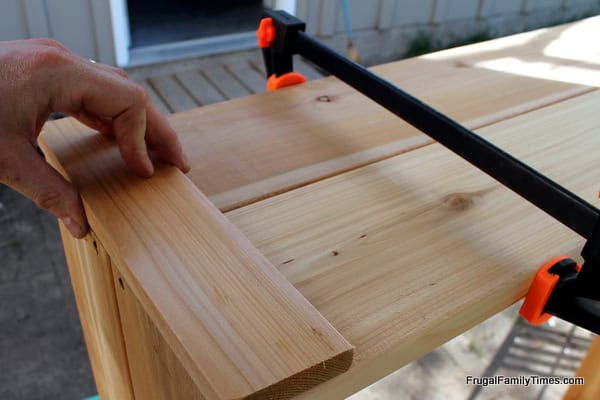
Step 4: Repeat the above steps for your second layer.
Get the same friend to hold the two layers together, or use some clamps. Look the box over and make sure both layers are lining up all the way around.

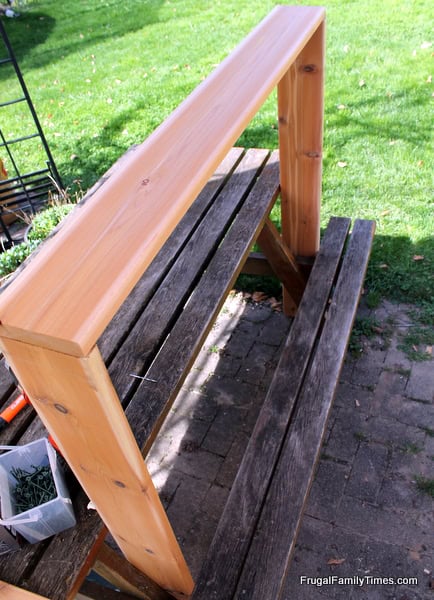
Step 5: Position the 11″ pieces of fence board on the corners
Cover the screw-joint (insert your own screw-joint joke here) on the corners of the fence boards. Check things over and drive some nails.
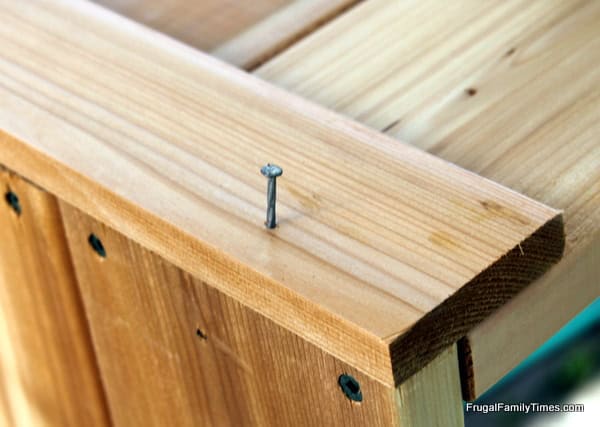


Not super-pretty, but solid and nice enough for what we are doing.
Step 7: Repeat on the other 3 corners.
The box in the foreground shows all 4 corners assembled and is ready to join its friend in getting lined.


Step 7: Line the boxes with Landscape fabric.
Carefully trim and fold the corners and staple it all into place.
Overlap by a foot in the middle of the box (unless you can find some 6-foot wide landscape fabric). You may be able to skip this step if your driveway is really level or if you are building your raised beds on top of earth.

Done!

Cost to build raised garden boxes (per box):
- 4 Cedar Deck Boards (9.83 each) = $39.32
- 1 Cedar Fence Board $4.49
- Screws/nails ~ $3
- Landscape Fabric ~ $25 for 100′ (we used maybe 15′) so $3.75
- Total Cost = $50.56/ box
Not $10 a la Ana White, but the closest retail product we found was this one at Canadian Tire, $50, the same cost as ours, but it’s smaller in size, unlined, not-natural wood and half the depth. We feel good about our choice.
Next time we will talk DIY raised bed soil mix and what to put into your frames to make them the optimal growth environment for seeds and seedlings.
After that, we’re talking about choosing and planting – and our plan to get our daughter to try more veggies.
(As far as planting – we are following the advice in this book – it’s pretty much considered the bible of raised bed gardening.)
Questions, comments or complaints? (Other than how white my legs are… gimme a break, it has been a long winter…. and tanning isn’t healthy… who am I kidding, this is as tanned as I ever get)
Keep reading here for more of our DIY Garden Boxes DIY – Square Foot Gardening experiences and tips!
This DIY Arbor Solved Our Curb Appeal Problem ~ Here’s How…


Easy DIY House Number 8 Wreath Craft: 5 minutes and less than $20!


Wood DIY Deck Planter Box to Upgrade an Old Deck with Plants and Style

Outdoor Visiting in Winter – The Physical Distancing Porch Set Up We Never Knew We’d Need


Adding onto a Deck: Our Simple DIY Deck Extension

Mihaela Albu
Saturday 17th of April 2021
Hello, I did follow your instructions and bought the material at Home Depot (British Columbia April 2021). Everything went smoothly. Thank you for your design! The only difference was the price: the four cedar deck boards were 4 @ 22.31 = 89.24 plus one cedar fence at 26.22. However, the final product looks amazing. I cannot wait to grow my plants and veggies. Thank you again.
frugalfamilytimes
Tuesday 20th of April 2021
I'm so happy you let us know you made this, Mihaela! Glad it looks amazing. :) I don't doubt that it cost more - sadly these "unprecedented times" have made all lumber much more costly than when we first made ours. :( Robin
50 DIY Raised Garden Bed Plans Free (Start Gardening)
Monday 24th of August 2020
[…] An amazing DIY raised garden plan to grow the crops of your dreams! Just make sure to have enough information on the crop you’re trying to grow. For example, potatoes need well-drained soil, and a deep underground reach as their roots spread out. frugalfamilytimes […]
Unknown
Wednesday 27th of June 2018
Such a cool diy project. I'm fall in love.
Unknown
Sunday 1st of April 2018
I have been looking around - and I think this will be our winner for what we build this spring. How much did it cost to put soil in these puppies? Just trying to budget appropriately :)
Unknown
Monday 2nd of April 2018
Thanks - that is super reasonable! Definitely an upfront investment, but less the next year. Thanks for sharing :D
frugalfamilytimes
Sunday 1st of April 2018
Hi Amanda - this post we talk all about the great soil we used: https://www.frugalfamilytimes.com/2013/05/growing-vegetables-in-our-driveway-soil.html
It cost us about $33 to fill the first time. And then we add some composted manure each spring. Gets cheaper! :)
Steven
Tuesday 29th of August 2017
WOW! Just an amazing idea. I'm a gardener but never make garden bed box before. It's an a unique idea. I'm so excited to make it. Thanks
frugalfamilytimes
Tuesday 29th of August 2017
We love ours, Steven! Come back and let us know if you make them. :)