How to Install Grid Pattern on Wall with Trim ~ A simple way to add character on a budget!


Intro by Robin
Steps by Ed
For the life of me, I don’t know exactly what this type of wall treatment is called! Is it “grid paneling? Is it “moulding squares”? Is it “square paneling”? I don’t rightly know!
What I do know is adding this grid pattern on wall trim is an easy and affordable way to add character to an otherwise bland wall.
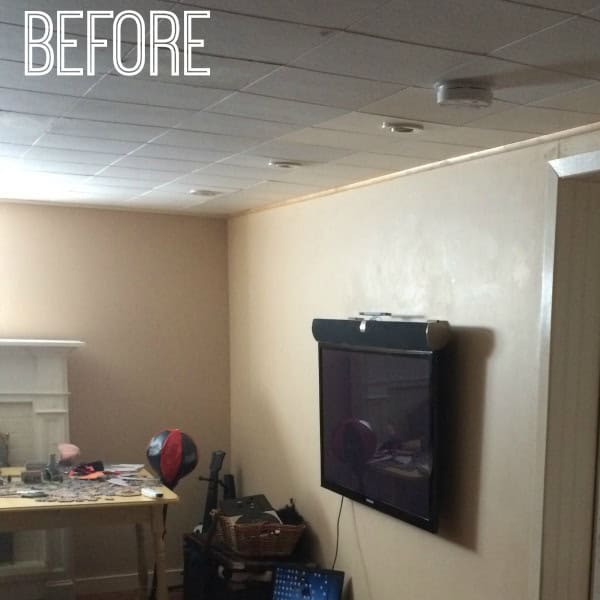
It’s like (slow motion) magic! Nail up a few strips of wood and in front of your eyes, a rich texture emerges. After we painted the wall and wood strips, we thought we were transported to a much fancier den a la Downton Abbey. Certainly not the same old bland box our basement media room was before! It’s seriously incredible!
In today’s post we’ll walk you through everything you need to know to install this simple and high impact wall treatment…
How to Add Trim Grid Pattern on Wall

This is the exact trim we have used a few times. (We used it for the board and batten wall treatment in both our dining room and powder room.)
It is simple in profile and easy to cut and work with. It also has the added benefit of being the same depth as the narrowest part of both our baseboards and crown mould, so everything looks consistent.
We used finger-jointed pine because that was the only material we could find this size in. MDF would be cheaper – but sadly not available to us.
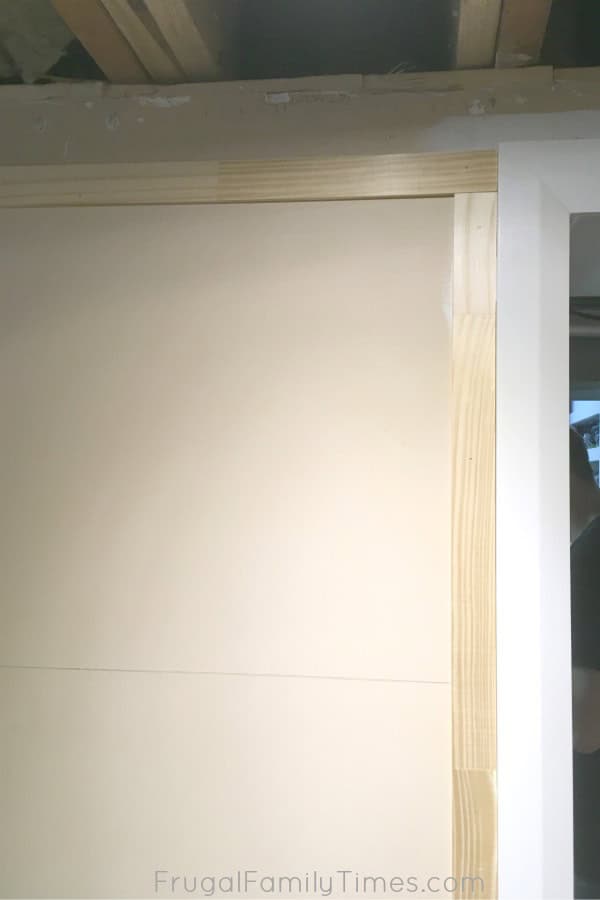
We then used the trim to frame a border into a large rectangle. You can now try various widths for the vertical battens (which, in turn, dictates the sizes of your squares).
Consider drawing them on the wall to get a good visual before you start nailing.
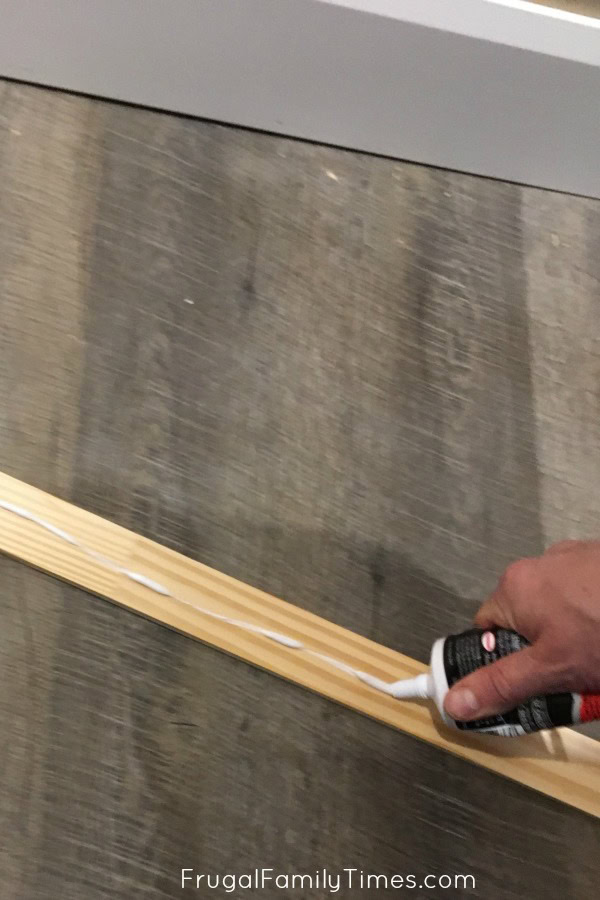
We used construction adhesive in addition to our finish nailer to make sure the stayed where we put them.

The width of the panels will obviously dictate the height of your boxes but know that you don’t have to make them perfectly square – but it’s essential that they run perfectly parallel.
If you can’t fudge things enough to make each batten even, put your non-square box on the bottom where it will most likely be hidden.
Measure, cut, glue and nail each piece, checking for level as you work. (A small level like this one is essential.)

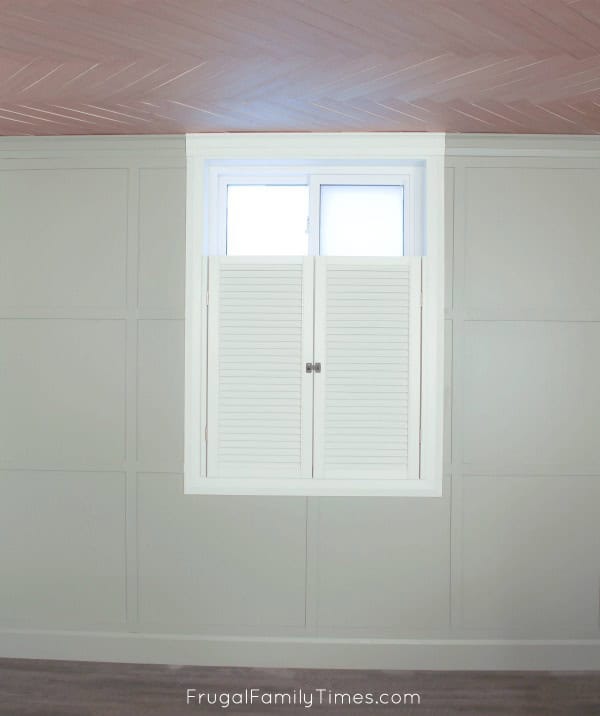
The finished photo above illustrates some of these. The main wall – on the right – has no openings and it was relatively easy to set the size of the squares.
The wall on the left is smaller and has an offset window. What we had to do was fudge the measurements of the squares – the squares on this wall are slightly smaller. Can you tell? I can’t.
You will likely have openings that you need to work around – in an ideal world the opening would be in the centre of the squares – that’s not often possible. We plan to have drapes on either side of the window that will distract from the off-centre of the grid around it. We chose to put a vertical batten in the centre of the window – because that will be noticed. In person, it looks just right.

We initially hadn’t planned on doing trim above the baseboard, but when we got to this point, we decided it was the way to go.
Next time we will have one complete piece of trim across the whole bottom.

When you have two walls with the box panelling meeting in the corner, we treated each wall as its own space and trimmed both edges.
This made for a heftier, bulked up look that we liked in the room corners.

Be careful not to round the edges of the trim – you just want to remove any roughness or imperfections.
Pay careful attention to any area where the trim is meeting or intersecting – the thickness often is not uniform – and you’ll need to build up your spackling to cover this.
Paint, fill and sand any imperfections that jump out at you and then give the whole thing a final coat.
The sage green paint we chose is the same as the panelled accent wall in our basement guest room/library: Milk Thistle by Behr.
You can pretty well do this whole project in a weekend if your room isn’t too large. Great return on investment for both your time and money!
Other projects in our Basement Media Room Makeover…
- We made a tiny, high basement window look big and beautiful (for less than $50)
- Natural wood herringbone ceiling – the ultimate gorgeous basement ceiling idea on a dime
- A timeless (and affordable) hollow core door makeover
- DIY media cabinet built-in – that only looks expensive
- Hidden TV cabinet that makes the room feel bigger and brighter (inspired by Fixer Upper and Pottery Barn – at a fraction of the cost!)
- The best basement floor – and how to install it
- How to build a faux fireplace that looks real (with German schmear bricks!)
- and more!
It’s going to take us some time to get all these projects finished, photographed and posted – I can’t wait!!!
In the meantime, have you seen our other Basement Makeover Projects? We turned a closet into a basement bathroom & made the coziest guest room that doesn’t feel like it’s underground.

Robin and Ed are a DIY-loving couple with over 25 years of design and build experience. Also, Robin is a Nutritionist and former Registered Dietitian and Ed is an award-winning Business Educator. We share strategies for living a rich life on a DIY budget: creative money-savvy ideas for a stylish home, healthy meals and family fun. Our work has been published in the pages of Do It Yourself, Farmhouse Style and Better Homes & Gardens magazines.


i like your ideas. i have used a few of them and always wait to see what is next.
the board and batton is great!
thanks for sharing and showing how to make projects more affordable!
Awww – thank-you so much, sunshine! I'm glad you like our ideas – we love sharing them! 🙂