We may earn a commission on purchases made after clicking links on this page.
by Ed
I had a treehouse as a kid. I remember the day of its building, despite the fact that I was very young.
I’m sure that it was actually built over a couple of days and many of my remembrances about it are skewed by time, but the thing I remember most was the feeling of awe: “This is MY treehouse” – the idea that I was going to get a space to call my own was all that mattered. (Bedrooms don’t count – you have to clean them and ask permission to put posters up).
This treehouse was my kid-only space and I wanted that for our kids too. And nothing I have ever made has elicited so many sincere and joyful “Thank-you, Daddy’s!”.
And who doesn’t love treehouses? There are now DIY shows about their construction and Pinterest boards full of ideas so incredible that the kid in all of us screams, “I want that!”.
I wanted to put one in our backyard, but we lacked decent trees to make it happen.
Now that we have the Mobile Home Makeover weekend property, though, the dream of being a treehouse owner once again seems doable.
Here are my essential tips for how to build a treehouse…
Last summer, the kids and I had “Treehouse Camp”. It was a creative weekend in the summer of designing and building a Treehouse on our rural acreage. We learned so much together.
In today’s post, I want to share what I learned both from reading great books beforehand and my own experience.
This isn’t a step-by-step tutorial, but really, no one wants to build the exact same treehouse as someone else anyhow.
Our Top-Tips for How to Build a Treehouse
Step 1: Location, Location, Location!
The tree(s) you choose for your treehouse are like the foundation of your actual house. This is such a crucial step and it will ruin everything if you get it wrong.
Some rules of thumb – if you can hug the tree trunk and touch your hands together, the tree is probably too small.
I initially felt that this was a foolish standard – My deck sits on 4×4 and 6×6 and stands up just fine.
But the main issue with treehouses isn’t support strength – it’s how much the tree trunk moves around in the wind. A small trunk moves a lot when a rainstorm blows through and your big, tough tree bolts will sheer off and drop your hard work to the ground in a pile of broken lumber.
Big trunks! Important. While we’re on the topic, a grouping of trees is nice as it provides multiple support points and gives beginner treehouse builders (like you and me) more options.
Spend some time in the spot where you plan to build.
We almost built our treehouse in a terrible spot.
Robin was pushing hard for building it at the very back of the property. She thought it would encourage the kids to go play at the back and have new adventures – rather than in the cedar grove in the middle where they always played.
This would have been a disaster! That back area was near a marshy spot that ALWAYS had mosquitos. There’s a reason the kids never played there! We came so close to building a West Nile-infested-unuseable treehouse.
Some trees don’t make good treehouses.
That’s why we never built one in our backyard at home.
Our biggest tree there is a Black Walnut which is notorious for not holding bolts well i.e. your treehouse would be a death trap.
Our other trees are also inappropriate: birches (too thin and bendy) and mountain ash (wimpy branches).
Do your research, here’s a helful link.
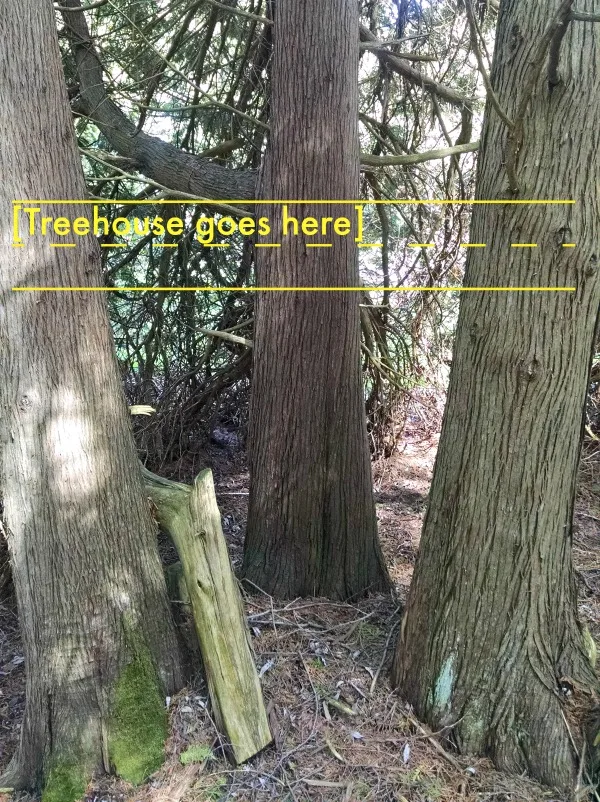
Their nice size and tripod arrangement would make treehouse building a snap.
Ultimately, the grouping I found was even bigger.
Step 2: Attaching the support beams – Less is more
The Internet and current Treehouse boom have given us many great ideas and bits of hardware.
These Treehouse bolt kits are the best way to ensure a tree can move and grow after you build a fort in it.
Single, large bolts are also much better for the tree’s health and – by extension – your treehouse’s long-term structural safety. Using multiple screws or nails can end up causing a tree to compartmentalize the area you are anchoring into, meaning the wood actually dies and all your work eventually comes crashing down.
A single, large anchor bolt means less damage and better strength. I used 4 of the biggest lag bolts I could buy, adding a washer to them and making the hole in the 2″x12″ beam more of a groove so that things could slide a bit in the event of severe wind. Not as good as the speciality bolts, but much more frugal.

I plan on easing out the lag bolts a bit to reduce the stress and strain.
For now, they offer a bit of breathing room and over 8″ buried in the trunk.
Step 3: Don’t be shy about height
Yes, kids will be playing in this, so don’t put it 30 feet up. But go as high as you feel comfortable – the deck on ours is around 9 feet at the lowest point.
You are going to build this thing strong and add a secure railing, so kids will be safe. Also, you want to build it with the future in mind and your tween-teen kids probably don’t want to hang out in a ‘treehouse’ that’s only 4 feet from the ground.

I’m over 6′ tall and had to really reach up to attach the joist ties.
Step 4: Build A Deck in the Sky
Most of the rest is like building a deck. After you have your beams connected to the tree trunks, add joists and deckboards for the floor.
I used some basic Deck guidelines like approx. 16″ centres for my joists and cantilevering by no more than 1/3 for my overhangs.
Looking at my photos, I’m sure you’ll see cheats like logs bracing my excessive overhang on one end, but I tried to make up for it with serious hardware like hurricane ties and more lag bolts.
When it comes to decks, bigger IS better.
Sometimes as parents we forget that our little ones are going to get big. They’re going to get taller and wider and so are their friends.
If you make the deck too small, your treehouse is not going to keep your kids coming back when they’re older. They’ll feel silly squashed in there when they’re teens and it will gather dust rather than friends.
We built our deck big enough so that we can pitch a tent up there.
Picture a double air mattress – if you can fit one of those you’re going to open up options for treetop sleepovers.

And the joists aren’t 100% parallel. It is a treehouse, after all.
Step 5: Use Nature wherever possible
One of the most pleasing parts (we think, anyhow) to our treehouse is the way the trees and nature play a role in the final design.
I really wanted to have some trees come through the deck and be able to walk around them.
This was more work (especially as I did all the cutting with a hand saw) to fit deck boards around the trunk and leave growth room, but it was worth it.
The other fun part (the Treehouse Guys call it “aisle 6” shopping) was scavenging for posts and railing pieces on the forest floor.
The contrast between the very un-natural deck and the blend-in-with nature railings etc make the whole project more fun.


Step 6: You’re not done till you add some other cool stuff
Obviously, you need a ladder, platform and/or ramp to get in.
I found a large log, secured it to the frame at an angle, notched it and added rungs to climb up with. I need to do a bit of refining, but it really looks cool and almost makes the entrance hidden till you get up close.

The rope-bucket-dumb-waiter is a treehouse mainstay too and we needed one.
I made use of a dead -but still sturdy- limb and a spool from some wire as the pulley. Work with what nature gives you/found materials and you’ll produce waaay cooler stuff than going to Home Depot and buying a trapeze or whatever (although we did attach a store-bought hammock swing underneath the frame).

And we’re done.
But are you ever really done?
Last summer we also added a temporary tarp-roof made with a camo-tarp, rope and some bushcraft.
Maybe a zipline would be cool too.
A fireman’s pole! Some other platforms up higher when the kids are older? Yeah, I need a hobby.
Unless treehouse renovating is a hobby?
Till then we’ll be hanging out reading comics in the sunshine…





Rebekah Purnell
Saturday 9th of September 2017
Great idea. I'm a DIY'er and love DIY work but I'm not a woodworker. I wanna make it. Actually, Am I able to work? or need hire a woodworker? Thanks
Lynn at Nourish and Nestle
Friday 12th of May 2017
I lived a relatively charmed childhood...but I never had a treehouse! Maybe it's not too late...
Hope your kiddos know how lucky they are!
Thanks for the great suggestions.
frugalfamilytimes
Monday 15th of May 2017
Oh they do know, Lynn! Our son has never expressed more thanks for anything than this treehouse - and he's a pretty thankful fella. All weekend long we heard many "Thank-you, Daddy!"'s. Even when we opened the place again this year he said it a couple times more! :)