
We may earn a commission on purchases made after clicking links on this page.


Intro by Robin/Steps by Ed
When I started designing our basement pub and hobby room I didn’t intend for us to build a DIY wet bar from a repurposed buffet. I had much much more boring and expensive ideas.
This is my usual design process: I tell myself that I’m a grown up now (very very much a grown up – 47 today! yikes). And since I’m a grown up I need to let myself spend more money on permanent things around our home. Like grownups do, right?
So I mocked up our “custom wet bar” with new cabinets in the IKEA kitchen design software. I wish I took a screenshot for you, but here’s how I’ll paint a word-screenshot for you: it was a super-bland, normal looking kitchen cupboard unit. Snore.
Plus this boring wet bar was going to cost about $800. That’s a lot of money for something so dull.
So this grown up decided she could come up with a vastly more interesting idea for much less money.
That’s my process:
- Try to spend lots on normal, new stuff, because I “should”,
- Feel uninspired with that and unable to justify the cost,
- Then innovate something far more interesting with budget or reclaimed materials.
I now fully embrace it. I LOVE my process!
The IKEA virtual mock-up wasn’t a total waste.
When I looked at what we could make fit in the space it looked familiar. It looked like the ubiquitous old sideboards/buffets you see on buy and sell sites everywhere.
So the idea was born – we’d make a DIY custom wet bar from a repurposed buffet: way cheaper and about infinity times more interesting than big box cabinets!
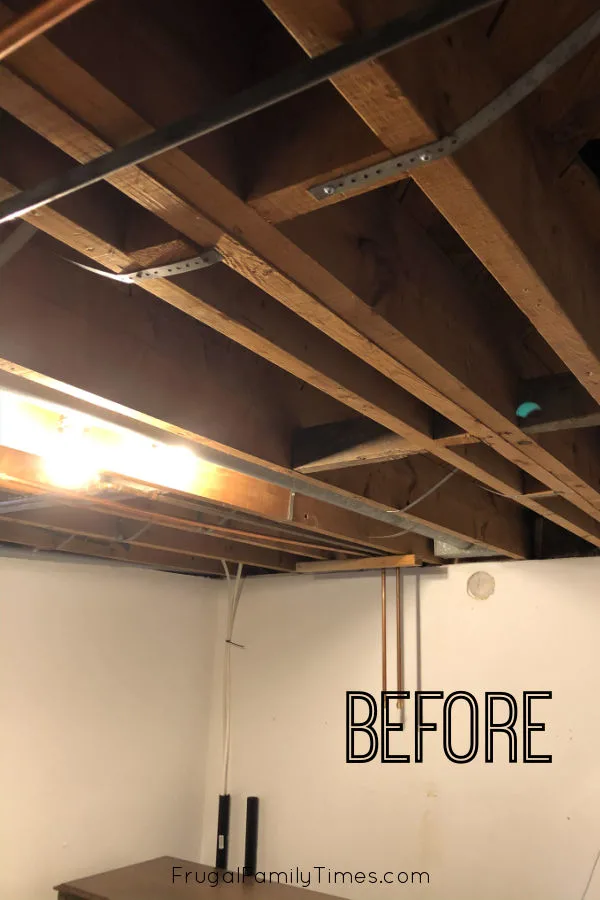
I’d been planning this bar area for years. Ed needed a place to brew beer and wine that DIDN’T look as bad or function as poorly as this:

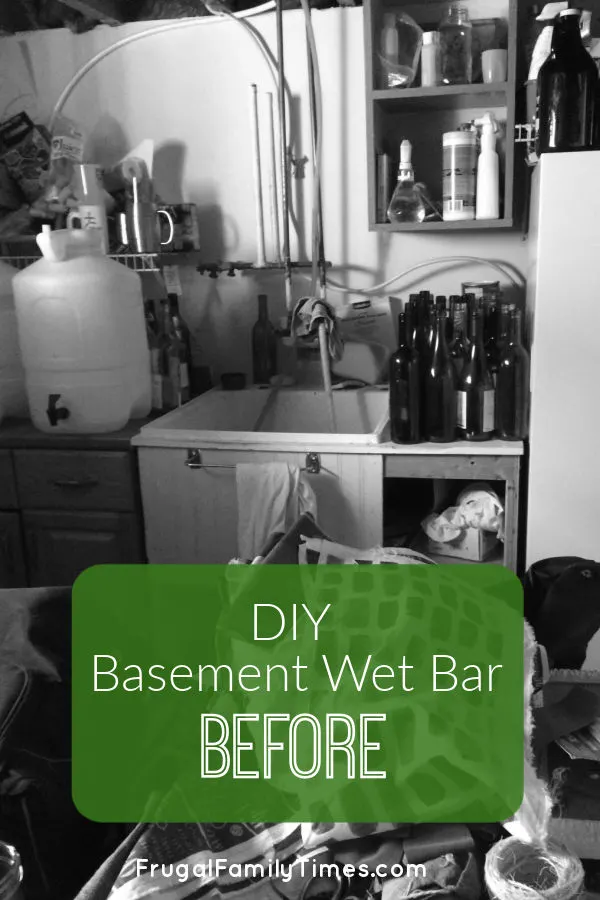
Plus you needed to walk through this room to reach our newly swanky basement media room. I’d try not to feel shame when guests visited, but c’mon this is bad.


I think I paid less than asking, but I don’t remember. You can see in the photo that it was new and retailed for $389 at Home Depot. Score! (It’s similar to this sink.)
The major challenge was also one of it’s fabulous features: it’s really big. Great for Ed – you can see in a photo below that he can fit two carboys (for winemaking) in the sink which is huge.
The tricky part was this huge sink made finding the right old buffet really hard.


I keep a list of sizes of things that I’m looking for on my phone. After consulting it I knew the length was perfect.
The question was – would the sink fit in the middle section? So before we drove the 45 minutes away to pick it up, I asked the sellers for the centre drawer measurements. By some miracle I was the perfect size!
I had to kiss a lot of buffet frogs before this prince. Good thing it’s part of the fun for me!


Sure the price for this counter is great – much cheaper than a new piece of butcher block.
But the real draw was we didn’t need to wait for IKEA to restock nor did we have to drive during the first, most scary part of the panedmic to pick it up.
A win! Sort of…
Like a buy and sell amateur I didn’t ask if it was real wood. It wasn’t until we picked it up that we saw it was laminate. Ed was keen to get started and he said he actually preferred the durability of laminate for when he makes a mess. So I quieted my inner snob and we went with it. It still looks great!
Plus it came with a sink we plan to sell – so we may come out even on this one.

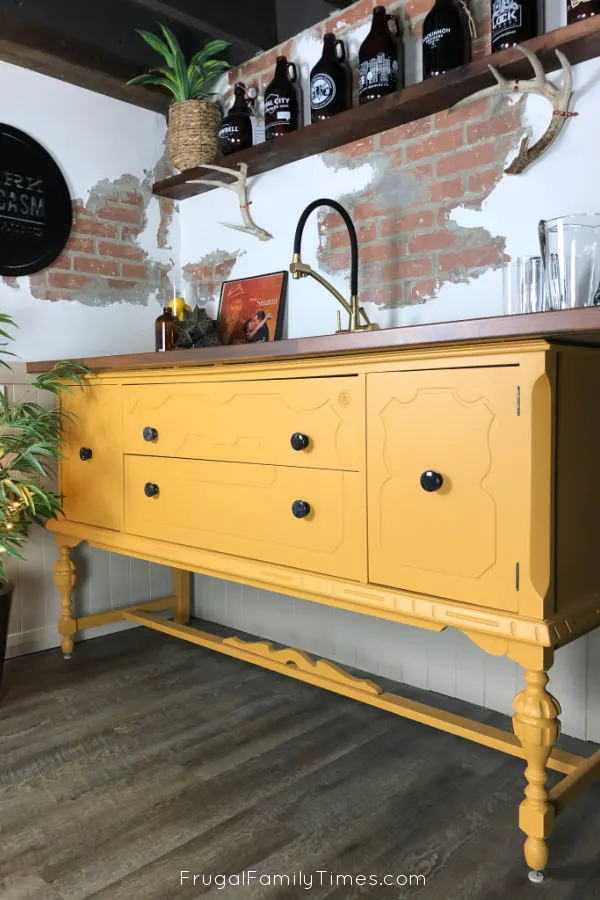
Look at those sexy legs – IKEA cabinets eat your heart out!


Ed and I both have spent quiet moments stroking her lovely shape. Ed loves how flexible it is – the black part is rubbery and can be removed to use like a hose. Great for brewing!
How to Make a DIY Wet Bar – A Sideboard with Sink Added!
Materials List:
- Masking Tape
- Circular saw and jigsaw
- Silicone Caulk
- Silicone tape and plumbers putty for the supply and drain connections
- Faucet
- Shark Bite fittings and PEX
- Round marble drawer pulls
- Hinges for Tip Out (for bonus storage behind top drawer face)
- Various painting prep and painting supplies
- Fusion Mineral Paint
How to Add a Sink to a Buffet Sideboard
Steps by Ed
Step one was to position the buffet where we needed it to be and screw it to the wall where possible.
We removed a section of plywood panel from the back of ours for the the plumbing to fit through too.


Start with a circular saw and carefully start it above the line and pivot/plunge it straight down.
Do this on all four straight runs around your sink.


This added thickness meant that the corners weren’t cut all the way through and we needed to use the drill holes above to allow the jigsaw a starter location.
Jigsaw blades DO NOT work well for plunge cutting.


This meant removing some drawer slides (the top drawer isn’t functional anyway) and some cross bracing. Given the buffet now has a whole extra countertop and is screwed to the wall, the sink’s weight is well distributed.
When everything fits, run a bead of silicone around the edge.


Our sink did not have much overhang to surface mount on, so we were prepared/expected excess silicone to squeeze out when the sink went in.


I used two wine/beer carboys to weigh it down while the silicone cured.
Might as well introduce the sink to it’s future life as soon as possible.


Wet Bar Plumbing Overview


We then put the faucet in place and loosely hand tightened the mounting plate (silver, half-moon shaped metal in the centre of the photo)


Many faucets come with these now, but if yours doesn’t you will have to use a wrench, long arms, patience and swearing.


Have I mentioned lately how much I love SharkBite Fittings for plumbing? I love them!
You can see where the PEX supply lines were installed back in our post on DIY faux brick plaster walls too.
Altering the Drawers of Our Repurposed Buffet with Sink for Custom Wet Bar


I just set the table saw up to the depth of the face and cut the drawer part off.
Done! You will see below how we attached/used the face.


We marked the area at the back of it where the sink drain trap needed space and cut it out.


I then glued and nailed it into place.


Two options for affixing the top drawer face – one, just have it mounted for show – not functional at all.
Or what we decided to do:
Altering the Top Drawer for New Storage.
We decided to make the top drawer into a tip out storage spot to store the long weird things that beer and wine making require.


No wasted space and right where I need them!
Painting Our DIY Custom Bar from Repurposed Buffet


I trimmed the doors a little because they were already scraping the buffet frames slightly and we knew that would remove any paint we put on.


It sometimes covers in one coat for us, but this lighter yellow needed three coats.
Once cured, it is pretty bulletproof.


We love how the bright yellow makes the room feel fun – and really accentuates the curves of the buffet.
How much does it cost to build a small wet bar?
Our DIY wet bar was really affordable! Here’s the cost breakdown:
- Sink $150
- Old Buffet $150
- Countertop $40
- Faucet $100
- New knobs and tip-out hinges, silicone, etc $50
- Paint $25
Total $515!
Not too shabby when you consider the IKEA cabinets alone would have been a few hundred dollars more than this (and we’d still need sink, counter, faucet, etc).
We couldn’t be happier with this project!
You can see all of our Modern Rustic Basement Wet Bar Projects here:
- Our Black Smeg Knock-off Fridge
- Our faux brick and plaster wall treatment!
- Our Custom Bar Sign! (with easy tips to design your own logo for personalized wall art.)
- Our DIY Floating Shelves Solid Wood. No expensive brackets required! (Antlers not included…)
- Our DIY Built in Cabinet – How We Out Basement Storage in a Beautiful Custom Way
- Our painted black basement ceiling – without a sprayer
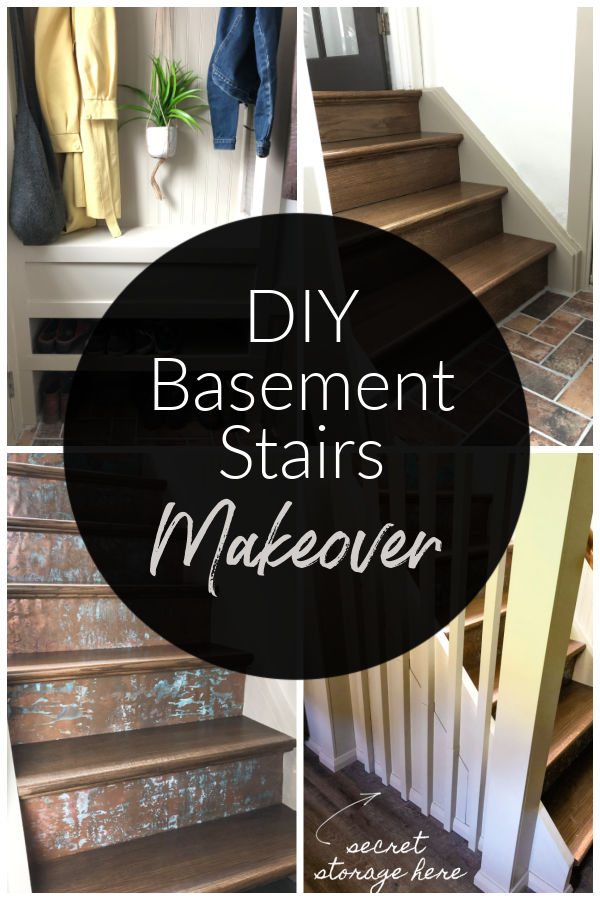

Our Magazine Worthy DIY Basement Stairs Makeover ~ Beautiful on a Budget


DIY Built in Cabinet – Max Out Basement Storage in a Beautiful Custom Way
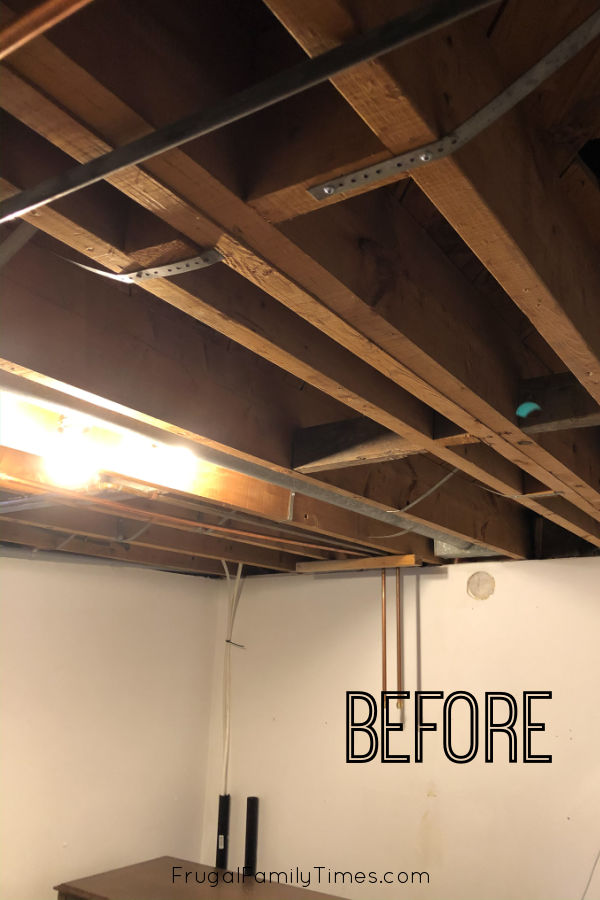
Our Painted Basement Ceiling: WITHOUT a Sprayer and the Perfect Black Paint

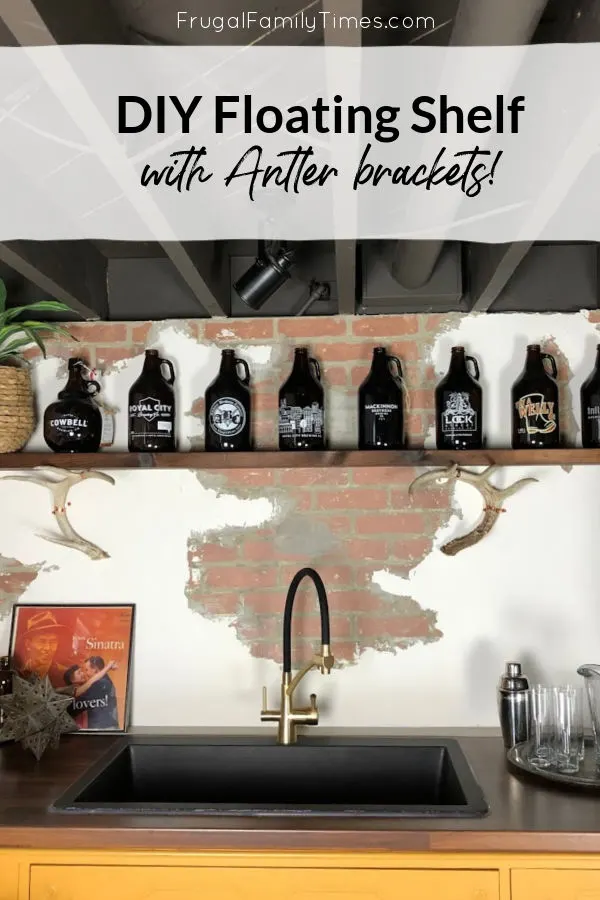
How to make DIY Floating Shelves Solid Wood. No expensive brackets required! (Antlers not included…)
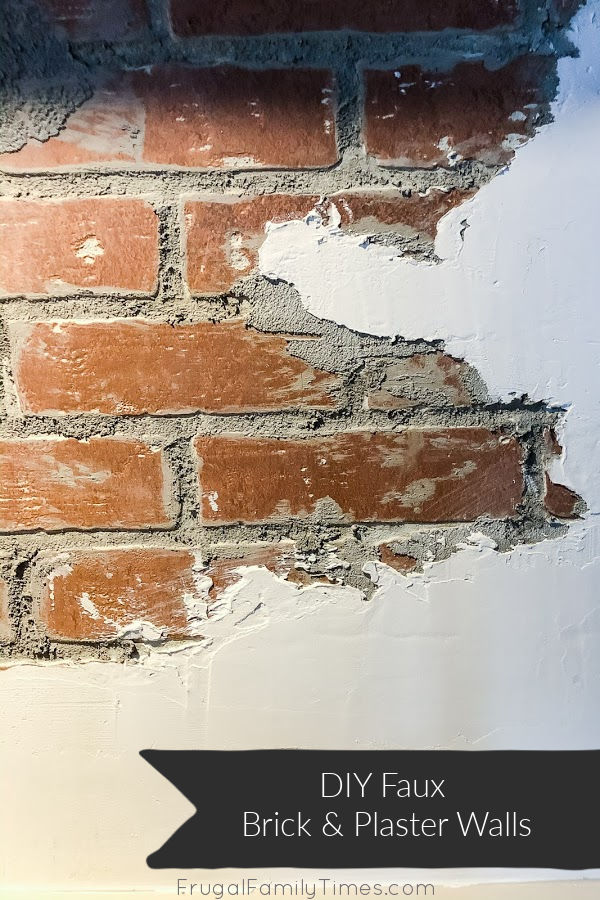

Realistic DIY Faux Brick Wall with Plaster Treatment (Distressed Exposed Brick Walls on a Budget!)


Lynn Spencer
Thursday 1st of July 2021
You guys are AMAZING! I love reading about your projects, your sourcing, and your inspiration. I consider myself fairly handy, but I am in awe of you two!
Thanks for my daily inspiration.
Hugs, Lynn
D. M. Holt
Tuesday 29th of June 2021
Beautiful outcome and great workmanship. Thanks for the detailed explanations. Gorgeous!
Vicki
Sunday 28th of March 2021
Looks gorgeous and a huge savings.
frugalfamilytimes
Friday 14th of May 2021
Thanks, Vicki! We're really happy with it - glad you like it too. :)