
We may earn a commission on purchases made after clicking links on this page.


Here’s how to stop weeds from growing between pavers!


Do you have an interlocking paver driveway? Then you understand my frustration.
Do you have a brick patio? Then you can feel my pain.
Weeds.
The little SOBs are pervasive and persistent. You’re probably wondering how to get rid of weeds between interlocking bricks.
We were fortunate enough to buy a house with an interlocking brick driveway. A great feature for any home.
But, often I would find myself envying neighbours with asphalt driveways. They weren’t out there for hours on the weekend weeding their driveway.
About once a year I’d get fed up with the weeds and sit on the driveway and weed until my hands throbbed. I’d feel satisfied with my hard work, until less than a week later the weeds returned with a vengeance.
They wanted revenge.
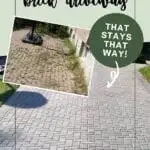
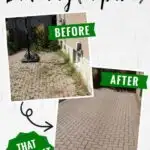
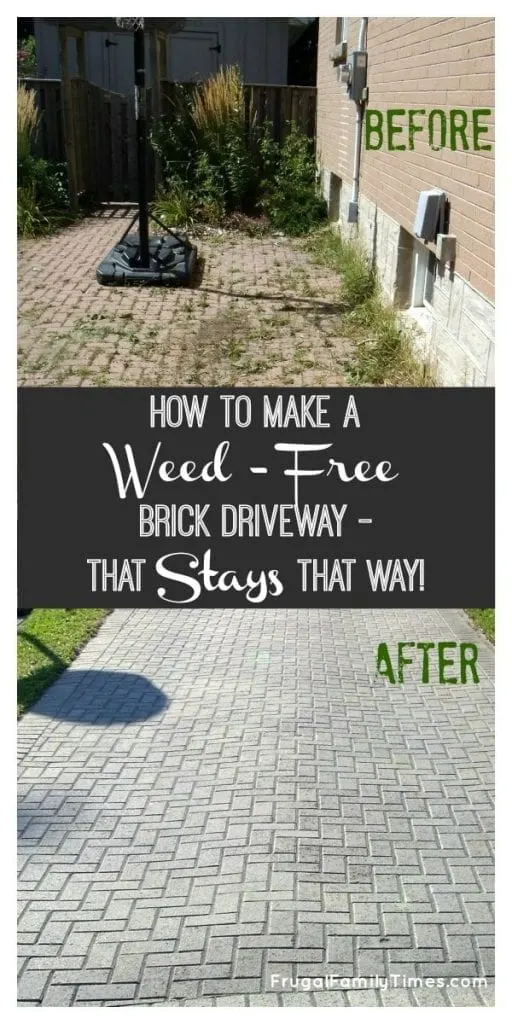
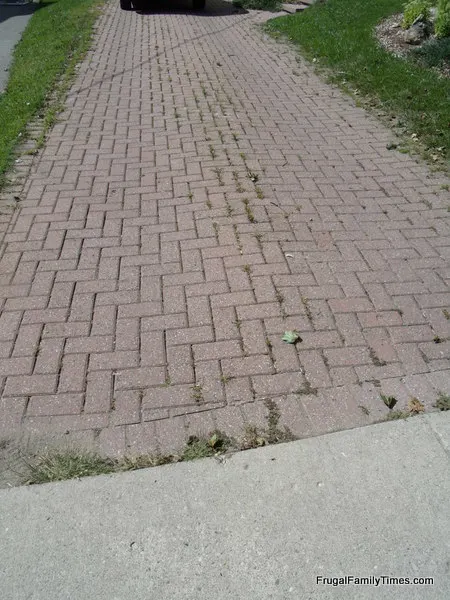
So, as you can see so clearly in the Before shot above, I’d give up. The weed gangsters could loiter as they pleased in our driveway. We’d avert our eyes and mind our own business.
We had coping strategies:
- Ed would run the mower over the driveway when he did the lawn.
- I’d park the van in such a way to hide the worst of them.
Four years ago, after we renovated, we needed to build a new walkway to our front door. It was then we discovered this product.
I describe it as sand that glues itself together and makes no room for weeds to infiltrate. We used this product on our walkway and have had little to no problem with weeds.
We needed to use this to take our driveway back from the weed mob.
You can find lots of instructions and advice for using polymeric sand on a brand new install of bricks, but I could find nothing for how to change your sand over to polymeric.
So we improvised. What follows is Ed’s description of what we did and what we do differently if we had to do it again. (Which we won’t because polymeric sand is da bomb.)
So, without further ado, here’s how to stop weeds from growing between pavers…

Steps by Ed
Our driveway, it was an eyesore.
We had full intentions of tearing it all up this summer, levelling the bed and relaying the bricks. We had blocked off some time for this. Summer rolled along. Time grew short and we started to realize that the time we had for it was likely not enough to get it all done.
Robin devised a plan whereby we remove the weeds and sand and re-lay new, polymeric sand without actually moving the bricks. Genius! But could it be done on time and without us dying of sunstroke?
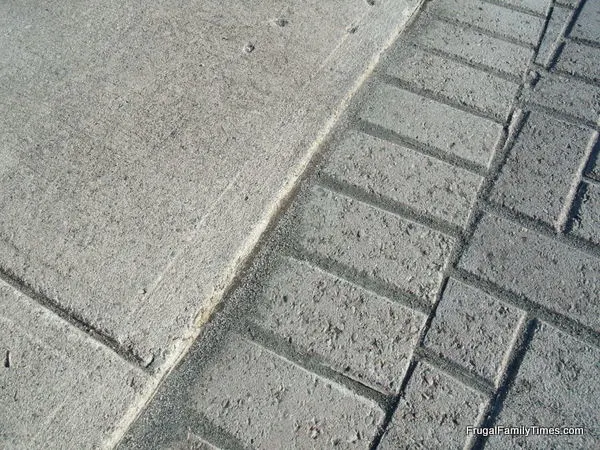
OK, let’s just have a good look at how bad the driveway/our maintenance of it was:

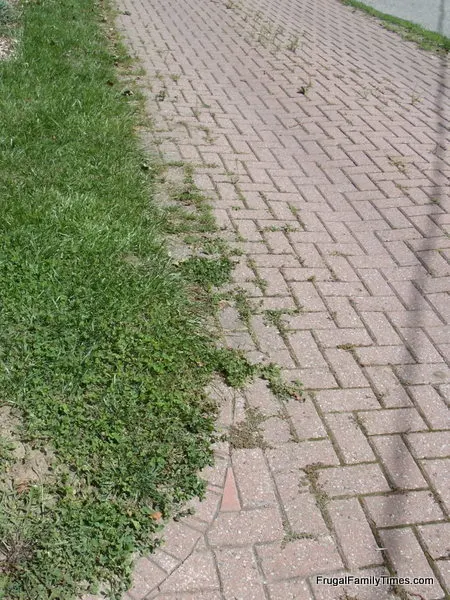

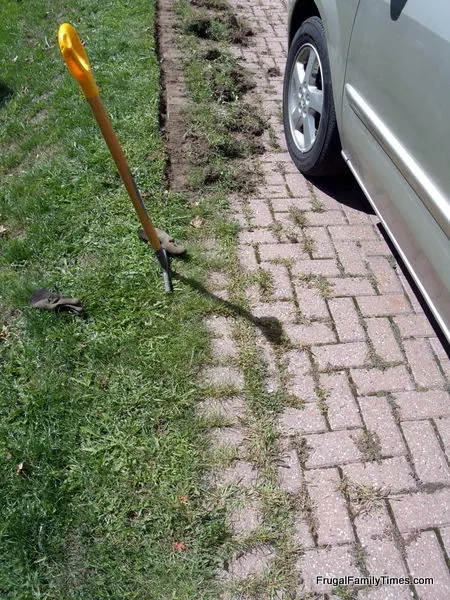
Here’s where Robin had started edging with our lawn edger.
You can see how far the lawn had crept in over the bricks:

Just Brutal. Here is what we did, in the order we did it. At the end, I have a suggested sequence that I would likely do if we had to try it again.
NEW! ⇒ If a Video Tutorial is more your style – we’ve got a video for you! Just scroll to the bottom…

How to get rid of weeds between interlocking bricks:
Step 1: Used an edging tool to find and cut the driveway edge.
Pulled up the clumps of grass and tossed them in the composter.
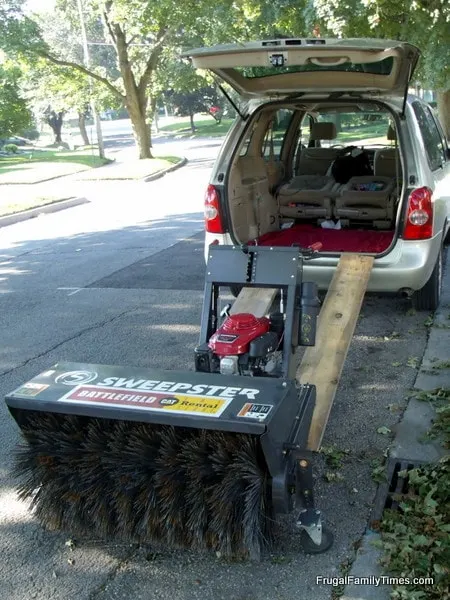
Step 2: Used a rented 36″ Sweepster for the day.
We lowered the brush as low as it would go and swept back and forth, up and down over a dozen times each way.
It was crazy hot and dry and it made the area very dusty, but it cleared most of the sand out of the accessible joints (see step 2 for what made a lot of the area inaccessible).

Step 3: Then we hand weeded between the remaining bricks

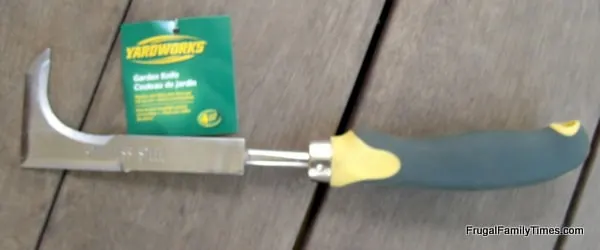
Every patio and brick driveway owner needs a crack weeder. So helpful!
It was perfect for getting weeds out from between bricks. We used, and broke three.
This is the one we use now – it does the job the best and didn’t break.
NEW!
We found THE BEST tool to remove weeds between pavers from CRACKs in PATIOS AND DRIVEWAYS – WE REVIEWED the top 3. (Here)
The Sweepster was a rock star at removing the existing sand/brick dust mixture, but wherever a weed had dug its roots in, there were issues. And you saw how many weeds there were, right?
Anyhow, we hack attacked the cracks for the better part of 4+ hours in the afternoon. We have no pictures of this, as we were worried that if either one of us stopped, we would never start again. It sucked. No, really, it did.

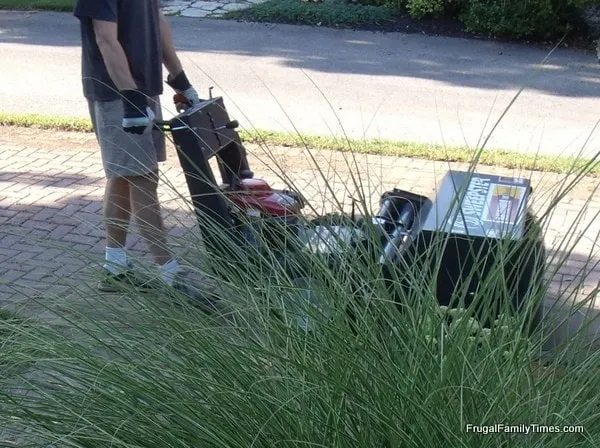
Step 4: ReSweepstered the weeded driveway to take care of all the last bits.

Step 5: Polymeric Sand the Joints.
Our NEW video shows how we did this.

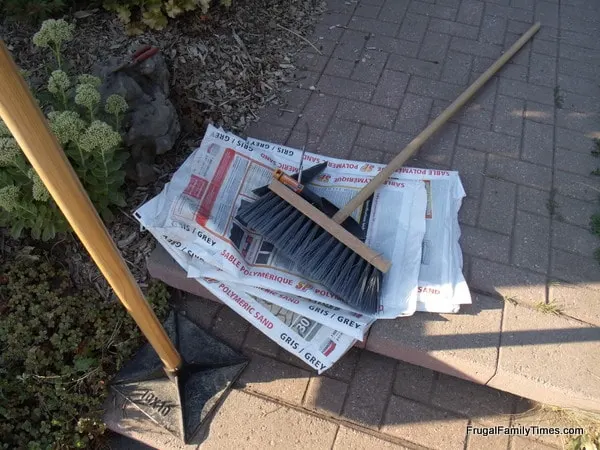
I also used a shop-vac on blower setting in place of the leaf blower and silent swearing in place of helpful narration.
We guesstimated the number of bags to buy, based on square footage in our driveway, minus the fact that we were only topping up, plus the fact that most estimates are based on larger pavers (fewer joints per square foot) vs bricks.
We ended up buying 3 bags too many but are keeping them for future projects (and have already used one on a back walkway).
If you have never used Polymeric Sand, it is a wonderful product.
On new construction, if you follow all the steps in the video, you are buying yourself 4-5 years of completely maintenance-free patio/walkway.
Even after that time frame, the weeding and upkeep are much less than regular sand, which means less time/ nasty sprays will have to be employed.

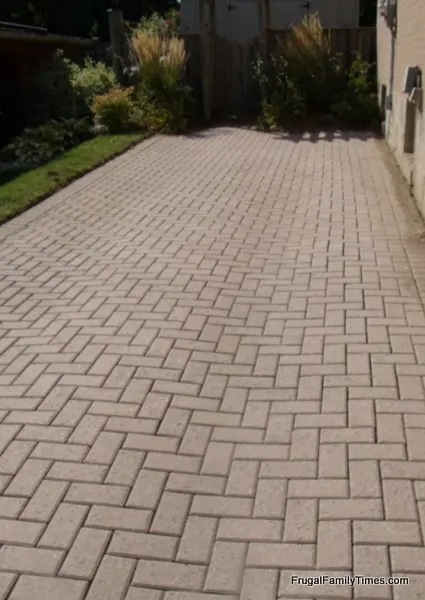
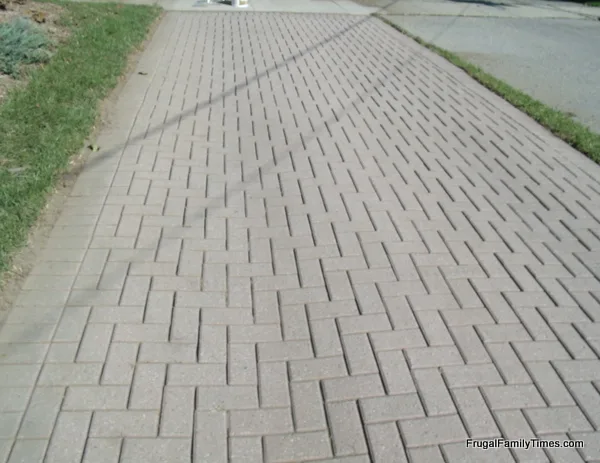
Notice there’s a gray-ish haze over the bricks – this will wear off.

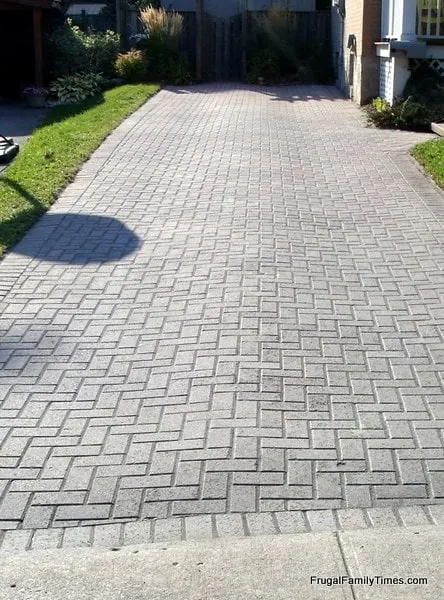
I didn’t do as thorough a job as I should have when blowing, so some haze is evident in some areas. I have decided to call those spots, “extra traction zones” for winter. You can’t argue the improvement in appearance, though.
We’re very happy and total time was a little over 2 days versus the unrealistic week we thought we could tear the whole thing up and re-lay it in.
To do it again, we would:
- Weed everything thoroughly first – we thought the sweepster would tackle the weeds better than it did.
- Pressure wash the sand out of the joints. If that didn’t work, then rent the Sweepster (more people likely own pressure washers than Sweepsters.)
- Finish as above with polymeric.
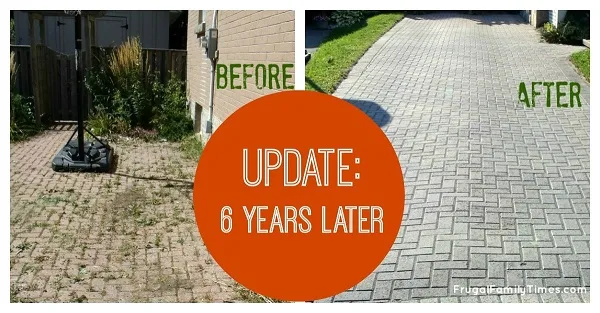
- Plus this update we did 6 years later!
Cost breakdown:
1. Rental of Sweepster (whole day) = $180.00 (having never used one before, I bought the extra insurance)
2. Weed crack tools (aka. garden knives) = $6 X 3 = $18
3. Polymeric sand = 5 bags at $20/bag = $100
Total cost = $ 298.00
Not cheap, but here’s some perspective:
Four years ago, after we did our walkway, our neighbour called around to see if she could get her sand driveway converted to polymeric sand. She was given a quote of $4,000! Her driveway is a similar size to ours.
So we figure we’ve saved ourselves thousands by doing two days of hard work.
Anyways, like I said, we’re happy for now and our neighbours can make eye contact with us again.
Any questions we can help you with?
An update for 2018! Click here to learn how our driveway held up 6 years later – and the mistake we made that you DON’T want to!

Want to know how to have a weed-free vegetable garden? We’ve got that answer, too!

This DIY Arbor Solved Our Curb Appeal Problem ~ Here’s How…


Easy DIY House Number 8 Wreath Craft: 5 minutes and less than $20!

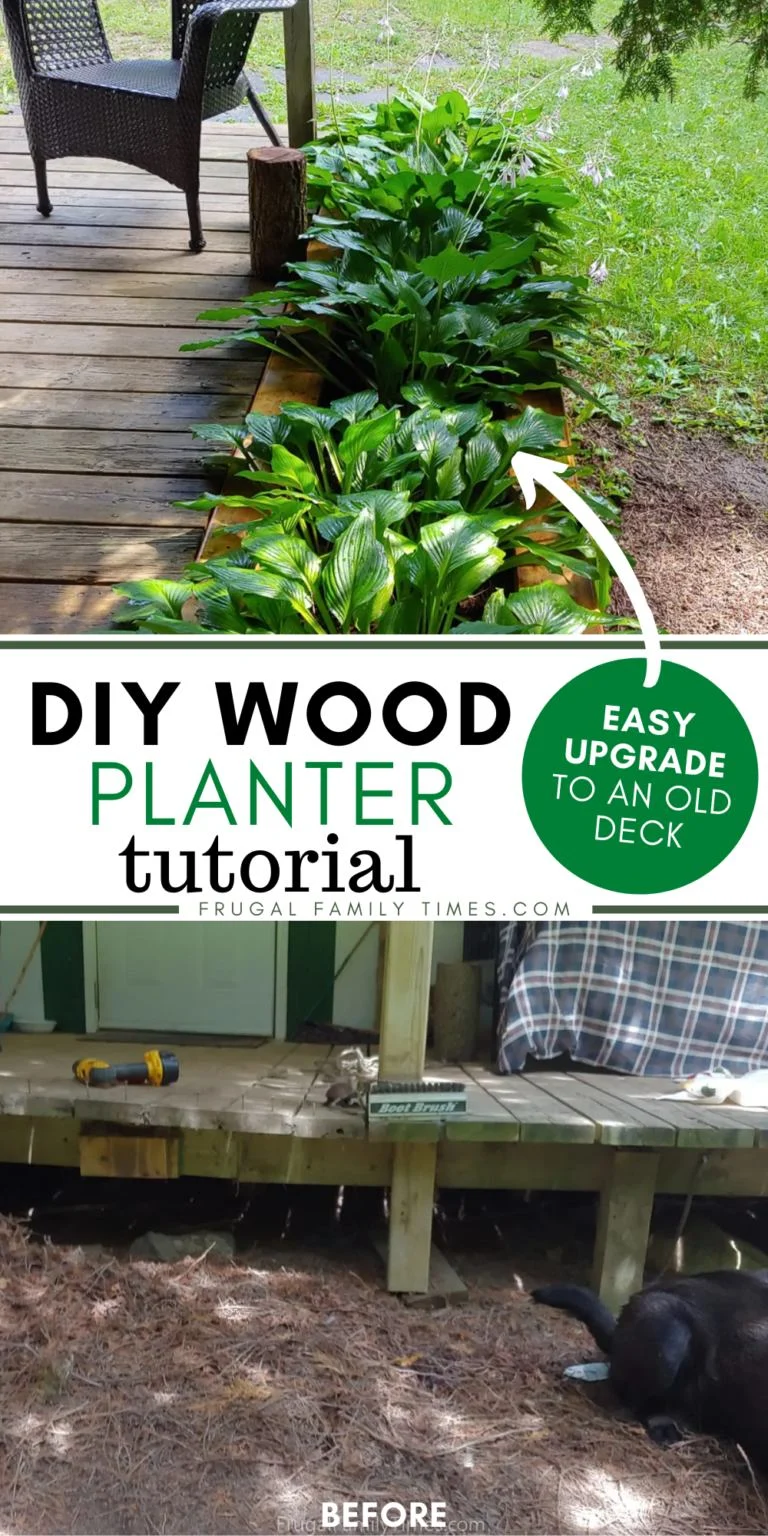
Wood DIY Deck Planter Box to Upgrade an Old Deck with Plants and Style

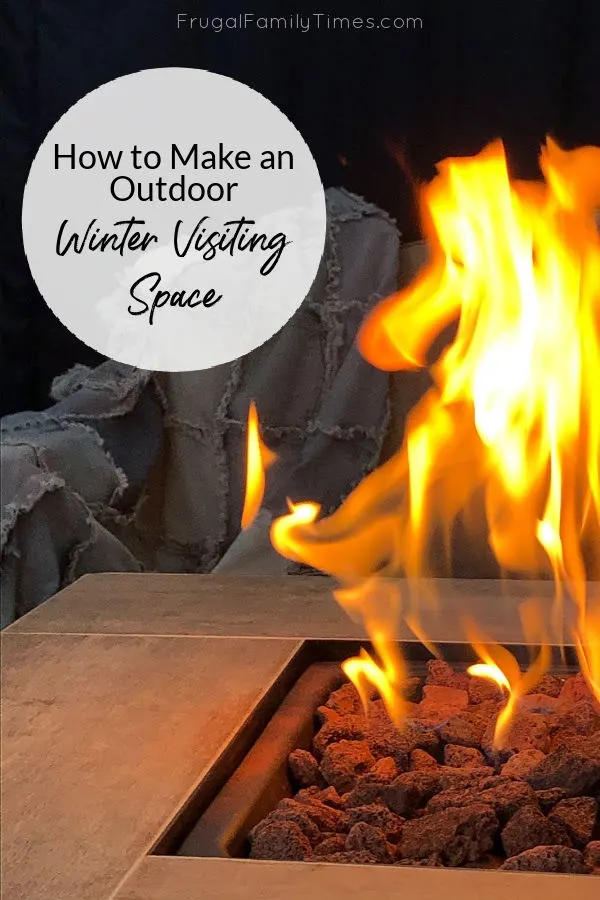
Outdoor Visiting in Winter – The Physical Distancing Porch Set Up We Never Knew We’d Need

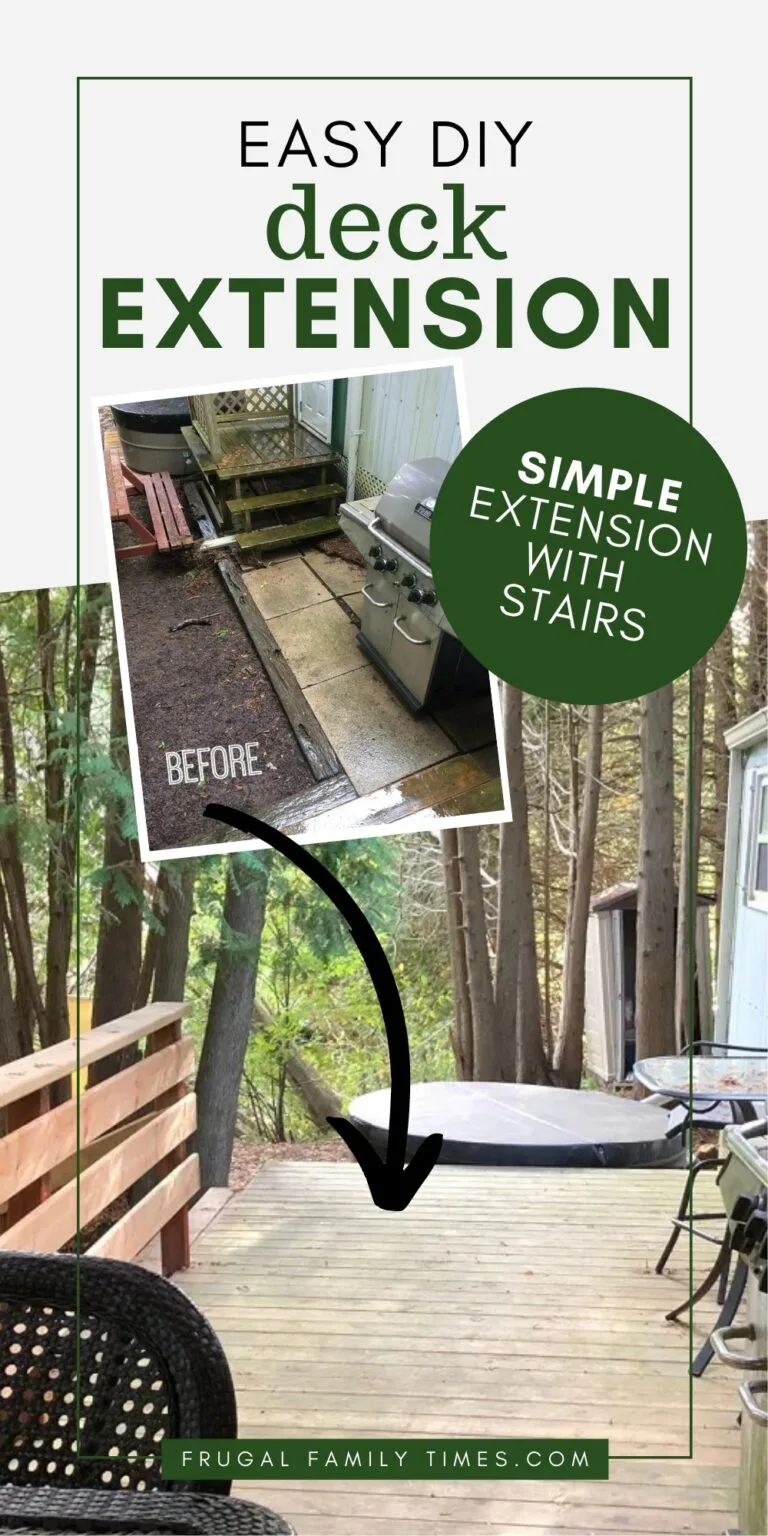
Adding onto a Deck: Our Simple DIY Deck Extension

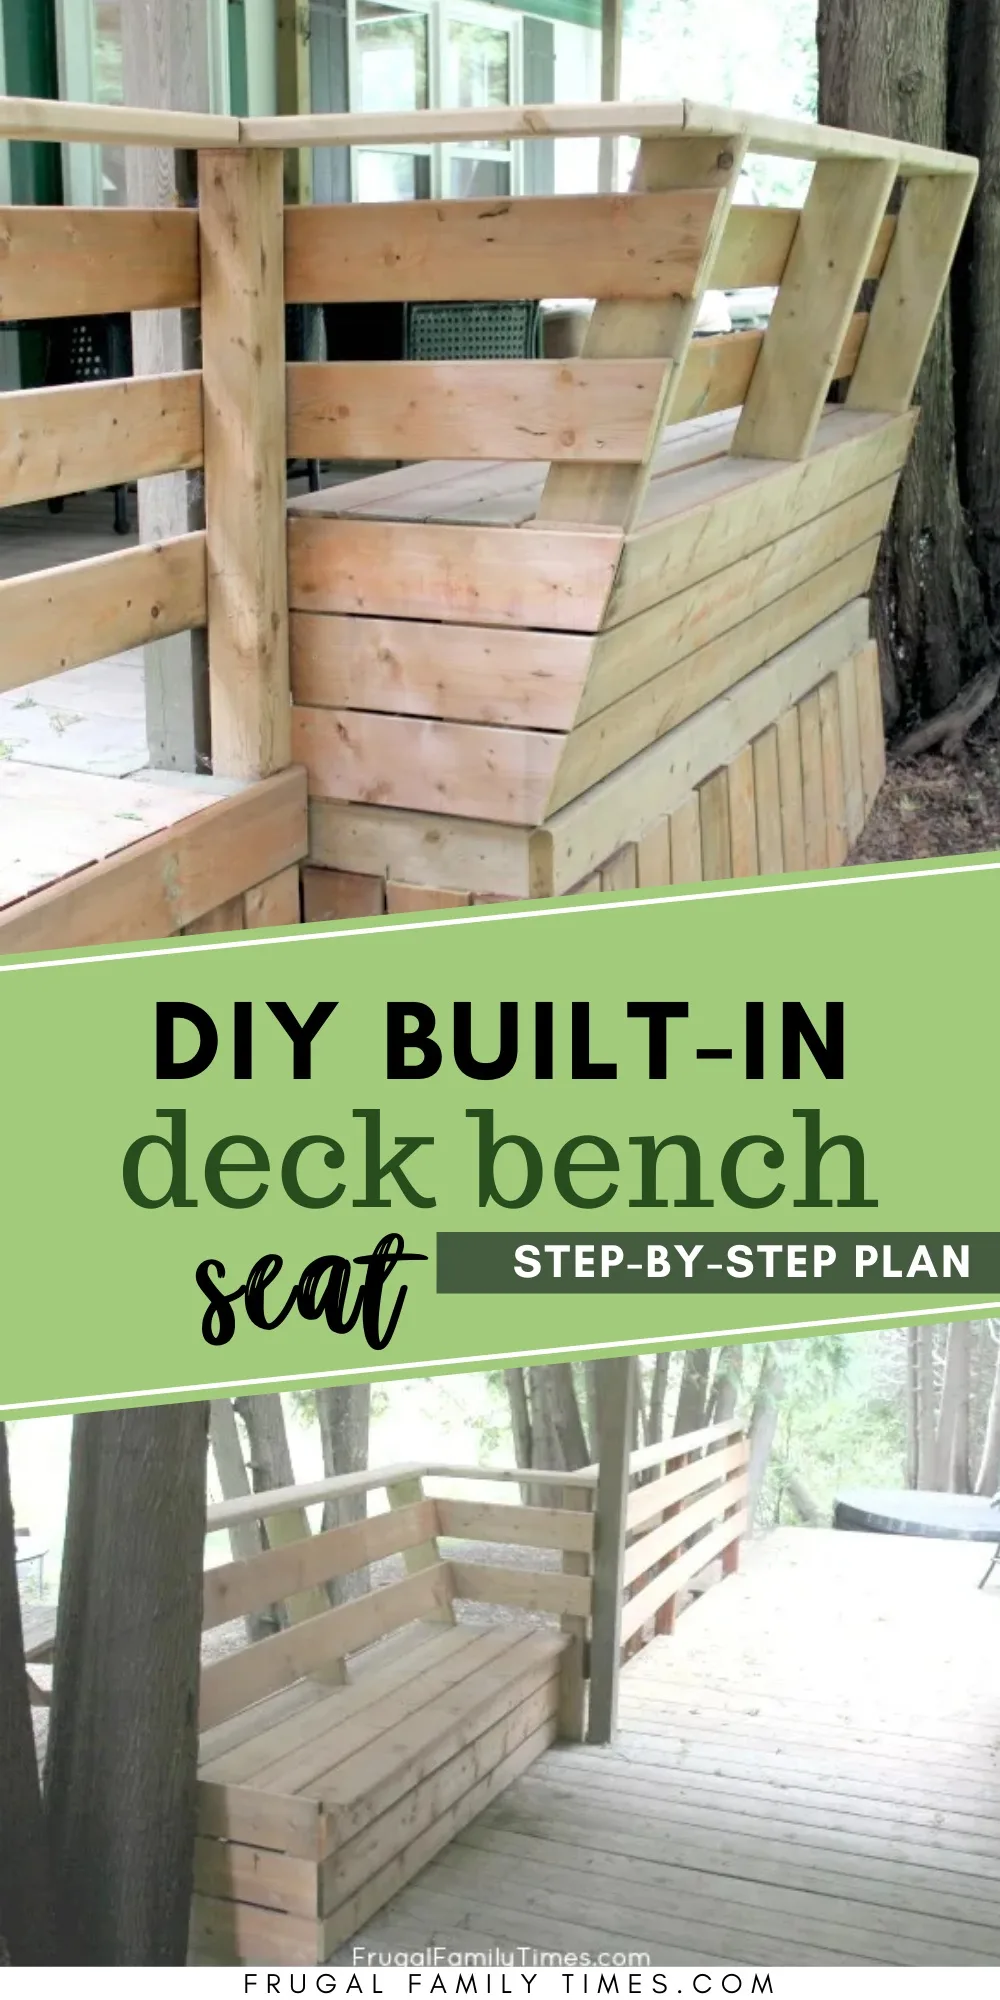
How to Make a Deck Rail Bench – Simple DIY Builtin Deck Bench Seating Tutorial


Easy DIY Wood Shutters: How to Make Board and Batten Shutters for under $10 a pair!
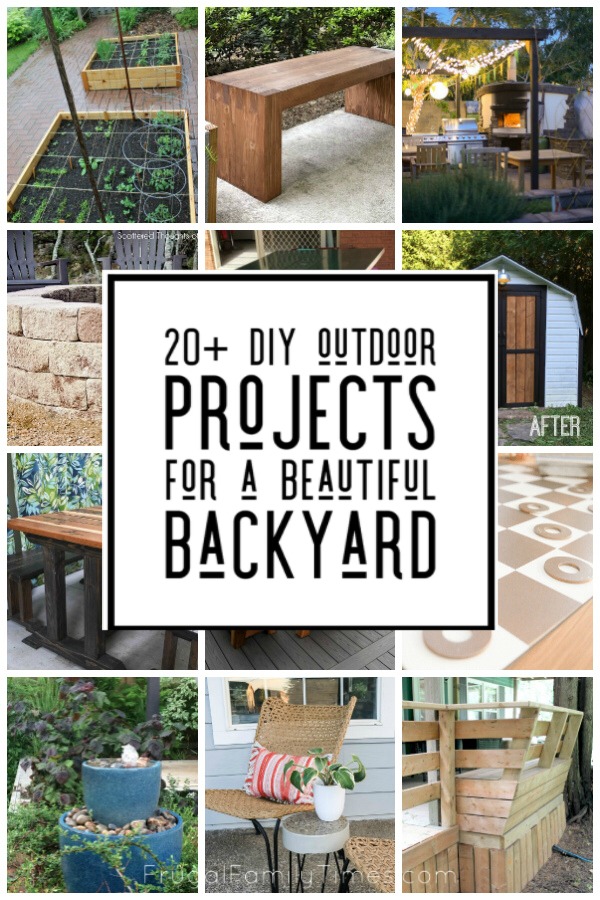

20+ DIY Backyard Projects for a Beautiful Outdoor Space (on a Budget!)


Best Garden Hose Repair Kit – a better than new DIY fix

LDC
Wednesday 5th of September 2018
It looks GORGEOUS! Great job! I'll pay you double that to come do our medium walkway and small backyard patio! lolCan't wait to read the 6 year update next.
mrsben
Sunday 8th of July 2018
Realizing you did this five years ago, just wanted to say you really did a good job! For those who might be looking for a quick fix for killing the weeds; road salt works well as not only does it kill the weeds but ensures nothing will grow for at least a few years. Will also add; there is no need to water it down, just let the weeds bake in the sun over the course of a few days and the salt will disappear thanks with the help of Mother Nature. To conclude; DO NOT use around plants however it also works great as a 'light'layer on top of black tarp for gardens/landscaping which in return can be topped off with something like cedar chips/mulch or river rock. -Brenda-
Anonymous
Monday 21st of May 2018
So when we had our asphalt driveway put in they told us we had to put down a product that sterilizes the ground to prevent weeds from growing up through the asphalt. I bet you could use it under brick pavers too for even more years of weed free-ness. :)
The Green Goddess @ Olaf’s Organic Garden
Thursday 25th of January 2018
Probably the most well-known of all weeds, the humble dandelion is actually bursting with vitamins A, B, C, and D, as well as minerals such as iron, potassium, and zinc. The great news is that there’s probably a ton of this nutritious weed in your backyard.
Dandelion has been used throughout history to treat everything from liver problems and kidney disease to heartburn and appendicitis. Today, it is mainly used as a diuretic, appetite stimulant and for the liver and gallbladder.
Every part of this common weed is edible, from the roots to the blossoms. Use the leaves in sandwiches and stir fries – they boast more beta carotene than carrots, meaning they are great for healthy eyes! Roots can be made into a herbal tea, or roasted and ground as a coffee substitute. The sweet flower heads will add color to salads and can be used to make wines.
Why Not Try: this Creamy Quesadilla Recipe with your Dandelion Greens?
Garlic Mustard (Alliaria petiolata)Part of the mustard family, this particular plant is considered an invasive species in North America. However, it brings with it a lot of great health benefits – aside from being a good source of vitamin A and C, Garlic Mustard is popular as a diuretic, helps with weight maintenance, improves heart health, lowers cholesterol and strengthens the immune system.
Historically it was used to flavor salt fish but it’s also really flavorsome when mixed with mashed potatoes, soups or salads.
Why Not Try: a Garlic Mustard Pesto or Mayonnaise?
Elderflowers (Sambucus nigra)ElderflowerThe truly versatile Elder is not exactly a weed but is quite a common wild tree, especially around rivers and lakes. The flowers can be collected in spring to make elderflower cordial, soda or champagne. With a refreshing, mild taste, they’re great when paired with apple or pear. Dry the flowers in bunches to make a tea.
Once the flowers on the tree die off, the green berries can be picked (before they ripen) and pickled to make elderberry capers. Make sure to leave some, as the ripened berries make a delicious balsamic vinegar.
The leaves, flowers, fruits, and root extracts are used by herbalists to treat bronchitis, cough, colds, flu and fever. Studies have shown that the wild plant is effective in treating influenza.
Why Not Try: a classic Elderflower Cordial?
Lamb’s Quarters (Chenopodium album)This rapidly growing summer weed produces black seeds which are related to the protein-rich superfood quinoa. Much like their cousin, the seeds of lamb’s quarters are a great source of protein, along with providing vitamin A, calcium, phosphorus, and potassium. Harvesting these seeds does take a little dedication though!
If that seems like too much work, don’t worry – you can also enjoy the young shoots and leaves of the plant. Whether raw or sautéed, they make a great replacement for spinach and are just as nutritious.
Medicinally, a tea made from the leaves is said to help with digestion issues and stomach aches.
Why Not Try: waking up to a Lamb’s Quarters Breakfast Ramekin? (Even tastier when using eggs from your own backyard!)
Anonymous
Sunday 6th of August 2017
Very good description of the work required Robin, pretty much the same as we did a couple of years ago. Unfortunately we weren't aware of the Polymeric sand - so we are now considering redoing it all again as the weeds are back with a vengeance.Further up the thread someone asked about re vibrating the sand into the joints. Not a practice I would recommend. With about an inch or less of sand removed between the joints the blocks still have over 60% of the original 'strengthening' between them. Applying vibration to the blocks, post refurbishment, presents a real risk of cracking the blocks - and that can be real frustrating.